Spreadsheet Report
What is a Spreadsheet Report?
A spreadsheet report contains sheets on Sessions and Speakers. There are four sheets available in the spreadsheet export. You can configure which columns are shown in each sheet, or use the default configuration.
- Sessions Sheet - This contains one row per session
- Speakers Sheet - This contains one row per speaker
- Combined Sessions and Speakers Sheet - One row per combination of Speaker and Session - This contains one row per combination of session and speaker. For example if a session has 3 speakers, then there will be 3 rows in the sheet. One containing the session and the first speaker, one containing the session and the second speaker, and one containing the session and the third speaker
- Combined Sheet - One row per session - This contains one row per session, then repeats the speaker columns as many times as necessary to include all the speakers for a session on the same row. For example a session with 3 speakers will have ‘First Name - 1’, ‘First Name - 2’ and ‘First Name - 3’ columns. This sheet it intended for use in a mail merge into Microsoft Word or similar.
How do I create a spreadsheet report?
To create a spreadsheet report:
- Navigate to >
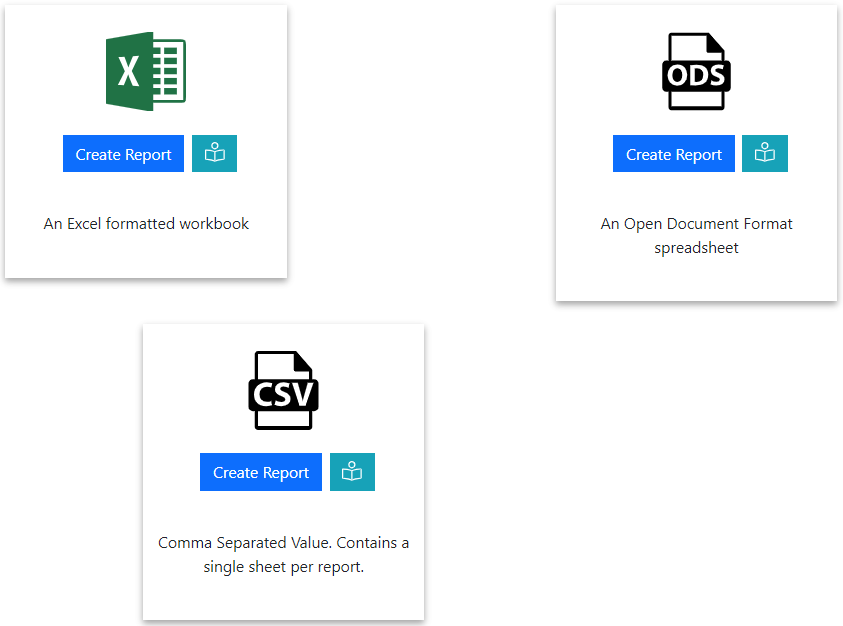
- Click ‘Create Report’ on one of the spreadsheet formats. You can choose between ‘Excel’, ‘ODS’ (Open Document) or ‘CSV’.
- You will see a screen to configure the report. You can:
- For CSV exports, choose the sheet you want to include in the report. CSV does not support multiple sheets per file. You can create multiple reports, one for each sheet type if you need.
- For each sheet you can choose whether the sheet should be included, excluded, or it can be included with a custom configuration.
- If you choose ‘Custom’ you will be presented with a list of available columns in the report. You can configure the column with these icons:
- When checked the column will be included in the report. When unchecked the column will be skipped
- Use this to drag the columns into the order you want in the report
- Some column have this icon. When enabled it means the cell will link to the relevant session, speaker or location in Lineup Ninja.
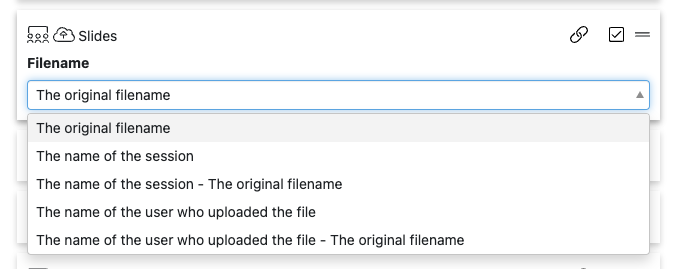
- You can optionally include links to uploaded files in the report. One column exists for each file type that you have configured. When you enable a file type column you will see additional options to choose the filename that will be used when the file is downloaded from the link in the report.
- Once you are happy with the configuration press ‘Save’
- To run the report click ‘Run’, the report will generated and will appear in a list titled ‘Generated Reports’. Click the ‘Download’ button to download the report.
Note
If you include links to uploaded files in a report then the created links are unique for that report, and are the same across each run of the report.
If you delete the report the links will stop working. This means you can revoke access to files that were previously shared be deleting the report.
How do I filter the sessions and speakers in a report?
You can filter which Speakers and Sessions will be included based on a number of criteria. Some common use cases for filters are:
- Preventing ‘Placeholder’ sessions from being included
- Holding back a Speaker who is not yet ready to be announced
- Excluding sessions scheduled during the ‘build up’ day for the event
- Only including speakers who have confirmed their slot
- Removing a particular location, or track from the included schedule
- Anything you can think of using labels!
For Speakers you can filter in 3 ways
- Choose which speakers are to be included based on their relationship to sessions
- (If Speaker Confirmation is enabled): Include speakers that have a confirmed session that is include and not filtered out.
- Include speakers that are speaking on any session that is included and not filtered out.
- Include all speakers
- Include no speakers
- Apply more granular filters with labels
- Only include speakers with a particular label. For example you might want to use a ‘Content Reviewed’ label to flag speakers that have had their content reviewed.
- Exclude speakers with a particular label. For example you might want to exclude a ‘Do not include’ label to prevent including of speakers who are not yet ready to be included.
For Sessions you can filter in numerous ways
- Choose which sessions are to be included based on their relationship to speakers
- Include All Scheduled Sessions. Includes sessions regardless of whether they have confirmed speakers or not.
- (If Speaker Confirmation is enabled): Include sessions that have one confirmed speaker.
- (If Speaker Confirmation is enabled): Include sessions that have all their speakers confirmed.
- Include All Sessions (available on Lineup Ninja Agenda App only)
- Apply filters with labels
- Only include sessions with a particular label. For example you might want to use a ‘Content Reviewed’ label to flag sessions that have had their content reviewed.
- Exclude session with a particular label. For example you might want to exclude a ‘Placeholder’ label to prevent including of sessions which are not yet populated.
- Filter by location
- Only include sessions in a particular location, or locations. This can be useful if you are including an agenda for just one or two locations.
- Exclude sessions in a particular location, or locations. This can be useful if you have scheduled sessions in your Green Room or similar back stage location.
- Filter by resource
- Only include sessions needing a particular resource. This could be useful if you are producing an agenda for a particular team that manages some resources.
- Exclude sessions needing a particular resource.
- Filter by Date
- Only include sessions in a date or dates. Useful if you are producing an agenda for a particular day.
- You can exclude a date or dates from your publication. Useful if you have dates for build up and tear down in your agenda.
- Filter by Track
- Only include sessions in a particular track or tracks. Useful if you are producing separate agenda for separate parts of your event
- Exclude sessions on a particular track. Can be useful to block presenting of a track until a product launch has happened.
How do I merge locations, tracks and roles in a spreadsheet report?
When running a report you can merge content together. This enables you to include a simpler report than the one you are using to plan your event.
You can choose to merge these types of data:
- Locations. Merging location A into location B will show all sessions in location A as taking place in location B. This can be useful if you have multiple locations configured for scheduling purposes that should be presented a single location in the report.
- Tracks. Merging track A into track B will show all sessions in track A as being in track B. This can be useful if you have some tracks with only a small number of sessions and wish to present this sessions as being in a more populous track.
- Roles. Merging role A into role B will show speakers with role A has having role B. This can be useful if you have a lot of roles internally that are not intended to be shown in the report. You can merge them into a role with a name appropriate for the report.
When merging the location, track, or role that you are merging into does not have to have any sessions itself. So you can use this to show a different name in the report than you are using internally. For example you could create a ‘Main Hall’ location, and merge ‘Building B - Hall A’ into that location the report shows ‘Main Hall’.
How do I embargo content in a spreadsheet report?
You can choose to embargo session titles and descriptions if you have content that should only be included in the report at a later day.
An embargo is applied by using labels to identify the sessions that should have an embargoed session title or description.
For example if you have a label ‘New Product Launch’, you can configure an embargo to hide the session title and description from sessions with that label. Following the launch of the product you can remove the embargo and re-run the report.
If you embargo a session or description you can replace the original text with something to indicate that the session will be included later, for example ‘Super Secret Session’.
The speakers for a session will still be shown when it is embargo’ed. To exclude a session, including it’s speakers from being included then use ‘Session Filters’ rather than an ‘Embargo Content’.
To configure an embargo:
- Click ‘Agenda Reports’
- Click on the name for your existing publication
- Click ‘Configure’
- Expand the ‘Embargo Content’ sections and configure the embargo that you need
- Save and re-run
Next - JSON Report
Still can’t find what you’re looking for? Email support@lineupninja.com and one of the team will get back to you as soon as possible.