Configure
How do I create a Digital Signage publication?
- Navigate to >
- Click on the ‘Publish’ button for the Digital Signage:
- Follow the on-screen instructions to configure your event, including the URL your digital signage links will be published to
- Click ‘Save’
- Click (you can re-publish at any time by clicking this button)
Tip
If you make changes to your Agenda after publishing it, you will see a red notification icon next to the ‘Publish Agenda’ menu item. This is to remind you that you have un-published changes.
The number is telling you how many agendas are now out of date.
How do I add branding?
You can choose the color for the main banner and footer for the signage. You can also set the text you would like to appear in the footer.
- Navigate to and click on the name for your existing publication
- Click ‘Configure’
- Expand the ‘Branding’ section and set the values
- Save and republish
Can I use different colors for each location?
Yes you can use the location’s color for the heading and footer. To do this
- Navigate to and set a color for each location.
- Navigate to and click on the name for your existing publication
- Click ‘Configure’
- Expand the ‘Branding’ section and choose the ‘Use a different color for each location’ option.
- Save and republish.
What content is displayed after the end of each day?
When there is no more content to show for a particular day you can configure ‘Intermission Content’, it will be shown after the end of the last session of the day until midnight.
You can say things like “Looking forward to seeing you tomorrow!” or “See you next year!” or whatever suits your needs.
- Navigate to and click on the name for your existing publication
- Click ‘Configure’
- Expand the ‘Intermission Content’ section and add the content
- Save and republish
Can I show content from more than one Location on a screen?
If you want to display content from more than one Location on the same screen you can Merge Locations together.
- Navigate to and click on the name for your existing publication
- Click ‘Configure’
- Expand the ‘Merge Locations’ section and configure the merges you require
- Save and republish
Here’s a worked example with a step-by-step guide:
For more information about merging content, please follow this link.
Info
If a location is merged into another one, it will no longer appear on its own in the publication.
If you need to display both merged and un-merged content, create two separate signage publications.
How do I add a sponsor logo to a Location?
You can add a sponsor logo for each Location. This is required for presentation in landscape, but optional for portrait.
To add sponsor logos to Locations:
- Navigate to >
- Click into the relevant Location
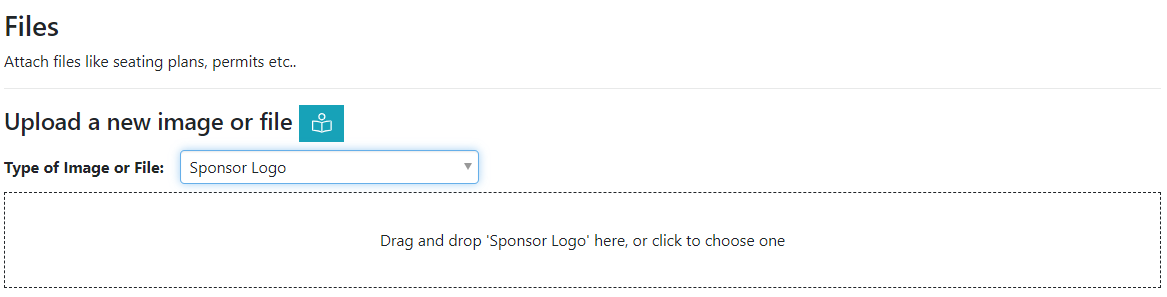
- Scroll to ‘Files’ and upload a ‘Sponsor Logo’
- Re-publish your signage
Landscape Presentation
There are two options to display the Sponsor Logo for the horizontal presentation. You can either provide an image the will fill the entire space, or provide a logo that the signage will center.
If you choose ‘Center the logo with margins’ the logo will be placed like this:
If you choose ‘Do not apply margins’ the logo will be placed like this:
The size of the image to provide depends on other configuration options and the resolution of your screen. Use this table to determine the appropriate size.
| Margins | Options Configured | 1080p Screen | 4k Screen |
|---|---|---|---|
| With Margins | Any | 462 x 320 | 924 x 640 |
| No Margins | Footer and ‘Agenda By Lineup Ninja’ | 840 x 563 | 1680 x 1126 |
| No Margins | Footer only | 840 x 664 | 1680 x 1328 |
| No Margins | ‘Agenda by Lineup Ninja’ only | 840 x 691 | 1680 x 1382 |
| No Margins | Neither | 840 x 792 | 1680 X 1584 |
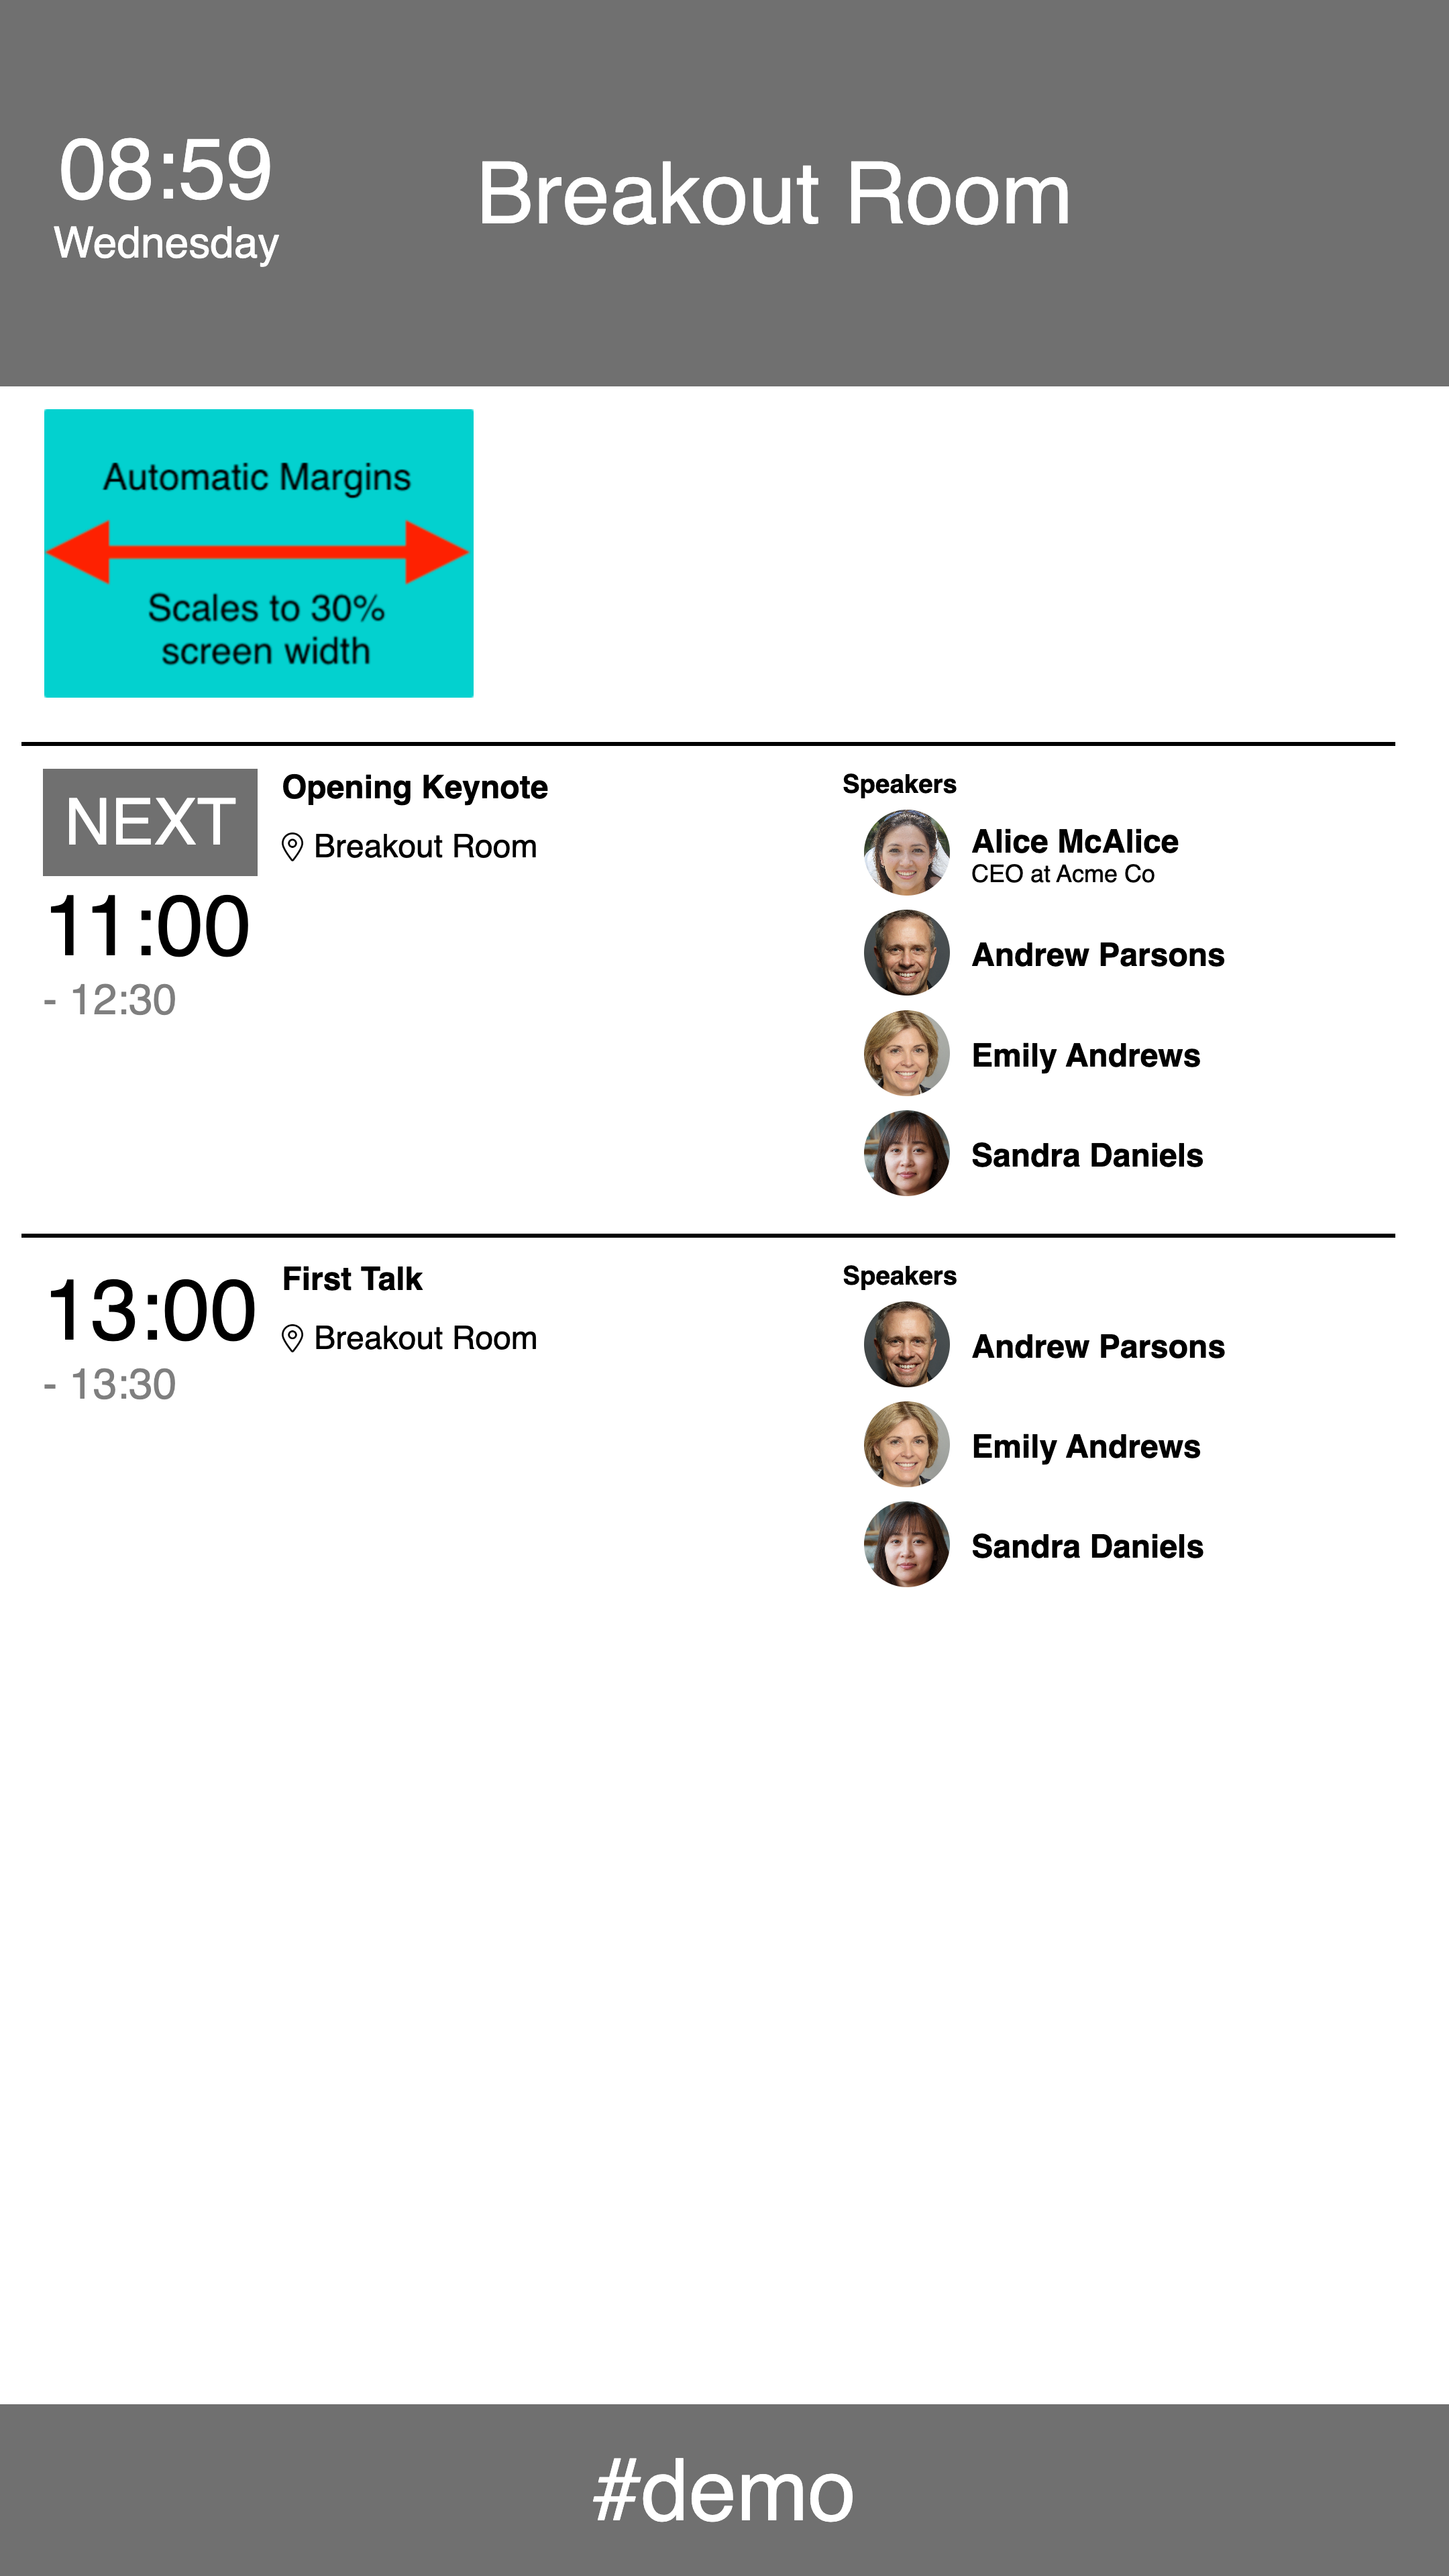
Portrait Presentation
There are two options to display the Sponsor Logo for the portrait presentation. You can either provide an image the will fill the entire width of the page, or provide a logo that the signage will scale and place to the left of the screen.
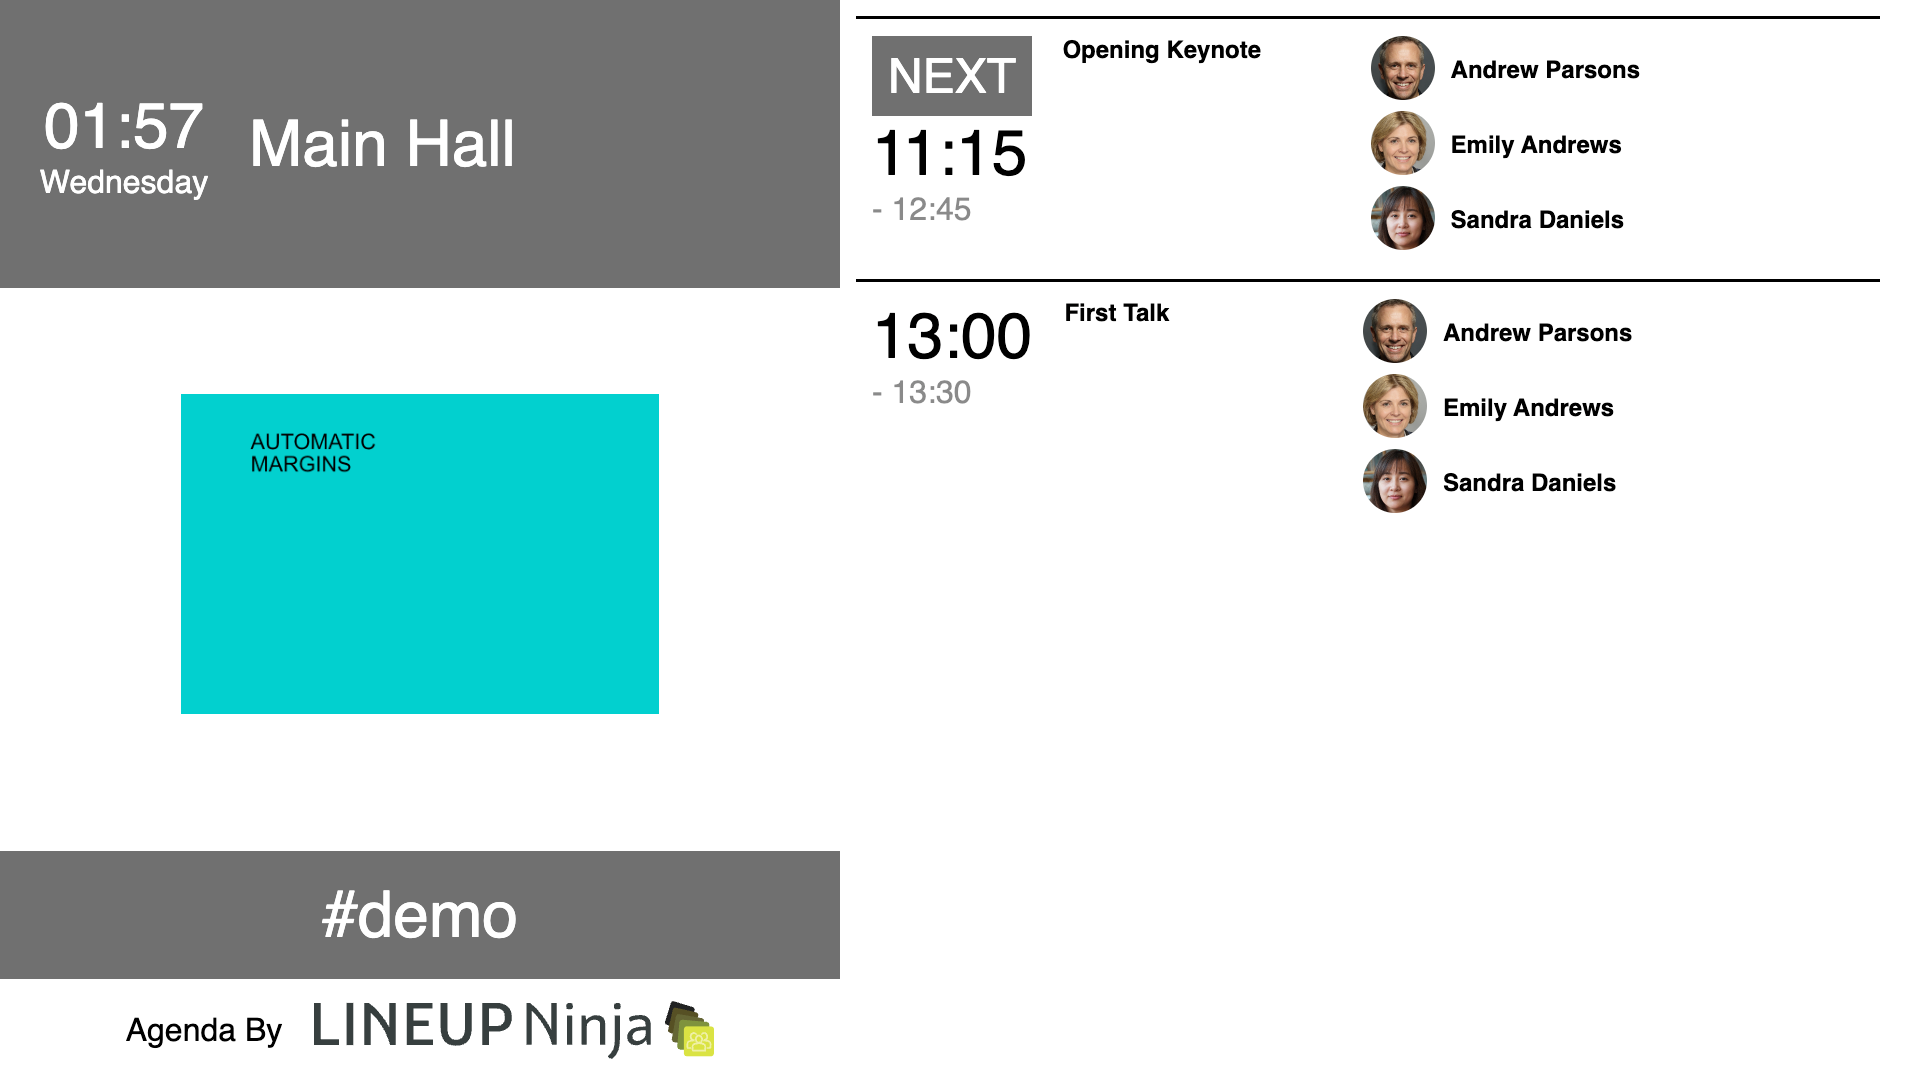
If you choose ‘Automatic Margins’ the logo will be placed like this:
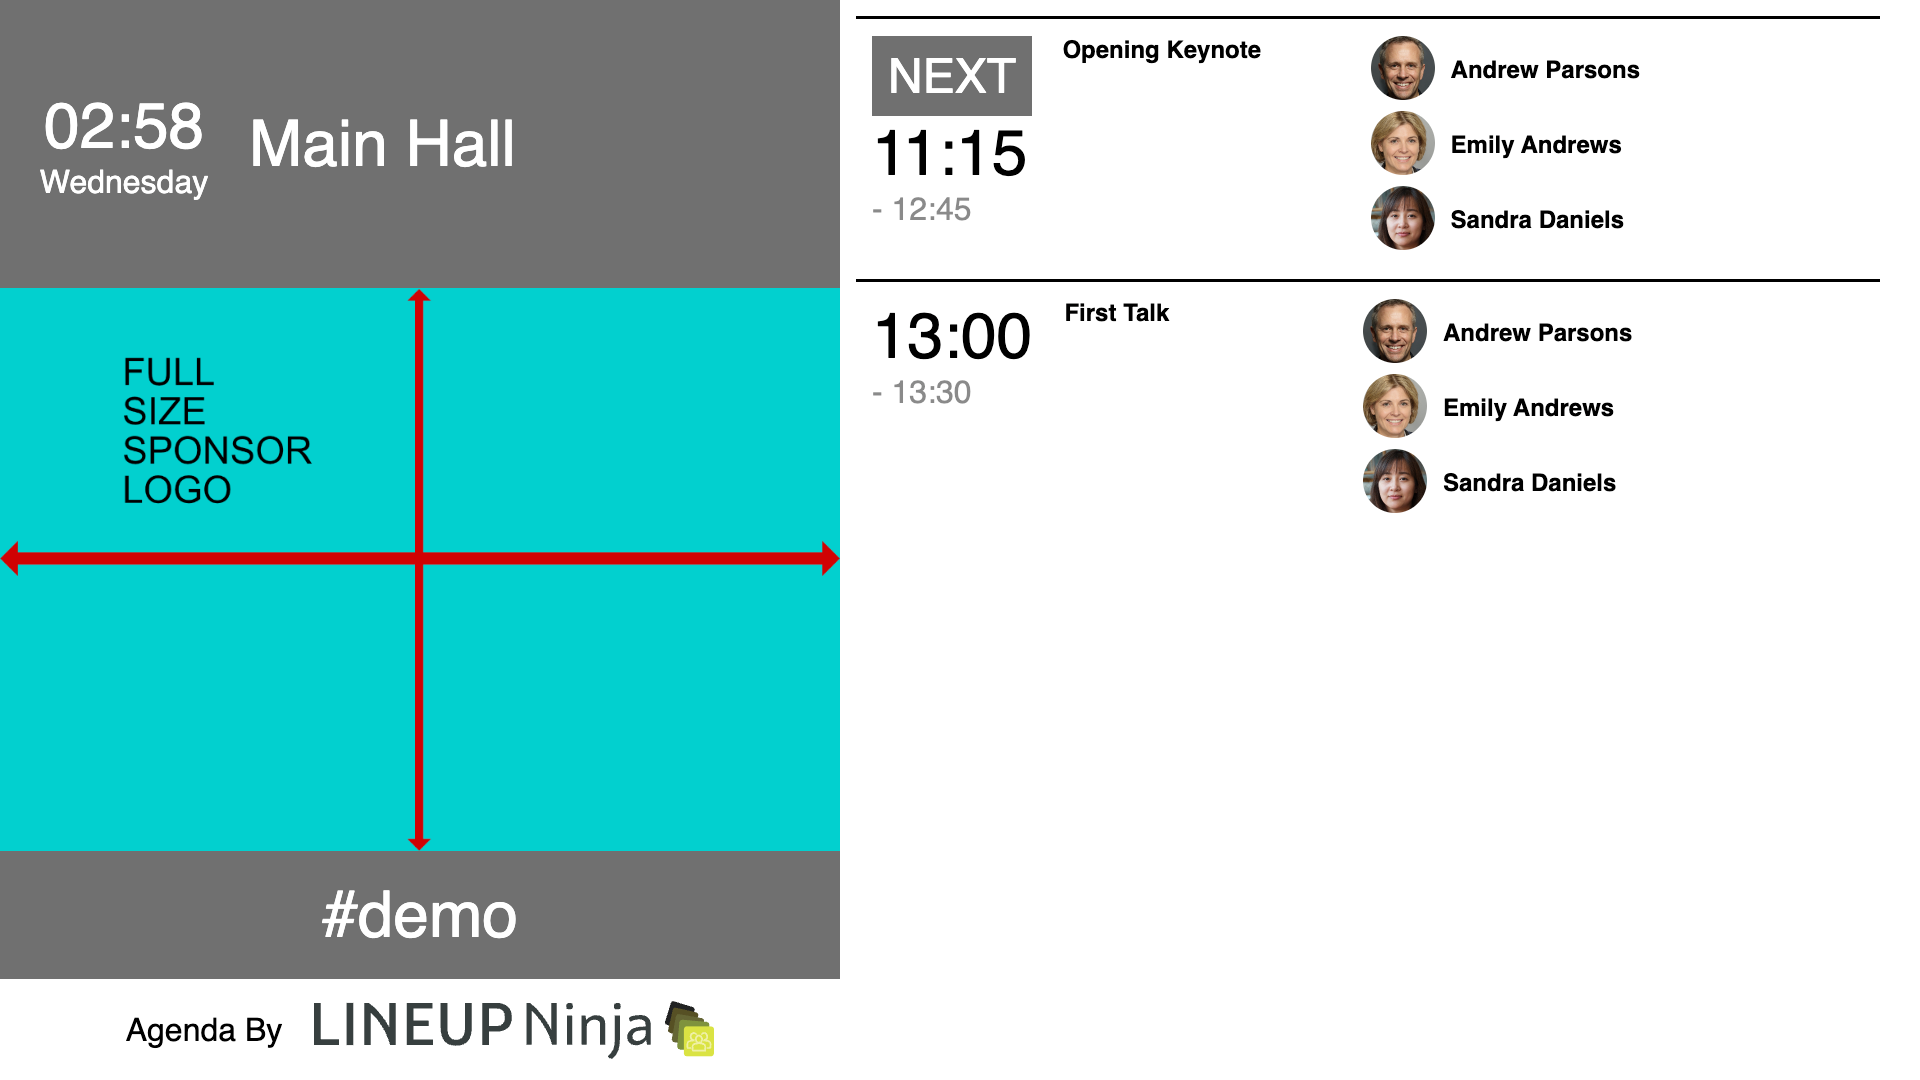
If you choose ‘Do not apply margins’ the logo will be placed like this:
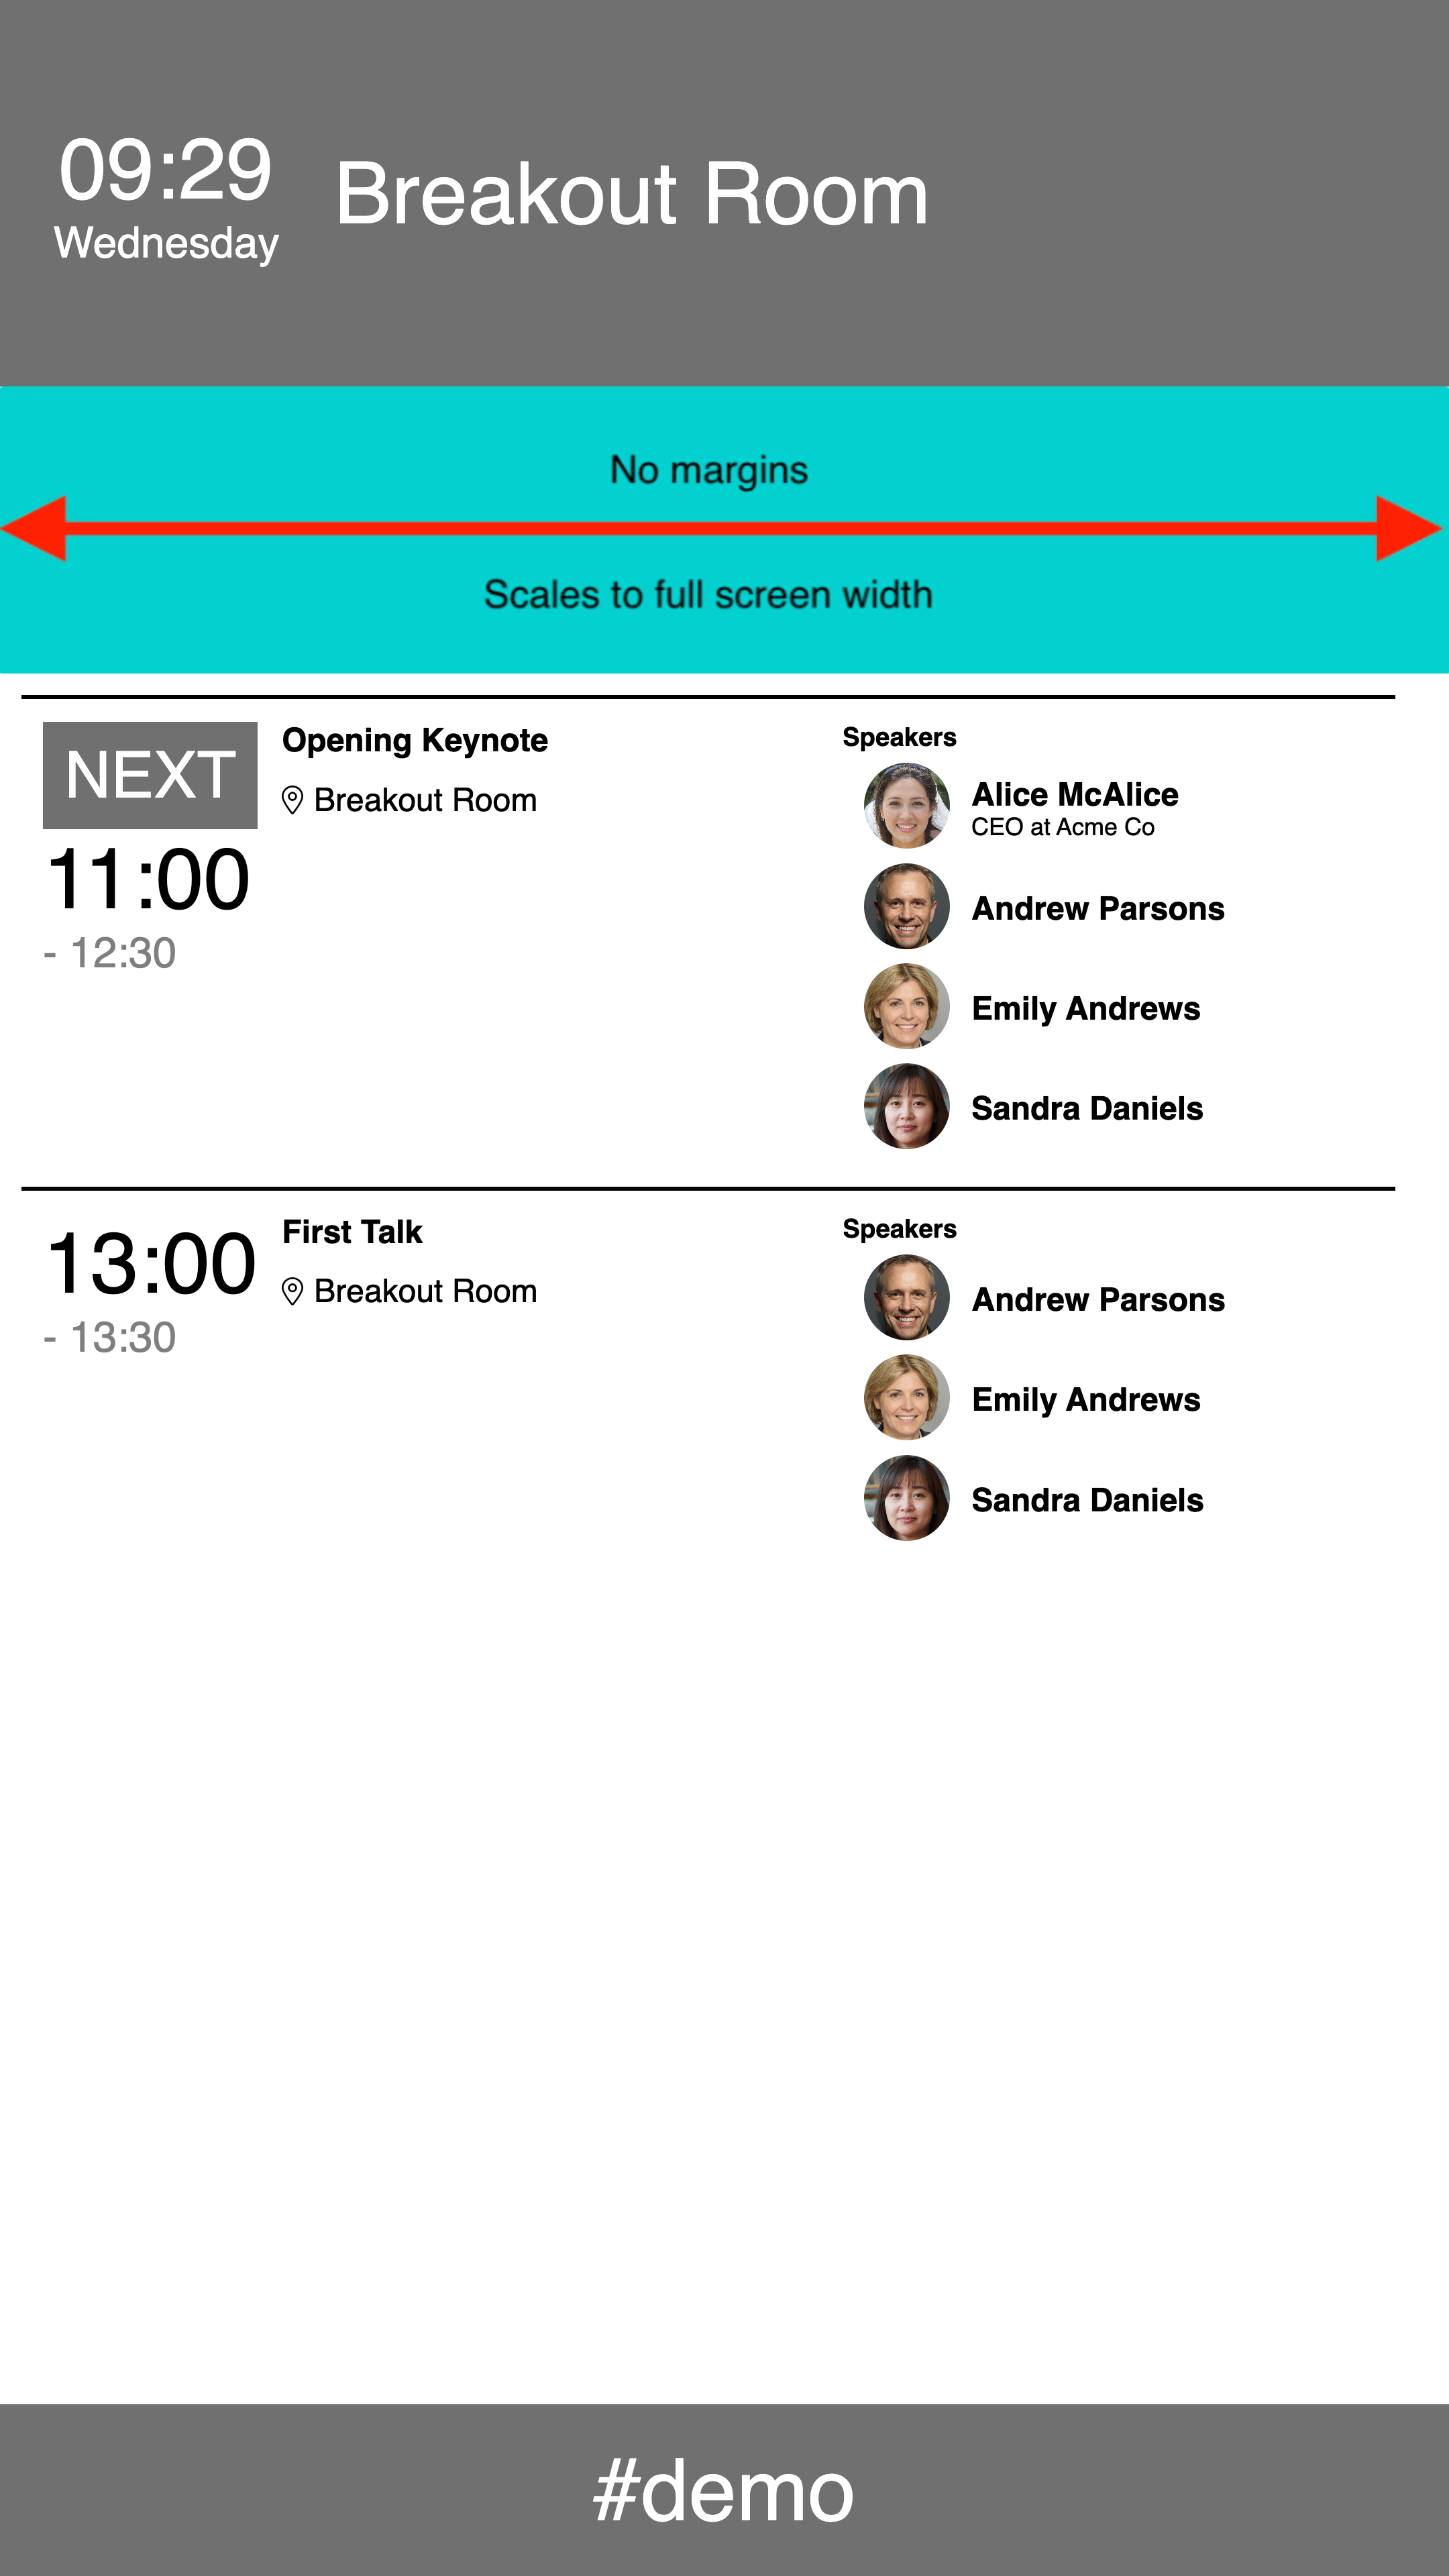
The size of the image to provide depends on the resolution of your screen
| Margins | 1080p Screen | 4k Screen |
|---|---|---|
| With Margins | 320 x any height | 640 x any height |
| No Margins | 1080 x any height | 2160 x any height |
Can I show multiple sponsor logos for a location?
To show multiple sponsor logos for a location create one image that contains all the logos you need. Then upload this image as the ‘Sponsor Logo’ for the location.
Can I help to promote Lineup Ninja?
We would love it if you would consider helping to promote Lineup Ninja by adding a small ‘Agenda By Lineup Ninja’ logo to the bottom of your signage. You can enable / disable this when you configure your signage.
How do I test my signage?
To ensure you have everything ready for the opening of your event you can run the signage in ‘Test Mode’ this will cause the signage to loop through the content for your event over and over.
You can turn the test mode on and off at any time by re-configuring and republishing your agenda: you do not need to involve the AV team.
To configure:
- Navigate to and click on the name for your existing publication
- Click ‘Configure’
- Expand the ‘Signage Testing’ section and choose one of the options
- Save and republish
Warning
Don’t forget to change the option back to ‘Off’ before your event starts!
Will the URL for a location change?
If you rename a Location, the URL for that location will change. However, the old URL will continue to work so the AV team will not need to update their configuration.
If you delete and recreate a Location, the URL will change and your AV team will need to update the signage configuration.
Will updates I make in the Agenda Planner go live immediately?
No, think of the Agenda Planner as your workspace, you can make any changes you need without impacting your published data.
When you are ready to publish navigate to and click on ‘Publish’ for the relevant publication.
When I publish updates, will they appear in real-time?
In most circumstances changes will publish immediately, on some networks and signage hardware it may take up to 2 minutes.
How can I publish automatically?
Warning
Consider your teams workflow as a team before enabling automatic publishing. When you enable automatic publishing there is a potential for the agenda to be published when you have content that is not ready for publication.
To schedule publishing scroll down to the ‘Scheduled Publishing’ part of the configuration.
You can then choose whether to publish once per hour, or once per day. If you choose to publish each day the publication will occur around 3am in the timezone of your event.
Can I use the signage without a network connection?
The signage is primarily designed to be used on a networked screen, and will continue to work even if network access is interrupted after the initial setup. However if you have a location that is out of network range, or would like an offline backup, then you can export the signage as a PDF and then display that via an alternative system.
You can generate one PDF per location, that PDF will contain one page per session showing that session and the subsequent sessions during the same day. You can rotate through the pages as best suits your event.
To download the PDF following these steps
- Browse to
- Either click the name of your existing publication or choose ‘Publish to your Digital Signage’ from ‘Create a New Publication’
- If necessary configure and publish the signage.
- Click the link for ‘Published at’
- In the ‘PDF Export’ section you will find a download link for each location.
By default each page will show ‘NOW’ and ‘NEXT’ next to the current sessions, if you want to produce a PDF without these then set the “Do you want to show ‘NOW’ and ‘NEXT’ next to the session names?” option in the configuration to “Do not show” and publish the signage.
If you want your live signage to include ‘NOW’ and ‘NEXT’ but your PDF signage to exclude these then create two signage applications.
How can I filter the published content?
You can filter which Speakers and Sessions will be published based on a number of criteria. Some common use cases for filters are:
- Preventing ‘Placeholder’ sessions from being published
- Holding back a Speaker who is not yet ready to be announced
- Excluding sessions scheduled during the ‘build up’ day for the event
- Only publishing speakers who have confirmed their slot
- Removing a particular location, or track from the published schedule
- Anything you can think of using labels!
For Speakers you can filter in 3 ways
- Choose which speakers are to be published based on their relationship to sessions
- (If Speaker Confirmation is enabled): Publish speakers that have a confirmed session that is published and not filtered out.
- Publish speakers that are speaking on any session that is published and not filtered out.
- Publish all speakers
- Publish no speakers
- Apply more granular filters with labels
- Only publish speakers with a particular label. For example you might want to use a ‘Content Reviewed’ label to flag speakers that have had their content reviewed.
- Exclude speakers with a particular label. For example you might want to exclude a ‘Do not publish’ label to prevent publishing of speakers who are not yet ready to be published.
For Sessions you can filter in numerous ways
- Choose which sessions are to be published based on their relationship to speakers
- Publish All Scheduled Sessions. Publishes sessions regardless of whether they have confirmed speakers or not.
- (If Speaker Confirmation is enabled): Publish sessions that have one confirmed speaker.
- (If Speaker Confirmation is enabled): Publish sessions that have all their speakers confirmed.
- Publish All Sessions (available on Lineup Ninja Agenda App only)
- Apply filters with labels
- Only publish sessions with a particular label. For example you might want to use a ‘Content Reviewed’ label to flag sessions that have had their content reviewed.
- Exclude session with a particular label. For example you might want to exclude a ‘Placeholder’ label to prevent publishing of sessions which are not yet populated.
- Filter by location
- Only publish sessions in a particular location, or locations. This can be useful if you are publishing an agenda for just one or two locations.
- Exclude sessions in a particular location, or locations. This can be useful if you have scheduled sessions in your Green Room or similar back stage location.
- Filter by resource
- Only publish sessions needing a particular resource. This could be useful if you are producing an agenda for a particular team that manages some resources.
- Exclude sessions needing a particular resource.
- Filter by Date
- Only publish sessions in a date or dates. Useful if you are producing an agenda for a particular day.
- You can exclude a date or dates from your publication. Useful if you have dates for build up and tear down in your agenda.
- Filter by Track
- Only publish sessions in a particular track or tracks. Useful if you are producing separate agenda for separate parts of your event
- Exclude sessions on a particular track. Can be useful to block presenting of a track until a product launch has happened.
To configure filters:
- Click ‘Publish Agenda’
- Click on the name for your existing publication
- Click ‘Configure’
- Expand either the ‘Speaker Configuration’ or ‘Session Configuration’ section
- Expand the corresponding ‘Filter Speakers’ or ‘Filter Sessions’ sections and configure the filters you need
- Save and republish
How can I embargo content that is not yet ready for the public?
You can choose to embargo session titles and descriptions if you have content that should only be shown to the public after being announced in the event.
An embargo is applied by using labels to identify the sessions that should have an embargoed session title or description.
For example if you have a label ‘New Product Launch’, you can configure an embargo to hide the session title and description from sessions with that label. Following the launch of the product you can remove the embargo and republish the agenda.
If you embargo a session or description you can replace the original text with something to indicate that the session will be published later, for example ‘Super Secret Session’.
The speakers for a session will still be shown when it is embargo’ed. To exclude a session, including it’s speakers from being published then use ‘Session Filters’ rather than an ‘Embargo Content’.
To configure an embargo:
- Click ‘Publish Agenda’
- Click on the name for your existing publication
- Click ‘Configure’
- Expand the ‘Session Configuration’ section
- Expand the ‘Embargo Content’ sections and configure the embargo that you need
- Save and republish
How can I merge locations, tracks and roles when publishing?
When publishing you can merge content together. This enables you to publish a simpler agenda for your attendees than the one you are using to plan your event.
You can choose to merge these types of data:
- Locations. Merging location A into location B will show all sessions in location A as taking place in location B. This can be useful if you have multiple locations configured for scheduling purposes that will be experienced by the attendee as a single location.
- Tracks. Merging track A into track B will show all sessions in track A as being in track B. This can be useful if you have some tracks with only a small number of sessions and wish to present this sessions as being in a more populous track.
- Roles. Merging role A into role B will show speakers with role A has having role B. This can be useful if you have a lot of roles internally that are not intended to be shown to attendees. You can merge them into a role with a name appropriate for your attendees.
When merging the location, track, or role that you are merging into does not have to have any sessions itself. So you can use this to show a different name to attendees than you are using internally. For example you could create a ‘Main Hall’ location, and merge ‘Building B - Hall A’ into that location so attendees see ‘Main Hall’ in their agenda.
Here is a step-by-step
Still can’t find what you’re looking for? Email support@lineupninja.com and one of the team will get back to you as soon as possible.