Digital Signage
What is Lineup Ninja for Digital Signage?
Using Lineup Ninja for Digital Signage you can publish your agenda to the digital signage at your event. It gives attendees an ‘at a glance’ view of what is happening, helping them navigate and ensuring they are where they need to be.
It creates unique agenda for each location, room, or stage, showing the session currently taking place and a list of upcoming sessions, and updates automatically as the event progresses. Whenever you publish a change to the agenda, (e.g. during your event), the signage updates immediately and automatically.
This can save you countless hours compared to crafting Powerpoint images for each location, arranging for these to be scheduled with the signage team, and then manually updating them when you need to make a last-minute change.
What does it look like?
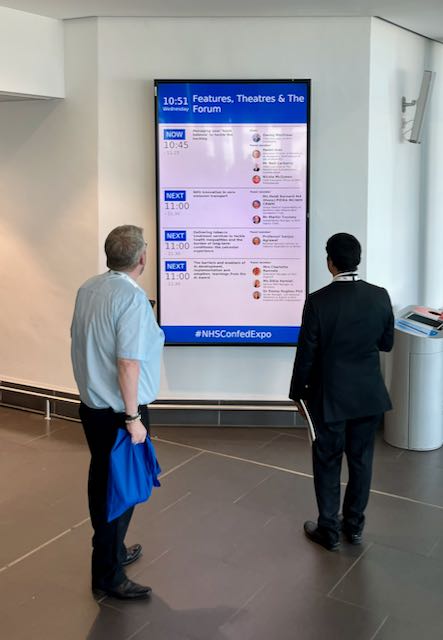
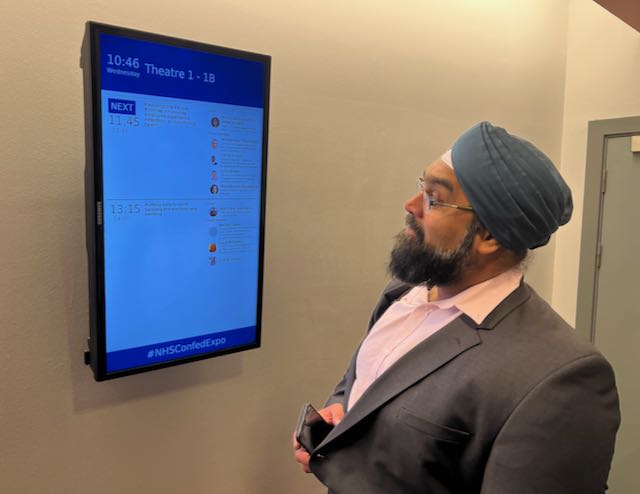
Here are a couple of pictures of the signage in action.
Showing an agenda for an exhibition hall:
Showing an agenda for a single room:
The signage can also be displayed in a landscape orientation:
How does it work?
Lineup Ninja for Digital Signage works by providing a web page for each location in your event, showing the agenda for that specific location.
Your AV team can then configure the signage to display the unique web page for each location. The content will automatically update throughout the day, and whenever you publish a new agenda.
What are the minimum technical requirements?
The playback device must meet:
- Chrome 45 or newer, or a recent version of Firefox, Safari or Edge
- Javascript must be enabled
- Internet access must be available
It has been tested on BrightSign XD232 and is expected to work on all newer versions of that platform.
If you are using the landscape presentation you must provide a Sponsor Logo for each location,
What screen sizes are supported?
The screen must be in a 16:9 or a 6:19 aspect ratio. I.e. a standard TV screen in either portrait or landscape orientation.
Both 1080p and 4k screens are supported.
When creating the publication you can choose between a portrait or landscape presentation. If you choose a portrait presentation the page will automatically detect the appropriate browser orientation.
How do I create a Digital Signage publication
- Navigate to Agenda Planning
- click on ‘Publish Agenda’ in the left-hand menu
- Click on the ‘Publish’ button for the Digital Signage:
- This will take you to a page where you can configure the publication
- Follow the on-screen instructions to configure your event
- Save your publication
- Publish your publication
- If you make changes to your agenda after publishing it, you will see a red notification icon next to the ‘Publish Agenda’ menu item with a number in it. This is to remind you that you have un-published changes: the number is telling you how many agendas are now out of date.
- You can re-publish your publication at any time by clicking the ‘Publish’ button next to it on the ‘Publish Agenda’ screen.
How do I test my signage?
To ensure you have everything ready for the opening of your event you can run the signage in ‘Test Mode’ this will cause the signage to loop through the content for your event over and over.
You can then take a look at the signage, either in your own browser (NOTE: it will be rotated by 90 degrees!) or on site and ensure things meet your expectations.
You can turn the test mode on and off at any time by reconfiguring and republishing your agenda: you do not need to involve the AV team.
To configure
- Click ‘Publish Agenda’
- Click on the name for your existing publication
- Click ‘Configure’
- Expand the ‘Signage Testing’ section and choose one of the options
- Save and republish
Don’t forget to change the option back to ‘Off’ before your event starts!
What branding can I apply?
You can choose the color for the main banner and footer for the signage. You can also set the text you would like to appear in the footer.
To configure
- Click ‘Publish Agenda’
- Click on the name for your existing publication
- Click ‘Configure’
- Expand the ‘Branding’ section and set the values
- Save and republish
What content is displayed after the end of each day?
When there is no more content to show for a particular day you can configure ‘Intermission Content’, it will be shown after the end of the last session of the day until midnight.
You can say things like “Looking forward to seeing you tomorrow!” or “See you next year!” or whatever suits your needs.
To configure
- Click ‘Publish Agenda’
- Click on the name for your existing publication
- Click ‘Configure’
- Expand the ‘Intermission Content’ section and add the content
- Save and republish
Can I show content from more than one location on a screen?
If you want to display content from more than one location on the same screen you can merge locations together.
If a location is merged into another then the original location will no longer be available in that publication. If you need to display both merged and unmerged content then you can create two separate signage publications
To configure
- Click ‘Publish Agenda’
- Click on the name for your existing publication
- Click ‘Configure’
- Expand the ‘Merge Locations’ section and configure the merges you require
- Save and republish
How do I add a sponsor logo to a location?
You can add a sponsor logo for each stage. This is required for presentation in landscape, but optional for portrait.
For Landscape Presentation:
- The logo for each stage will be positioned in the middle on the left hand side. The space is 840x561px if you display the ‘Agenda by Lineup Ninja’ footer or 840x662px if you do not. If you are using a 4K TV you can use images with double the dimensions. Images will be proportionally scaled to fit.
For Portrait Presentation:
- The sponsor logo will be shown after the main heading and before the agenda. Any image size can be used, it will be scaled to be 320px wide.
To configure the sponsor logos:
- Click ‘Publish Agenda’
- Click ‘Locations’
- Click the name of the location
- In the ‘Files’ section upload a ‘Sponsor Logo’
Then publish your signage. The sponsor logo will show above the list of sessions.
Can I show multiple sponsor logos for a location?
To show multiple sponsor logos for a location create one image that contains all the logos you need. Then upload this image as the ‘Sponsor Logo’ for the location.
Will updates I make in the agenda planner go live immediately?
No, think of the agenda planner as your workspace, you can make any changes you need without impacting your published data. When you are ready to publish navigate into the ‘Publish Agenda’ page and click on ‘publish’ for the relevant publication.
When I publish updates, will they appear in real-time?
In most circumstances changes will publish immediately, on some networks and signage hardware it may take up to 2 minutes.
Will the URL for a location change?
If you rename a location the URL for that location will change, however the old URL will continue to work so the AV team will not need to update their configuration.
If you delete a location and recreate it then the URL will change and your AV team will need to update the signage configuration.
Cam I help to promote Lineup Ninja?
We would love it if you would consider helping to promote Lineup Ninja by adding a small ‘Agenda By Lineup Ninja’ logo to the bottom of your signage. You can enable / disable this when you configure your signage.
This is currently available on the landscape presentation only.
How can I filter the published content?
You can filter which Speakers and Sessions will be published based on a number of criteria. Some common use cases for filters are:
- Preventing ‘Placeholder’ sessions from being published
- Holding back a Speaker who is not yet ready to be announced
- Excluding sessions scheduled during the ‘build up’ day for the event
- Only publishing speakers who have confirmed their slot
- Removing a particular location, or track from the published schedule
- Anything you can think of using labels!
For Speakers you can filter in 3 ways
- Choose which speakers are to be published based on their relationship to sessions
- (If Speaker Confirmation is enabled): Publish speakers that have a confirmed session that is published and not filtered out.
- Publish speakers that are speaking on any session that is published and not filtered out.
- Publish all speakers
- Publish no speakers
- Apply more granular filters with labels
- Only publish speakers with a particular label. For example you might want to use a ‘Content Reviewed’ label to flag speakers that have had their content reviewed.
- Exclude speakers with a particular label. For example you might want to exclude a ‘Do not publish’ label to prevent publishing of speakers who are not yet ready to be published.
For Sessions you can filter in numerous ways
- Choose which sessions are to be published based on their relationship to speakers
- Publish All Scheduled Sessions. Publishes sessions regardless of whether they have confirmed speakers or not.
- (If Speaker Confirmation is enabled): Publish sessions that have one confirmed speaker.
- (If Speaker Confirmation is enabled): Publish sessions that have all their speakers confirmed.
- Publish All Sessions (available on Lineup Ninja Agenda App only)
- Apply filters with labels
- Only publish sessions with a particular label. For example you might want to use a ‘Content Reviewed’ label to flag sessions that have had their content reviewed.
- Exclude session with a particular label. For example you might want to exclude a ‘Placeholder’ label to prevent publishing of sessions which are not yet populated.
- Filter by location
- Only publish sessions in a particular location, or locations. This can be useful if you are publishing an agenda for just one or two locations.
- Exclude sessions in a particular location, or locations. This can be useful if you have scheduled sessions in your Green Room or similar back stage location.
- Filter by resource
- Only publish sessions needing a particular resource. This could be useful if you are producing an agenda for a particular team that manages some resources.
- Exclude sessions needing a particular resource.
- Filter by Date
- Only publish sessions in a date or dates. Useful if you are producing an agenda for a particular day.
- You can exclude a date or dates from your publication. Useful if you have dates for build up and tear down in your agenda.
- Filter by Track
- Only publish sessions in a particular track or tracks. Useful if you are producing separate agenda for separate parts of your event
- Exclude sessions on a particular track. Can be useful to block presenting of a track until a product launch has happened.
To configure filters:
- Click ‘Publish Agenda’
- Click on the name for your existing publication
- Click ‘Configure’
- Expand the ‘Filter Speakers’ and ‘Filter Sessions’ sections and configure the filters you need
- Save and republish
How can I embargo content that is not yet ready for the public?
You can choose to embargo session titles and descriptions if you have content that should only be shown to the public after being announced in the event.
An embargo is applied by using labels to identify the sessions that should have an embargoed session title or description.
For example if you have a label ‘New Product Launch’, you can configure an embargo to hide the session title and description from sessions with that label. Following the launch of the product you can remove the embargo and republish the agenda.
If you embargo a session or description you can replace the original text with something to indicate that the session will be published later, for example ‘Super Secret Session’.
The speakers for a session will still be shown when it is embargo’ed. To exclude a session, including it’s speakers from being published then use ‘Session Filters’ rather than an ‘Embargo Content’.
To configure an embargo:
- Click ‘Publish Agenda’
- Click on the name for your existing publication
- Click ‘Configure’
- Expand the ‘Embargo Content’ sections and configure the embargo that you need
- Save and republish
How can I merge locations, tracks and roles when publishing?
When publishing you can merge content together. This enables you to publish a simpler agenda for your attendees than the one you are using to plan your event.
You can choose to merge these types of data:
- Locations. Merging location A into location B will show all sessions in location A as taking place in location B. This can be useful if you have multiple locations configured for scheduling purposes that will be experienced by the attendee as a single location.
- Tracks. Merging track A into track B will show all sessions in track A as being in track B. This can be useful if you have some tracks with only a small number of sessions and wish to present this sessions as being in a more populous track.
- Roles. Merging role A into role B will show speakers with role A has having role B. This can be useful if you have a lot of roles internally that are not intended to be shown to attendees. You can merge them into a role with a name appropriate for your attendees.
When merging the location, track, or role that you are merging into does not have to have any sessions itself. So you can use this to show a different name to attendees than you are using internally. For example you could create a ‘Main Hall’ location, and merge ‘Building B - Hall A’ into that location so attendees see ‘Main Hall’ in their agenda.