Agenda App & Website: Timetable Grid
How do I present my Agenda as a timetable?
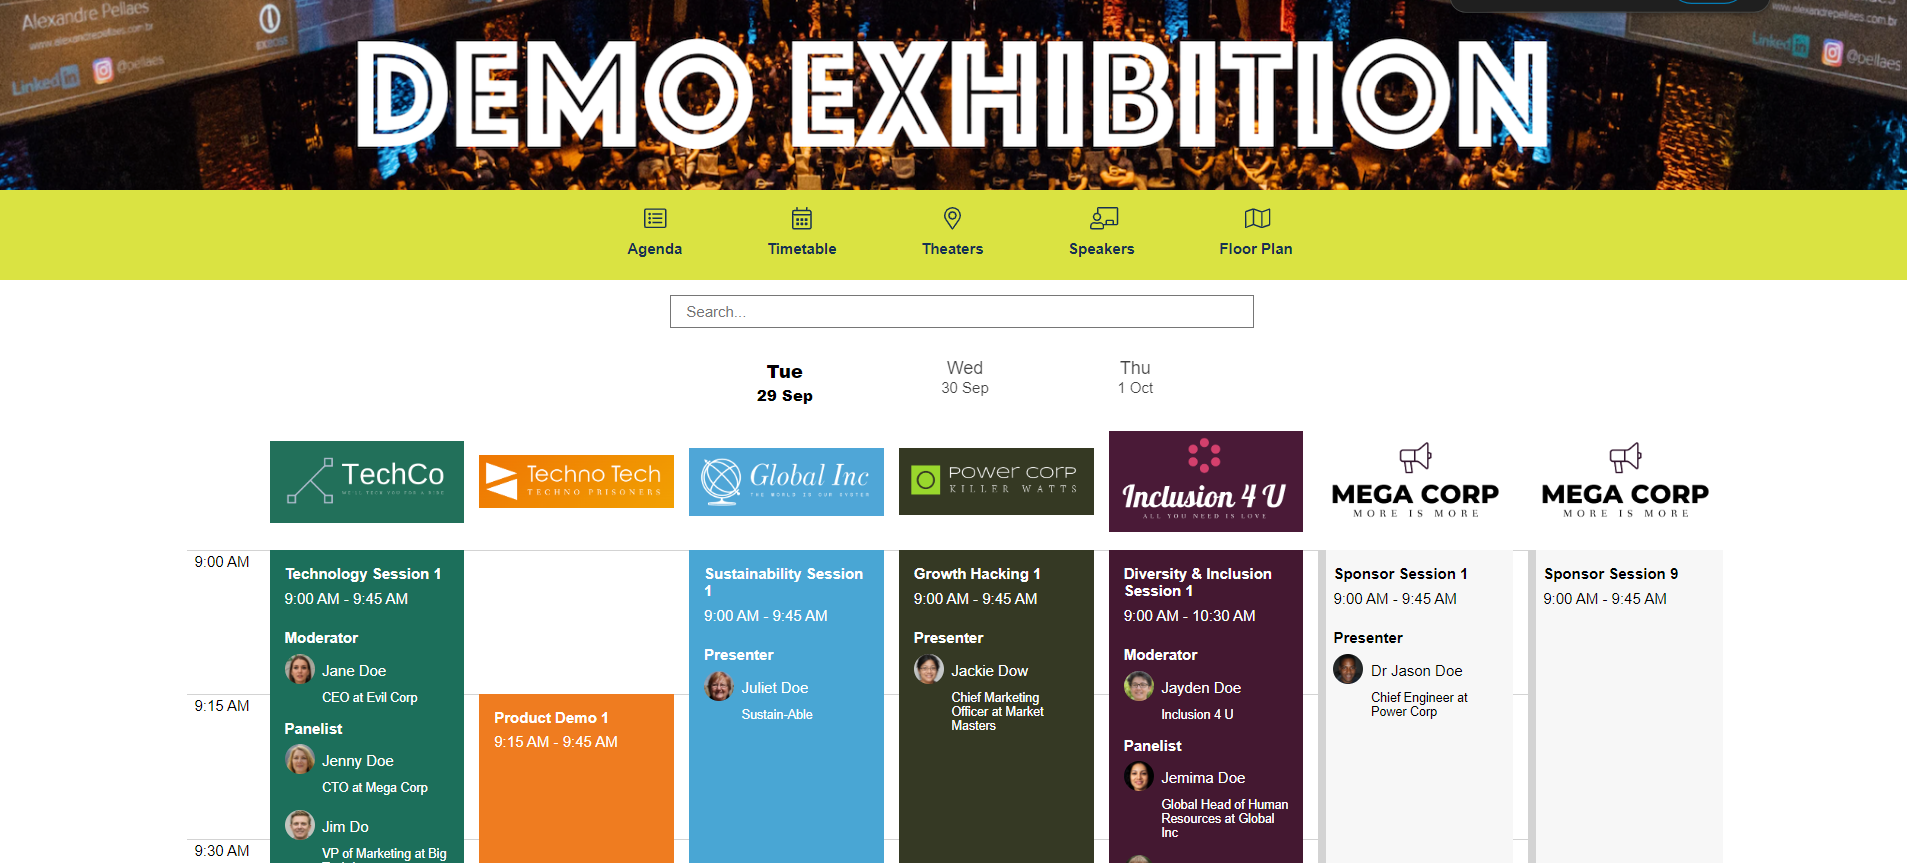
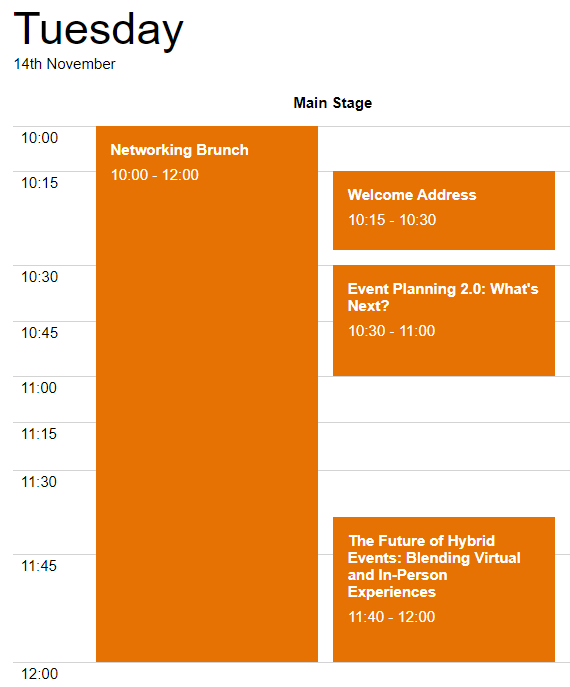
There are two options to display your agenda, either as a list of sessions, or as a timetable grid.
The timetable grid means the columns are either the Locations or Tracks in your event.
To enable this page in the agenda app do the following
- Navigate into the Agenda App publication configuration
- In General Configuration, scroll to ‘Timetable Page’
- Choose whether you want the columns to show Tracks or Locations. You can also choose the order the items are shown, and hide any tracks/locations you don’t want to show.
Note
- Save and publish your publication
How do I show multiple sessions taking place in the same location at the same time?
- Navigate to >
- Create an additional Location for the extra session(s)
- Schedule the sessions in the additional Location
- Navigate to > Lineup Ninja Agenda App > Configure
- Expand the Timetable Page section, scroll to Locations and untick the checkbox to hide the new Location
- Scroll to Merge Locations and merge the new Location into the original Location
What colours are used for the Sessions?
By default, the Track colors are used for the background colour of the sessions.
To optionally choose to show the colour of the Location, navigate to your Agenda App configuration, scroll to ‘Timetable Page’ and change the below question:

If a session has multiple Tracks then the colours will be applied depending on whether you are showing Tracks or Locations in the grid:
- If you are showing Tracks then the background color will be the color of that Track only
- If you are showing Locations then the track colors will be shown in the left hand border, and the background of the session will be grey
How do I show Speaker Names?
To optionally show Speaker Names in the timetable grid:
- Navigate to your Agenda App configuration and scroll to ‘Timetable Page’
- Change the below question:

Note
If you are choosing to show Speaker Roles, these will also be shown.
How do I add logos to the columns?
The columns in the timetable represent either Tracks or Locations. To help your user navigate the agenda you can add logos to the columns:
- Navigate to > /
- Click the name of the item you wish to set a logo for
- Scroll down to ‘Files’
- From the ‘Type of Image or File’, choose ‘Location Logo’ or ‘Track Logo’
- Upload the logo
- Repeat for other Tracks or Locations
- Navigate to ‘Publish Agenda’
- Click ‘Publish’ for your Agenda App to publish the new logos
What are the recommendations for logos?
We make the following recommendations:
- Use the same height and width for all logos, this will ensure a consistent presentation
- Upload a high resolution image, we will automatically scale it appropriately
- Avoid logos with a high level of detail as they may look unclear when scaled down to fit on the timetable
How do I add sponsor logos to the sessions?
To manually add sponsor logos to sessions:
- Navigate to > and open the relevant session details
- Scroll to ‘Upload a new image or file’ and open drop down for ‘Type of Image or File’
- Select ‘Session Sponsor Logo’ and upload the image
Note
You can also request submitters to upload a Session Sponsor Logo in the Form Designer of your Submission Flow. For more information on how to do this, please follow this link.
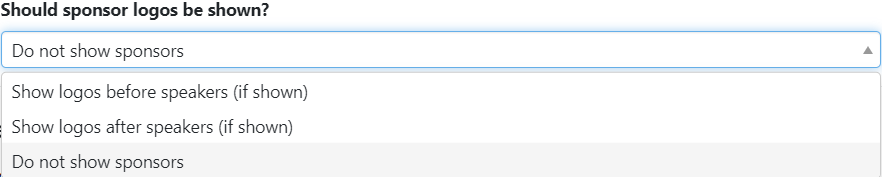
To enable sponsor logos to appear in Agenda App:
- Navigate to >
- Open your Agenda App configuration and scroll to ‘Timetable Page’
- Edit ‘Should sponsor logos be shown’ drop down and select either ‘Show logos before speakers (if shown)’ or ‘Show logos after speakers (if shown)’
Next - Publish
Still can’t find what you’re looking for? Email support@lineupninja.com and one of the team will get back to you as soon as possible.