Sessions
What is a Session?
In Lineup Ninja, a Session is a block of time that gets scheduled in a specific location and time slot. It can have a variety of data associated to it:
- Speaker(s) profile data
- Session title
- Description
- Track (theme)
- A duration
- A required capacity (i.e. minimum capacity for the room or stage where the session will be scheduled)
- A list of physical resources required to deliver it
- Uploaded files (academic papers, slide decks, images)
- Scheduling rules that can govern when it may or may not be scheduled (very handy)
- Labels (useful for distinguishing between oral presentations and round-table sessions, or the language the session will be conducted in)
Once a Session has been scheduled, it will also have:
- Location
- Date, time
- Information about whether there are any scheduling problems (clashes/double booking etc)
- Information about whether the speaker(s) has been notified of the proposed time, and has confirmed that they’ve seen this
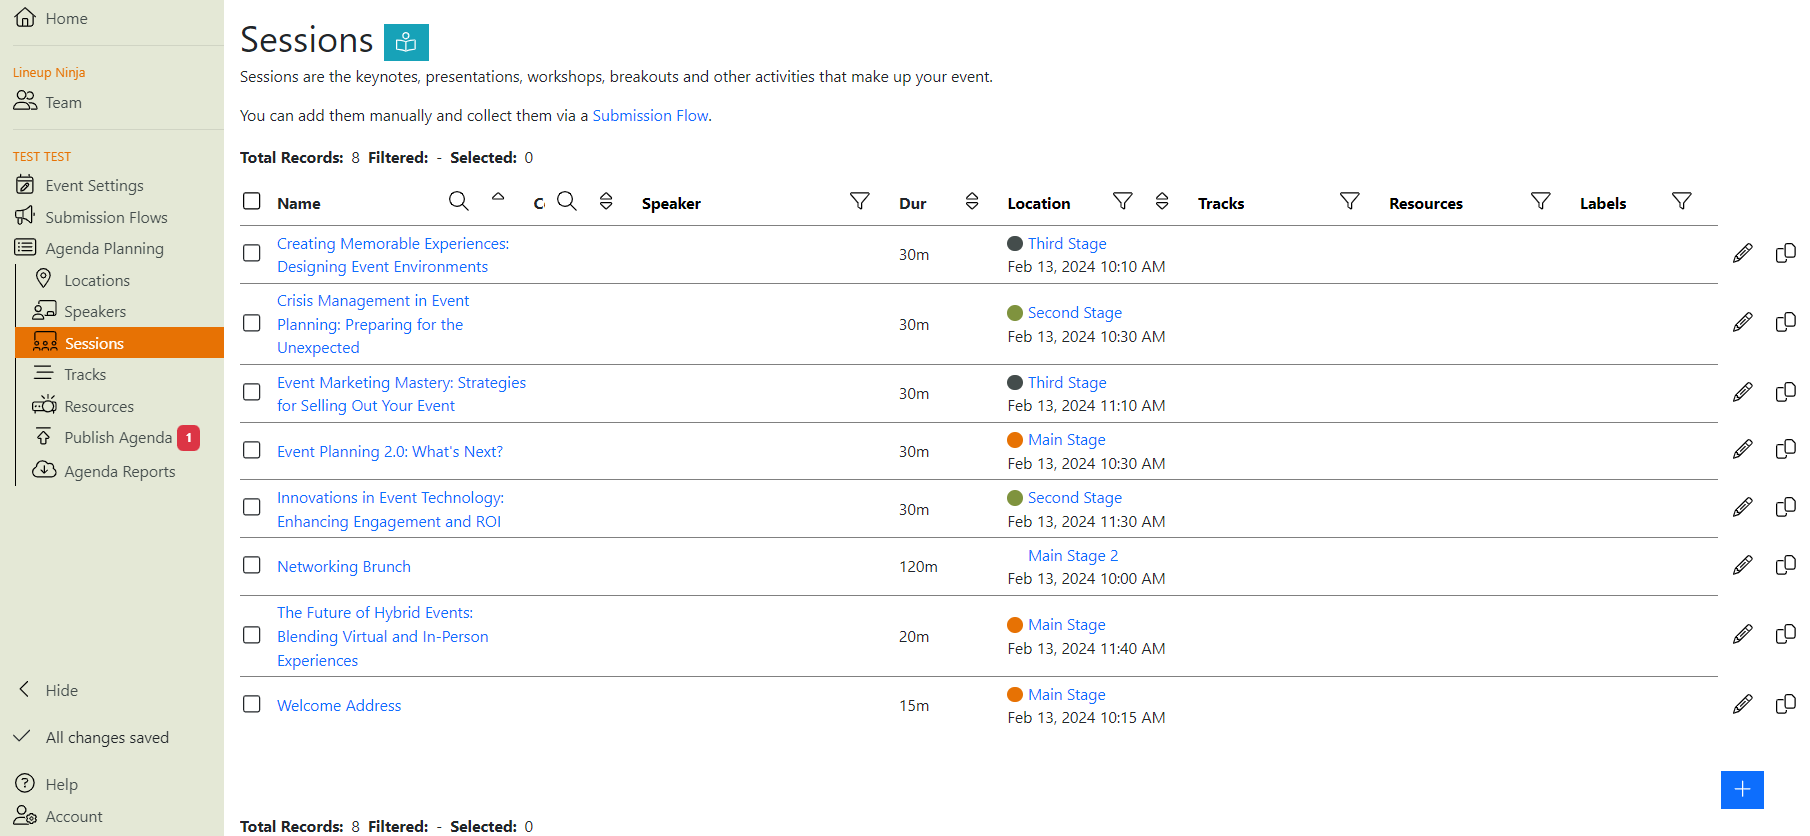
How do I create and manage Sessions?
To manually create a Session:
- Navigate to >
- Click to add a new session
You can also create a session via Submissions Flows:
- Invite people to propose sessions via a Call for Papers Submission Flow
- Review and choose the submissions you wish to accept
- Create a Session from the Submission by navigating into the submission name and click ‘Create Session/Speakers’. Alternatively, you can do this in bulk by selecting the submission using the tick box on the left-hand side, scrolling to the ‘Actions’ drop down and selecting ‘Create Session/Speakers’.

How do I invite a speaker to deliver a session?
- Create a session
- Click on the session name to navigate into the Session Detail view
- Scroll down and click on ‘Invite Submission’
- Follow the on-screen instructions
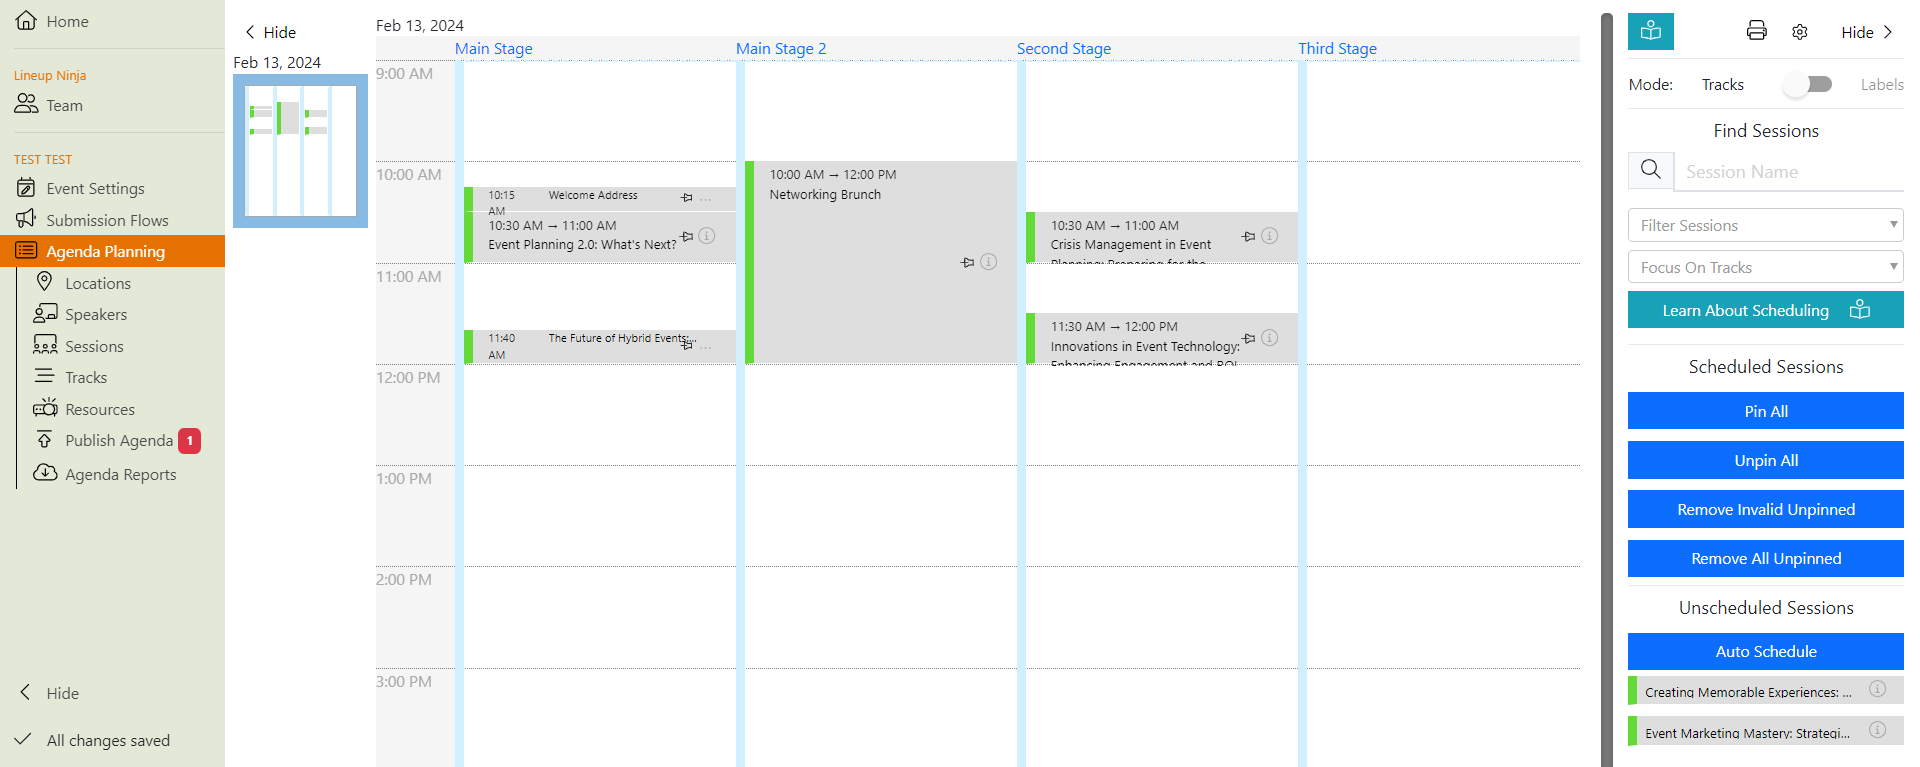
How do I schedule a Session in my agenda?
- Navigate to
- The right-hand column shows any unscheduled Sessions
- Drag and drop a Session from this list onto the Agenda Planning board
- Locations and times that are valid scheduling options for the session will appear white. Invalid options will be greyed out
For a detailed introduction to scheduling Sessions, check out the Scheduling guide.
How do I edit the default session duration and changeover time?
- Navigate to >
- Scroll to ‘Settings’ at the bottom of the Sessions list
- Click next to Default Duration/Default Changeover Time to edit
How do I change a Session’s duration?
To update an individual Session:
- Navigate to >
- Click on next to the session you wish to change
- Edit the duration
To update Session lengths in bulk:
- Navigate to
- Filter the table to show the Sessions you want to update
- Select the Sessions using the tick box in the heading or on the left-hand side
- Scroll to the ‘Actions’ drop down and select ‘Update Session Durations’
How do I keep notes for internal use about a session?
- Navigate to > and click on the Session’s title
- In the Session Detail view there is a ‘Notes’ field for internal notes
How do I set the expected number of attendees for a Session? / How do I set the minimum venue capacity required for a given Session?
- Navigate to >
- Click into the Session you want to change
- Edit the ‘Required Capacity’ field by clicking

How do I manage Session booking?
Lineup Ninja doesn’t currently manage Session bookings. If you require this, we can offer this via integrations with our partners, such as Eventscase or Guidebook.
How do I copy Sessions within the same event?
For more information on how to copy Sessions, follow this link.
How do I delete Sessions?
- Navigate to >
- Click at the end of the Session row and then click
- To bulk delete sessions, select the session using the tick box on the left-hand side, scroll to the ‘Actions’ drop down and select ‘Delete Sessions’
Warning
Use with caution: This cannot be undone!
Still can’t find what you’re looking for? Email support@lineupninja.com and one of the team will get back to you as soon as possible.