Speaker Details Task
How do I Use the Speaker Details Task to Collect Speakers’ Profile Information?
Here’s a step-by-step guide to creating and configuring the Speaker Details Speaker Task:
-
Go to your event, and then: Agenda Planning / Speakers / Speaker Tasks
-
Click the “Create Speaker Details Task” button:
-
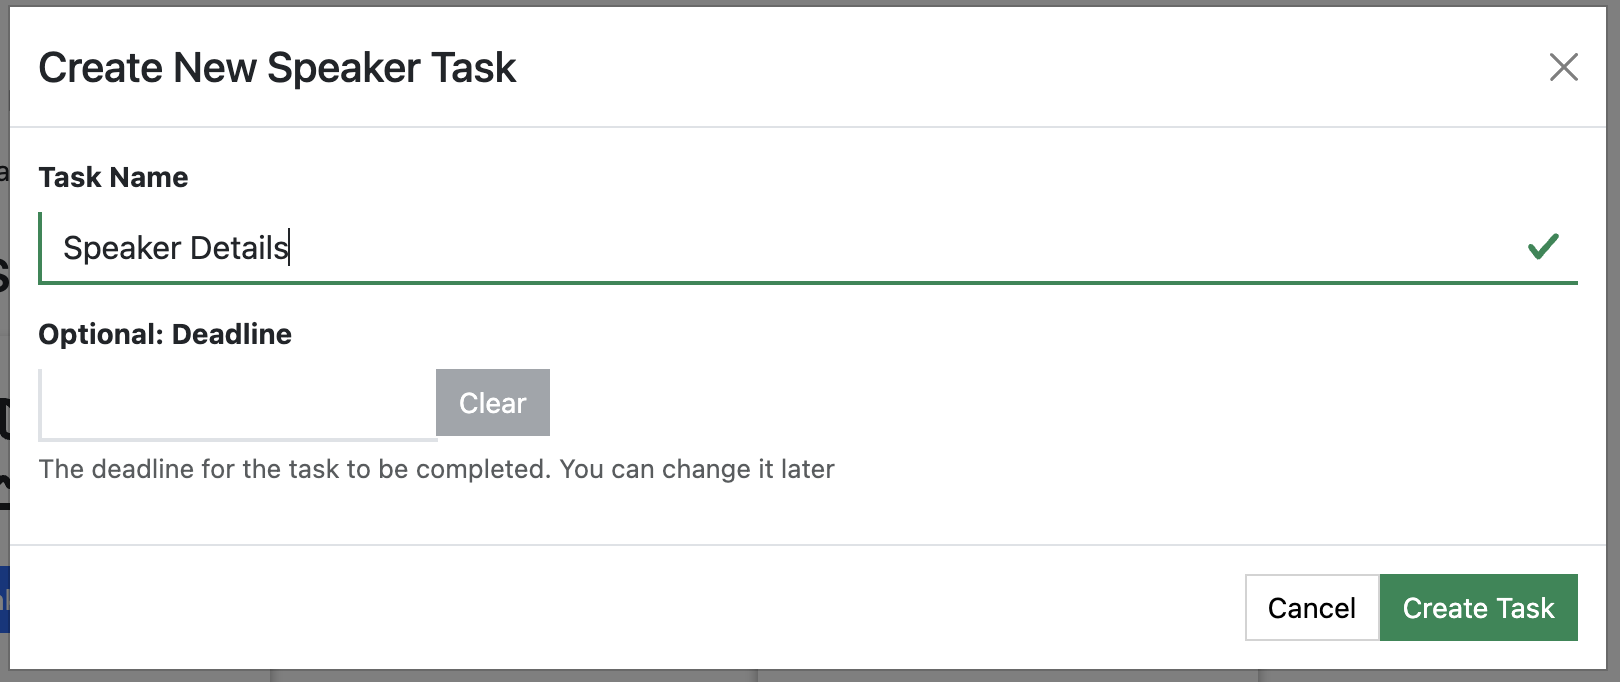
Accept or edit the task name, and optionally, provide a deadline for it:

-
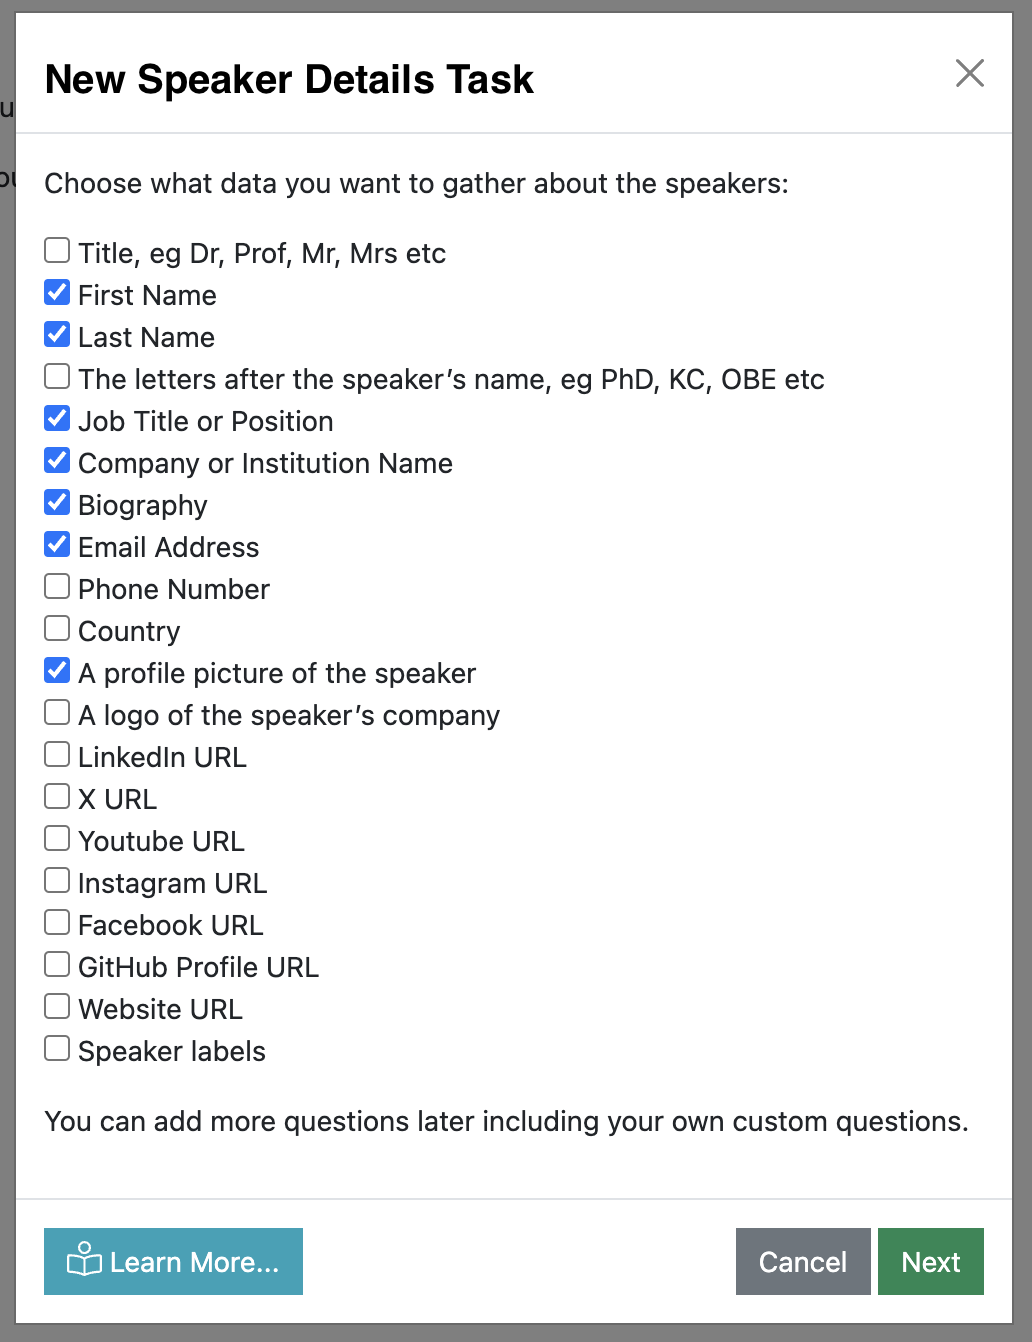
Choose which fields you want to capture from your speakers:
-
Next you will be asked if you want to review the content before adding it to the Speaker’s record on the agenda.
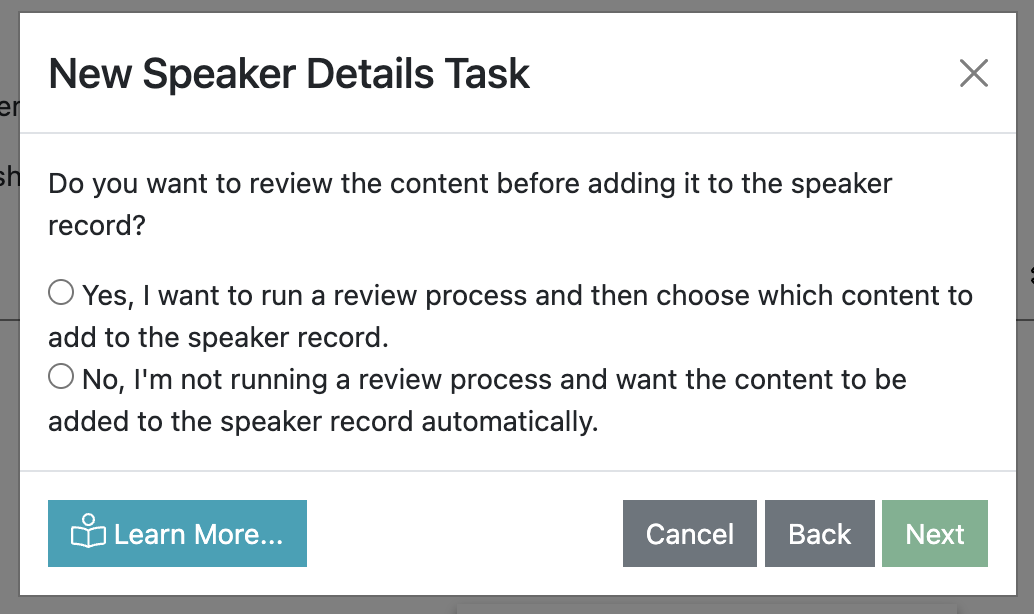

Answering “Yes, I want to run a review process and then choose which content to add to the speaker record.” will NOT automatically update the speaker’s record on the agenda with their answers. Instead, you will be able to manually update Speaker’s records from the Task data when you’ve reviewed it and are happy with it.
Answering “No, I’m not running a review process and want the content to be added to the speaker record automatically.” will mean that when speakers fill the form in, their Speaker record on the agenda will be updated automatically and immediately.Warning
If you answer ‘No’ to this question, speakers can directly update their Speaker Record on the agenda - i.e. you are effectively allowing them to edit data that will be published to the show website, mobile app, signage etc.
If you have ‘Scheduled Publishing’ enabled on any of your publications (website, mobile app etc), it is possible that speakers’ changes will be automatically published without anyone from the content team reviewing this content. -
If you choose ‘Yes, I want to run a review process…’ to the question in step 5, you will see this question:
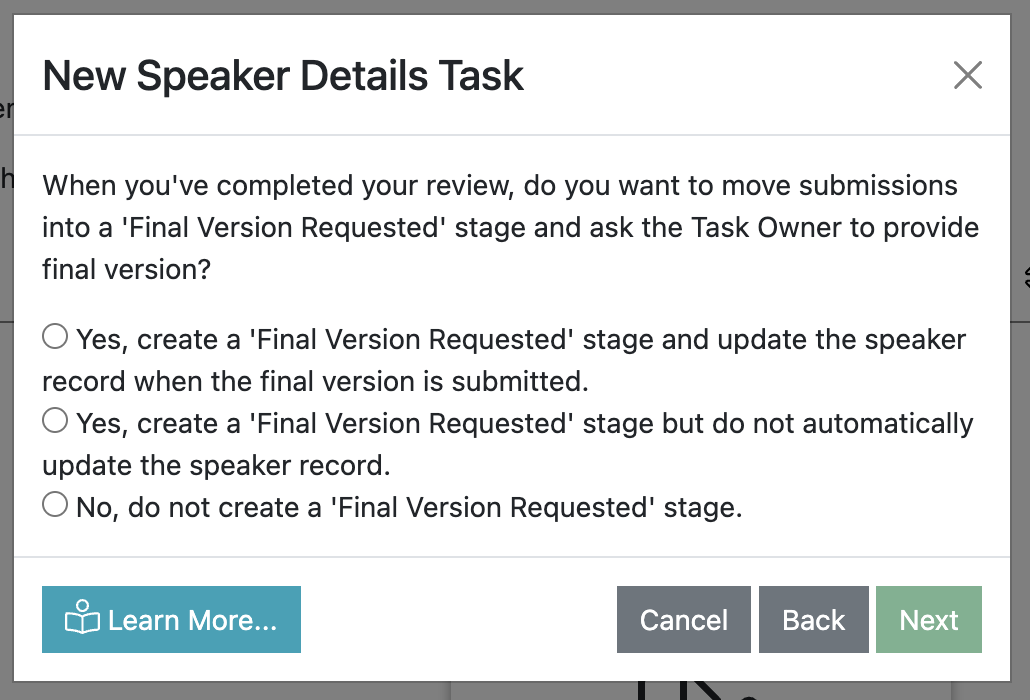
 This allows you to choose whether to add another Stage to your Speaker Details Task to capture the final version of speakers’ details - or not.
And if you DO choose to add a ‘Final Version Requested’ stage to your task, you can choose whether that final version of their details should automatically update the Speaker’s Record on the agenda, or not.Tip
This can be useful in a couple of situations:
1. If you want speakers to provide a draft - or limited - version of their speaker profile (e.g. name, job title, and headshot) early in your process so you can use it to promote the content at your show, and then collect more details (e.g. full biography) closer to the show.
2. If you want to review speakers’ profiles and ask them to make changes based on your feedback, like “Your headshot is blurry and you biography reads like War and Peace. Please change it!” -
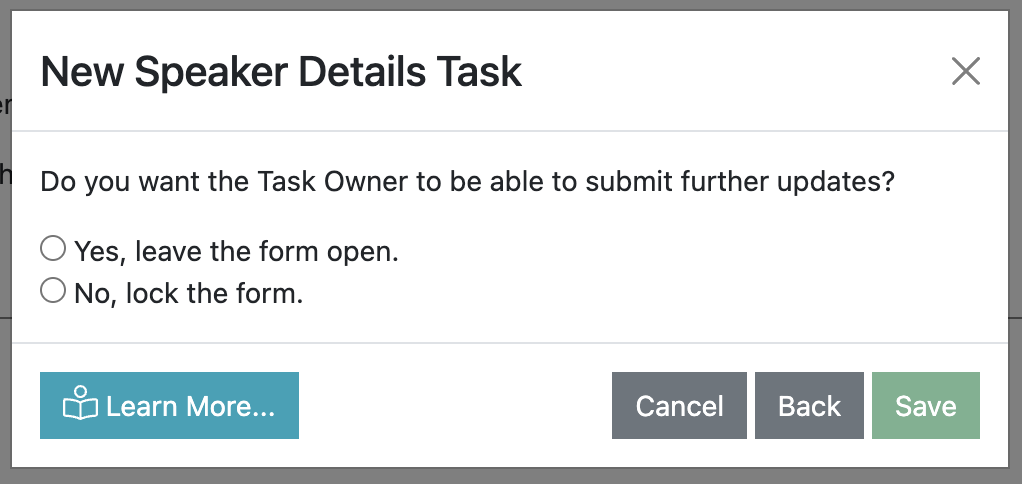
How do you want the form to behave when speakers submit their details?
Would you like to:- lock the form (useful if you’re keen to maintain some editorial control) or
- leave it open (useful if you want to allow speakers to make last minute changes in the run-up to the event?
-
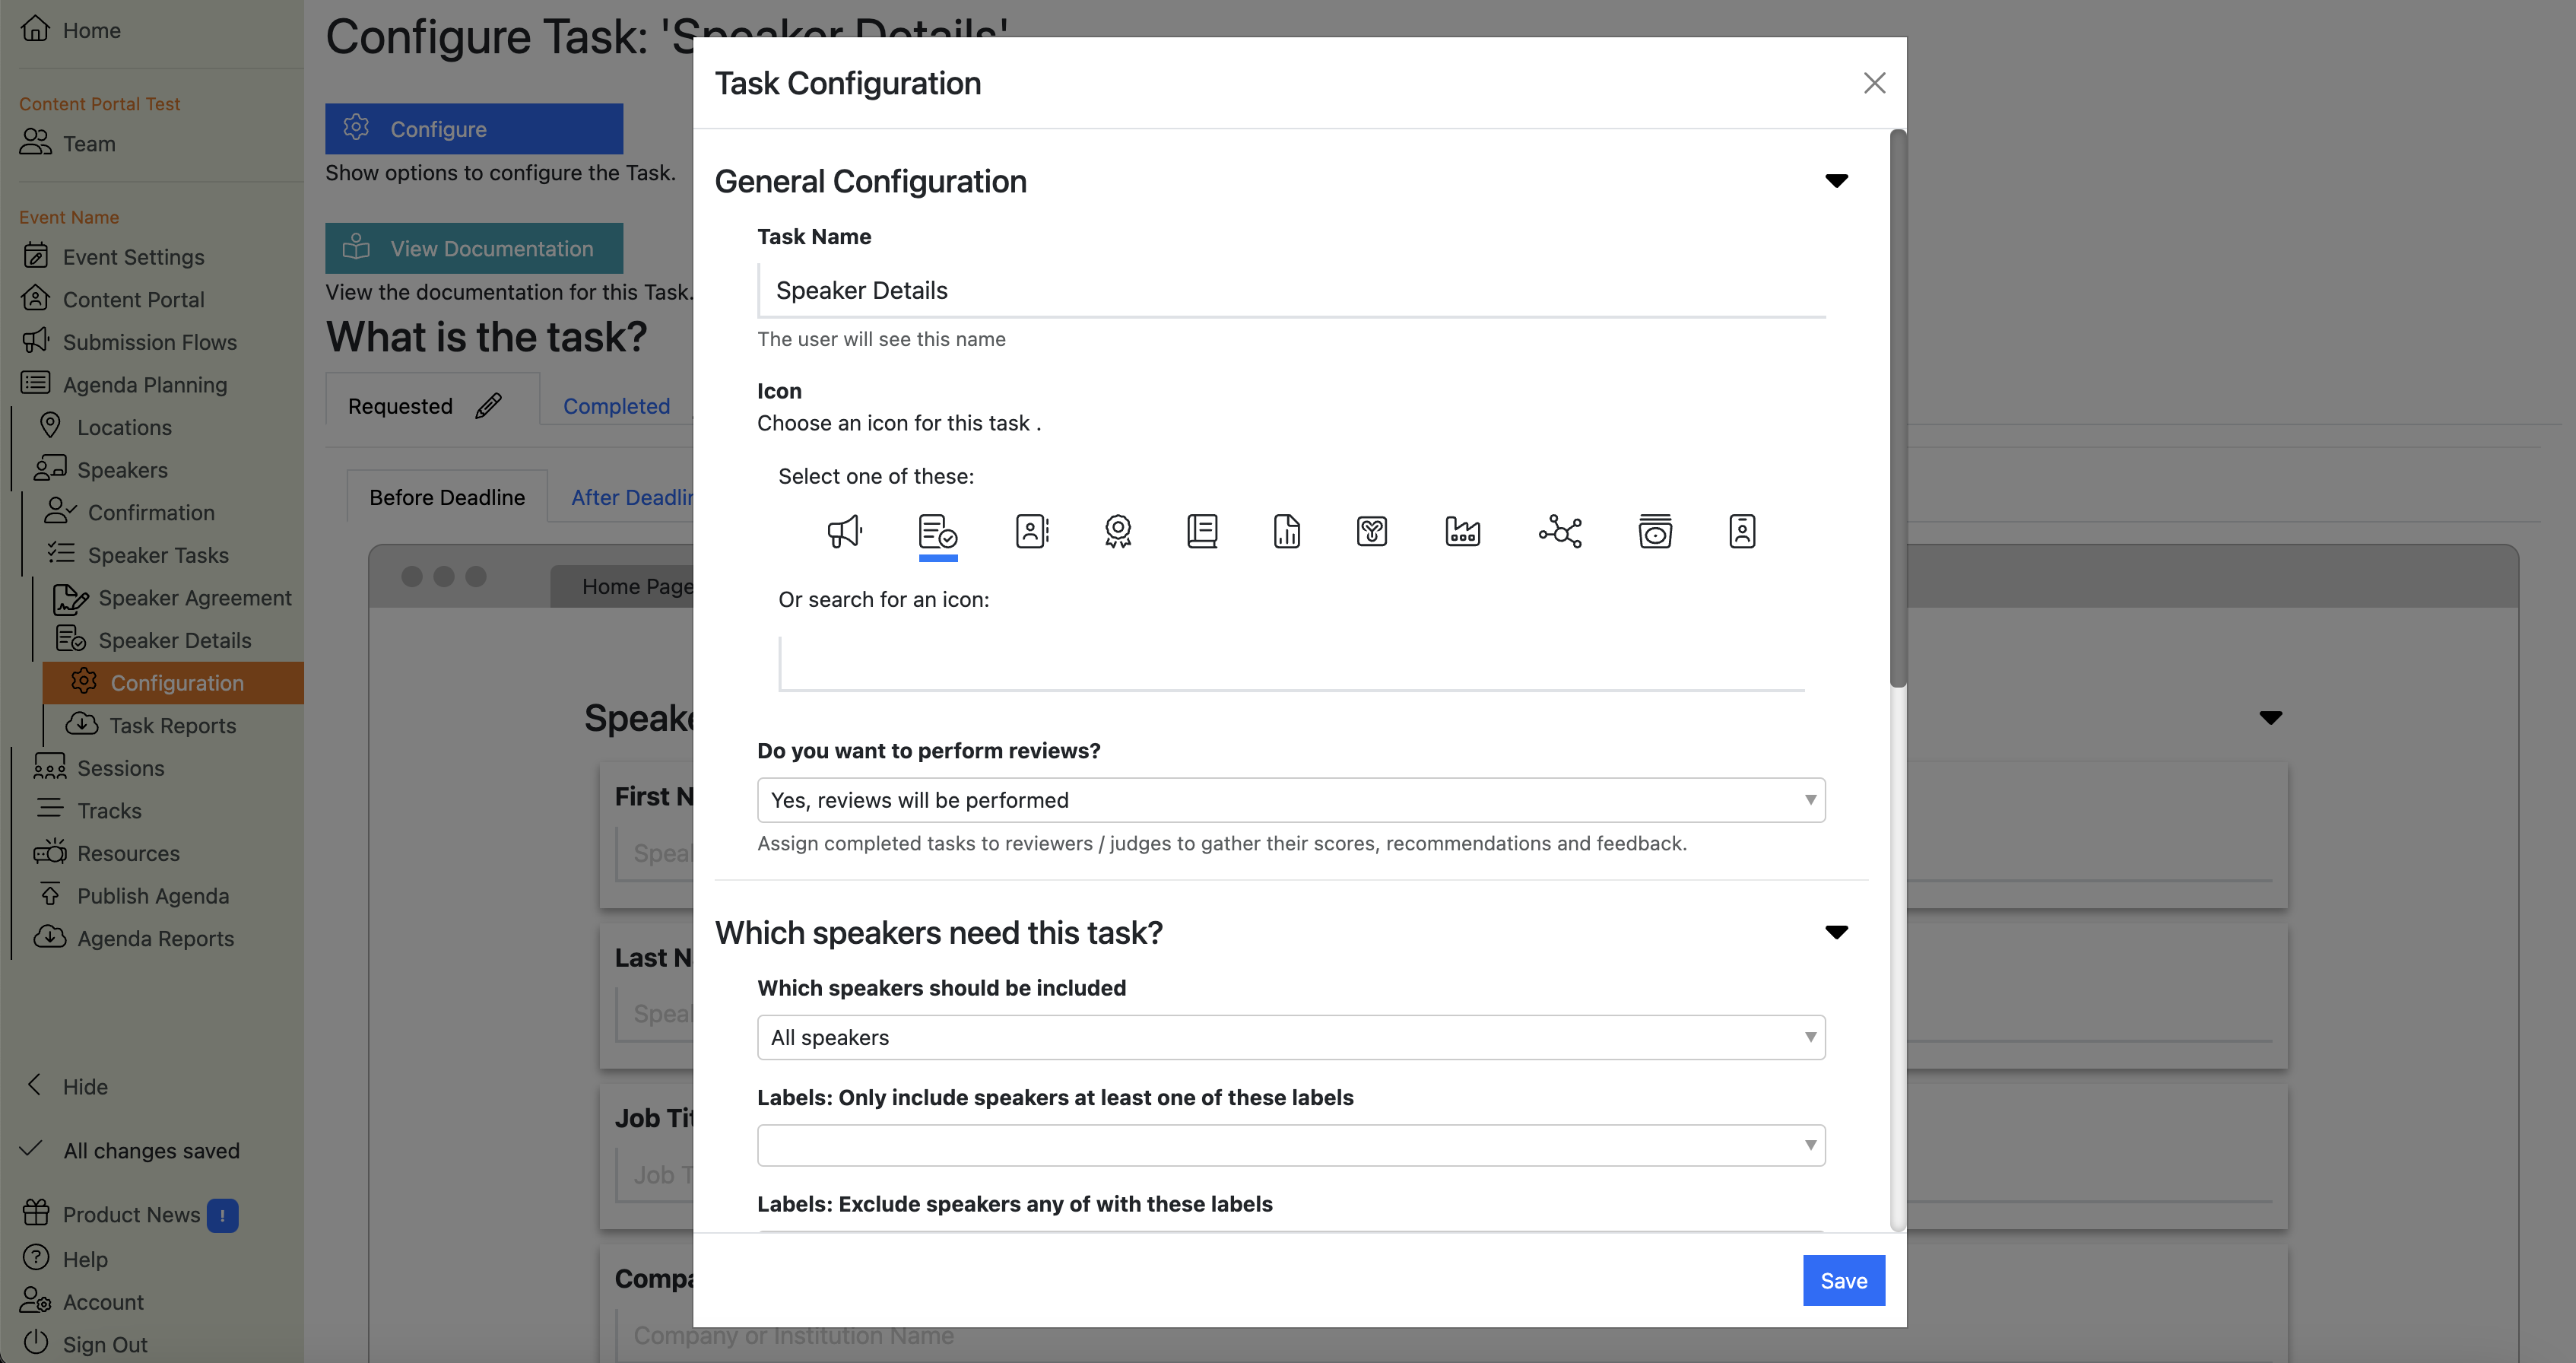
You will now be taken to the Speaker Details Tasks Configuration Page, which will have the Task Configuration Dialogue pop-up already open:

-
The Task Configuration Dialogue pop-up allows you to check (and change) some of the settings you’ve just chosen, and is where you can make some other important configuration choices.
Two important settings that you should review here are: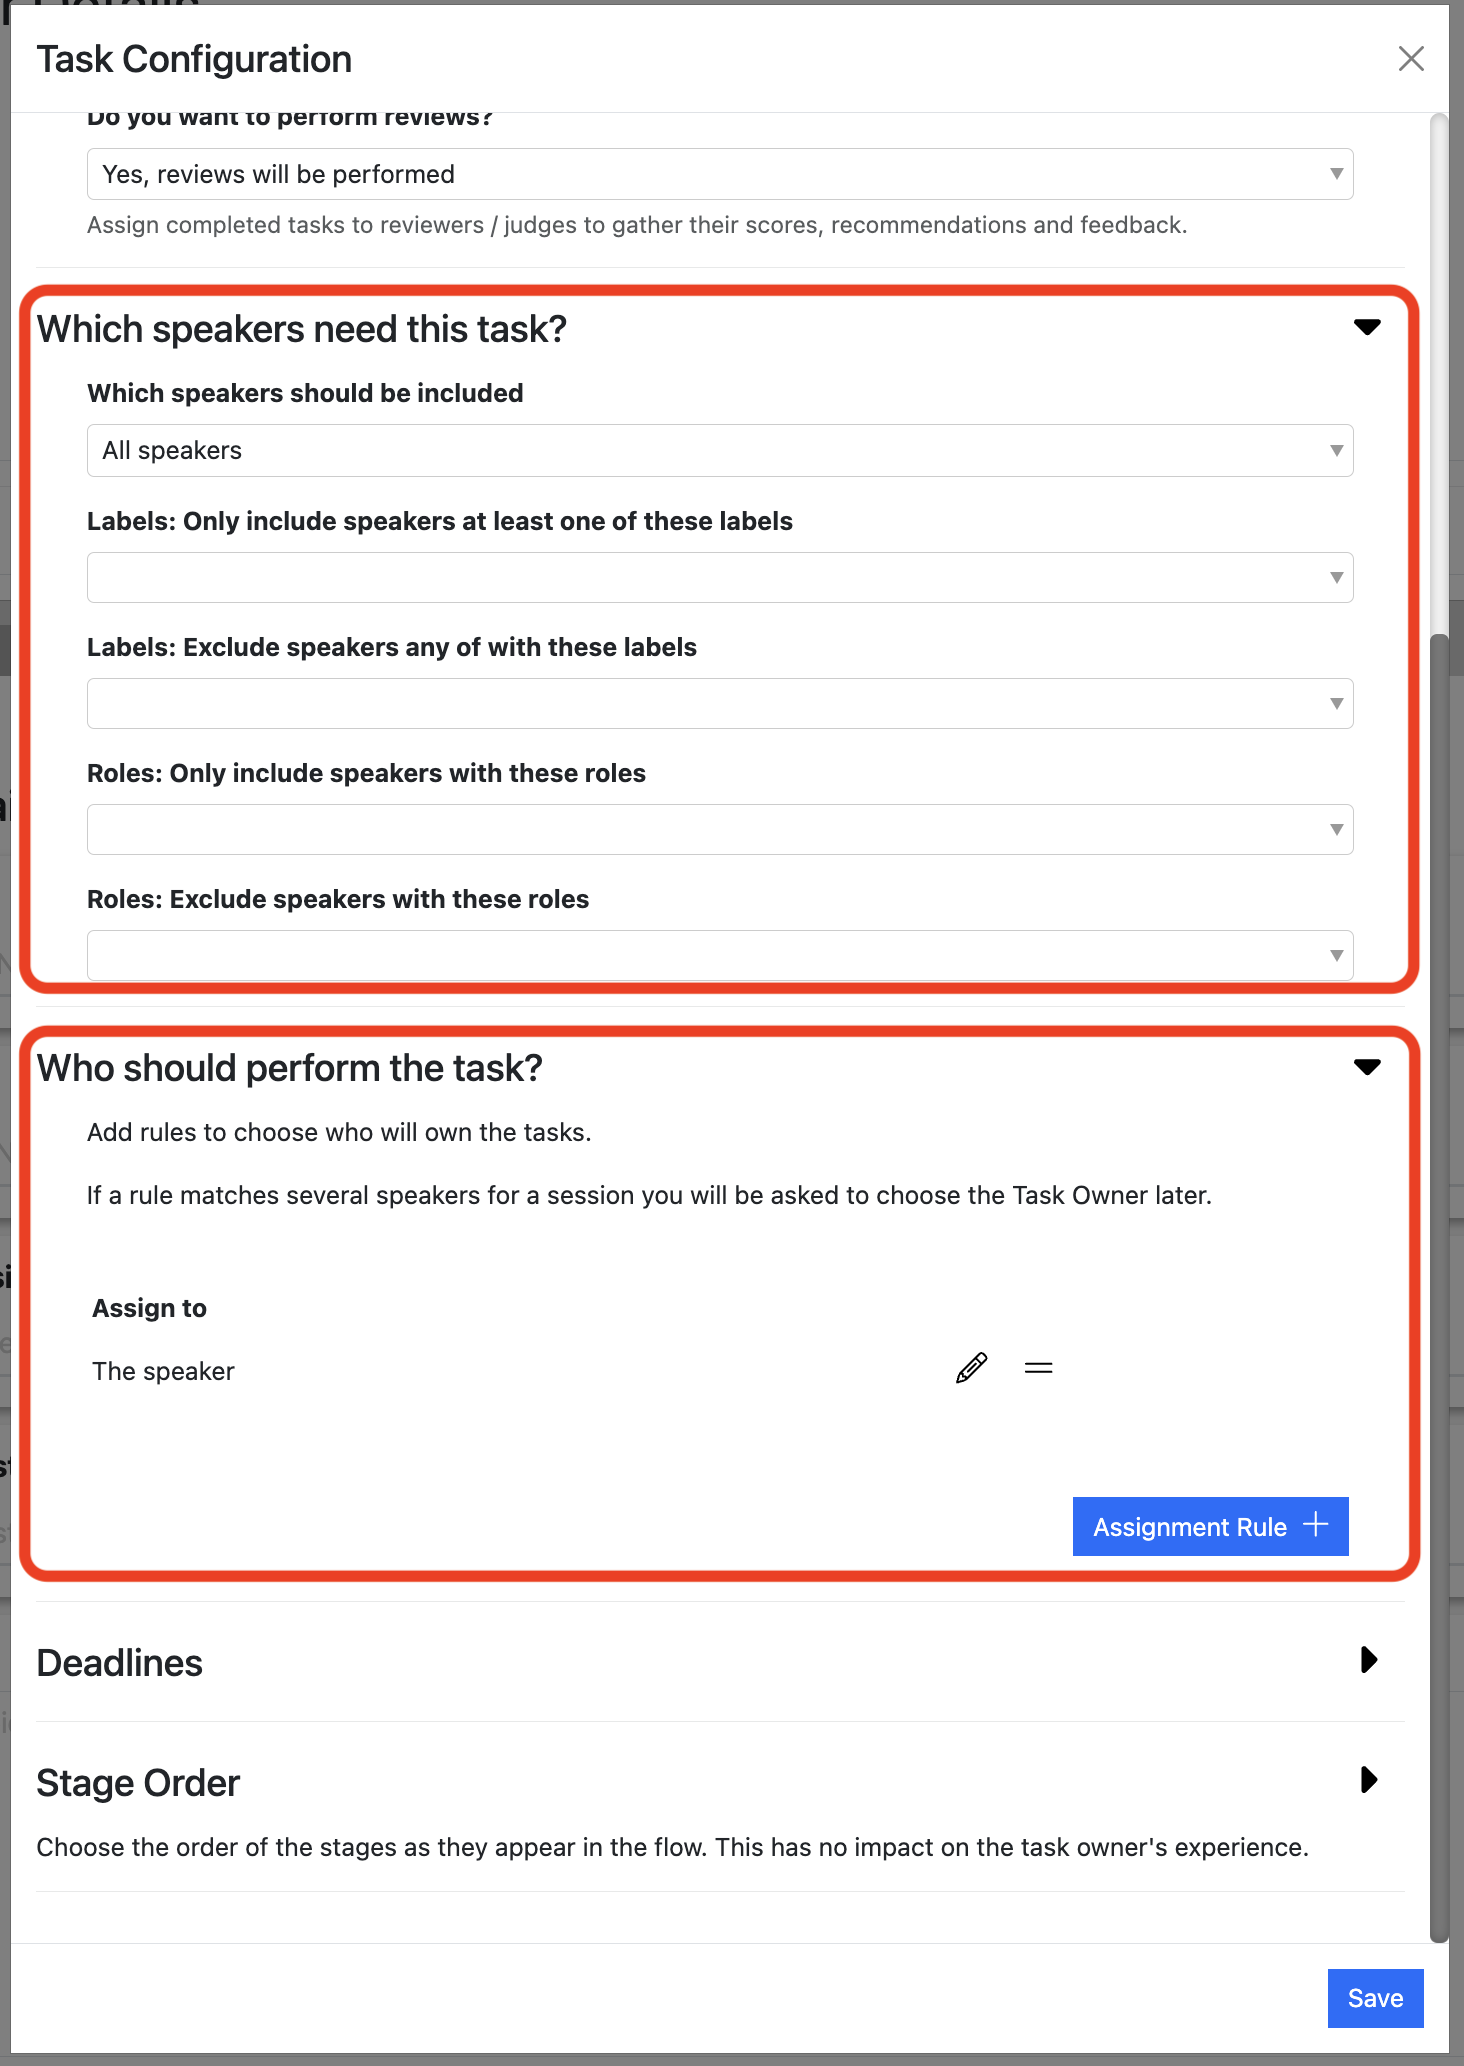

-
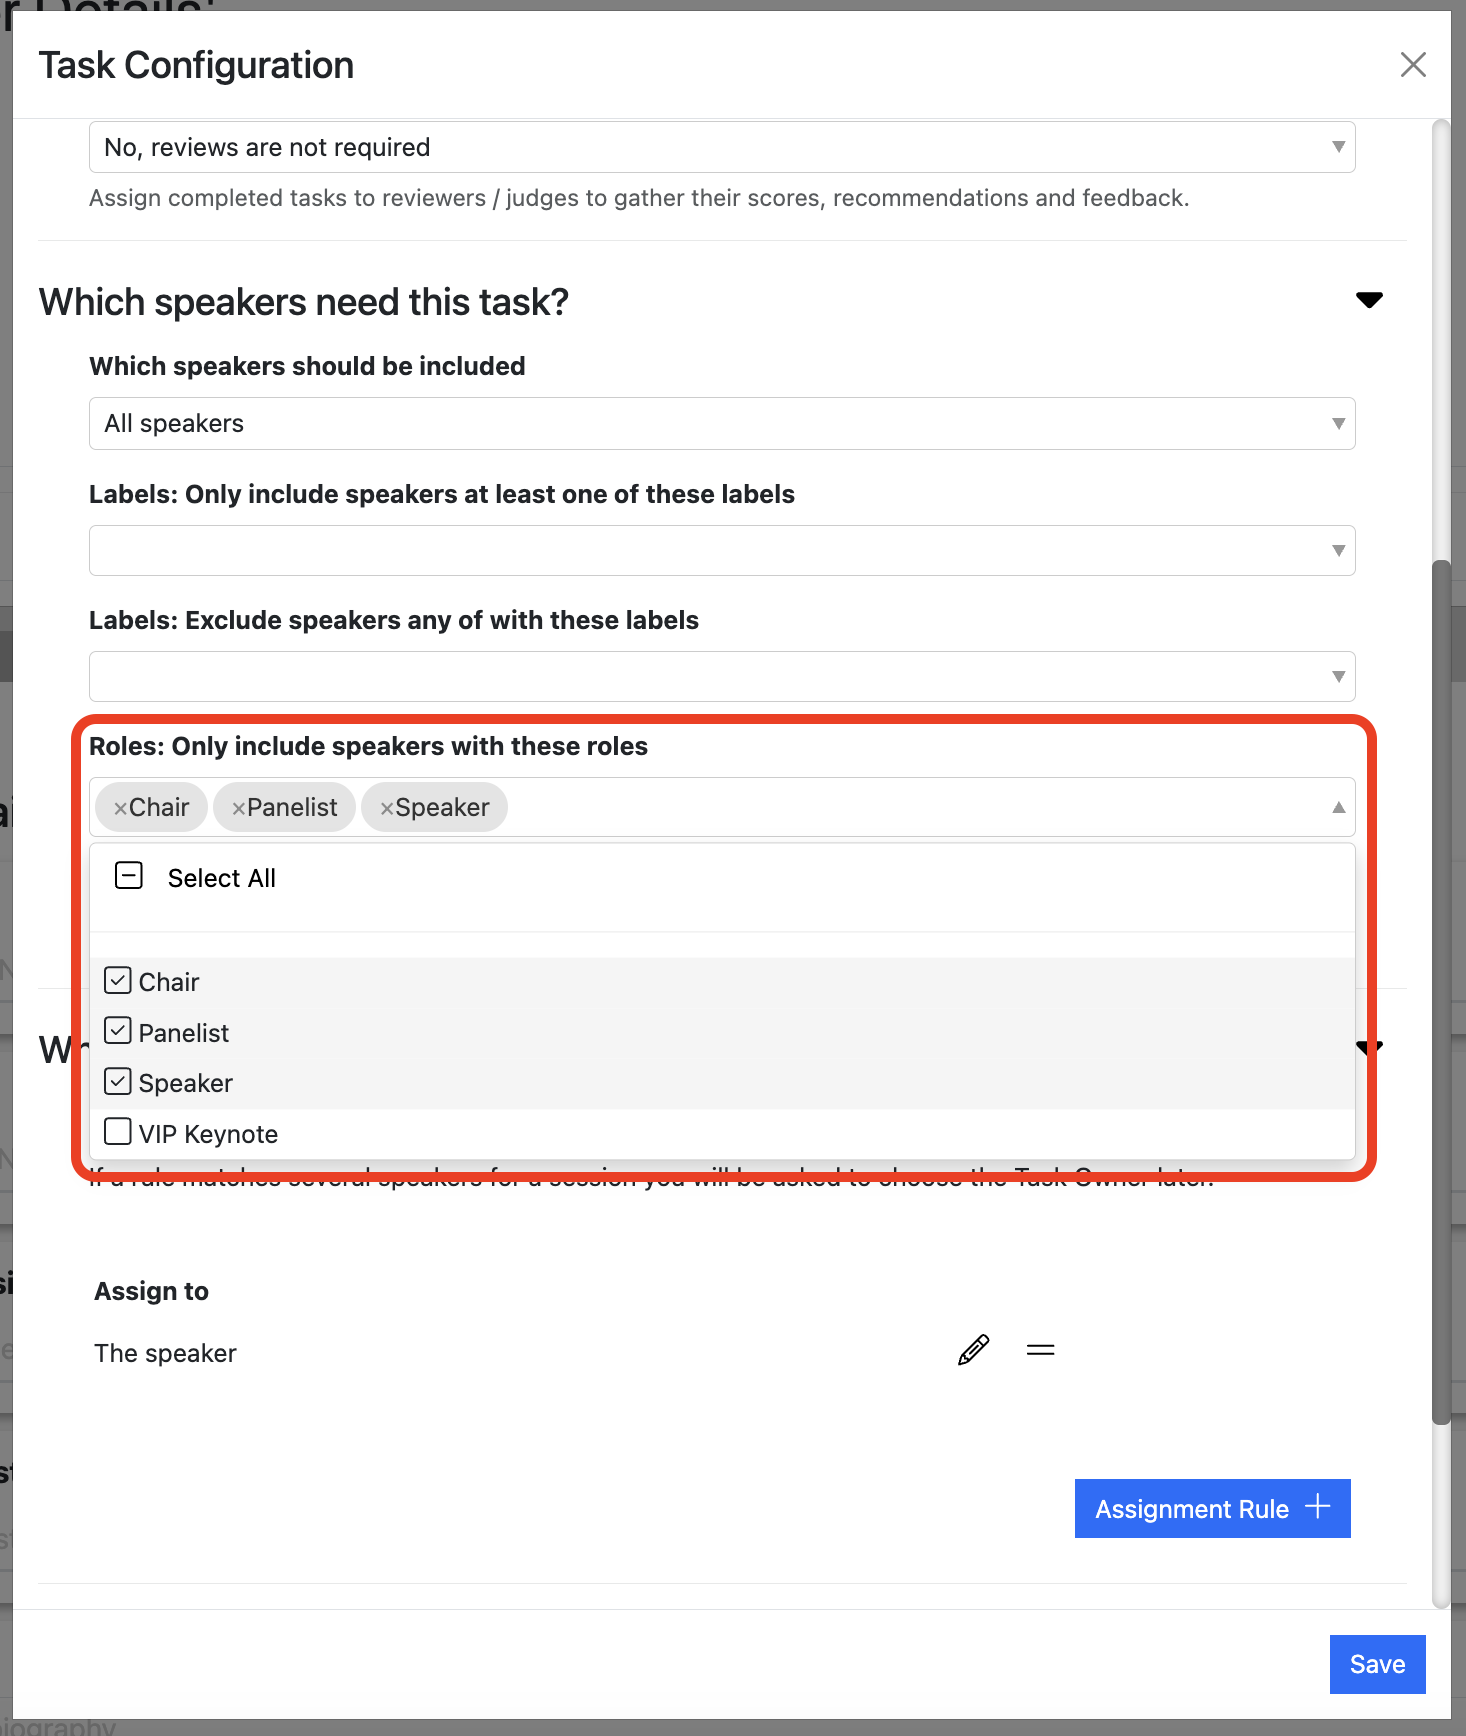
Which speakers need this task? This allows you to filter which speakers need this task to be performed.
Tip
This is useful if you have different sets of speakers, and you want to collect different details about them.
For example, let’s say you have four speaker roles:
- ‘Chair’
- ‘Panelist’
- ‘Speaker’
- ‘VIP Keynote’
You want to collect speaker details for your Chairs, Panelists and Speakers, but you’ll get the details from the VIP Keynotes’ personal assistants and add them to the system manually.
You can do this by choosing “Chair, Panelist and Speaker” from the drop-down menu for the field “Roles: Only include speakers with these roles”.
Then when you assign the task, it won’t create tasks for your VIP Keynote speakers. -
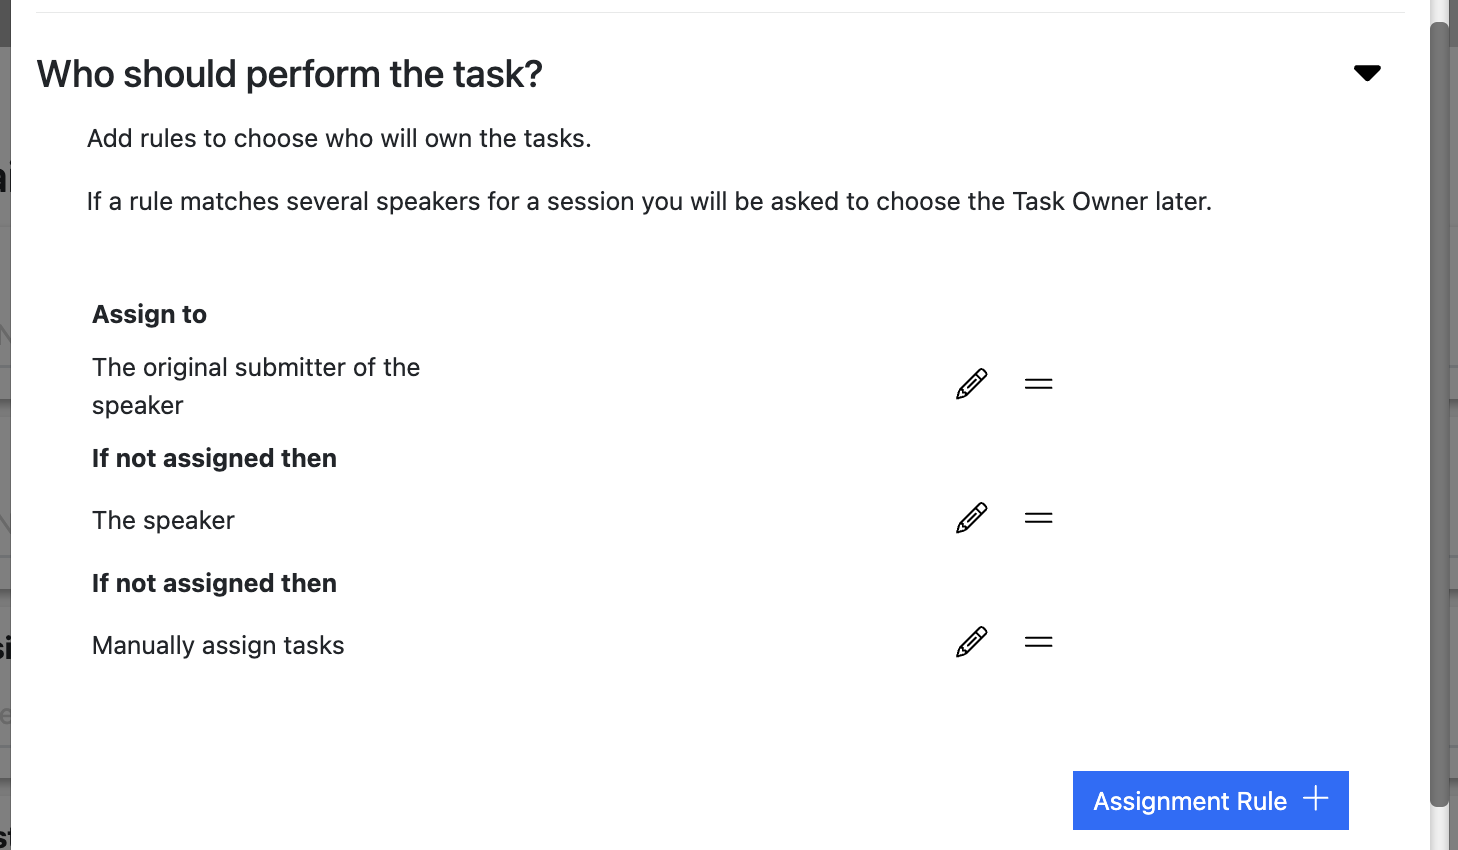
Who should perform this task? This allows you to decide who the Task Owners will be. You can set rules to automatically assign this task to the relevant people.
Tip
Often the task owner will simply be the speaker, but sometimes it may be someone else, eg. a panel chair might supply the details of all of their panelists.
You can also create fallback rules, for what should happen in the event that the first rule won’t work
Finally, you can add deadlines to each stage, and even reorder the stages in your task in the Task Configuration Dialogue pop-up if you need to:
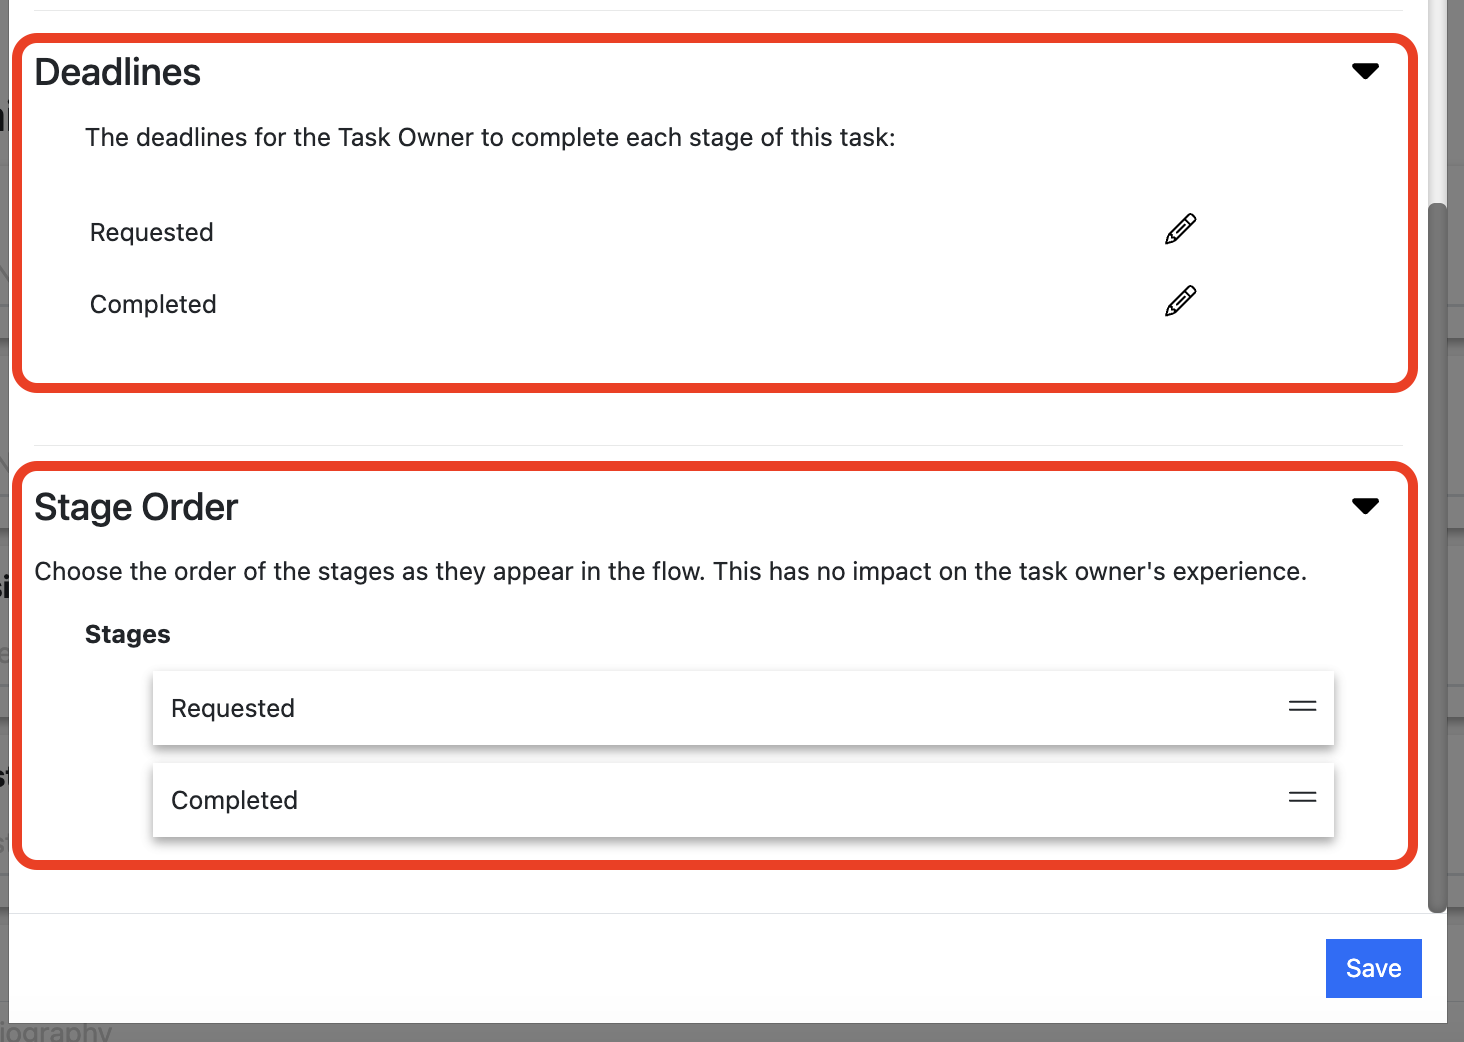

Once you’ve reviewed these settings, click the blue ‘Save’ button. This will close the Task Configuration Dialogue pop-up. -
-
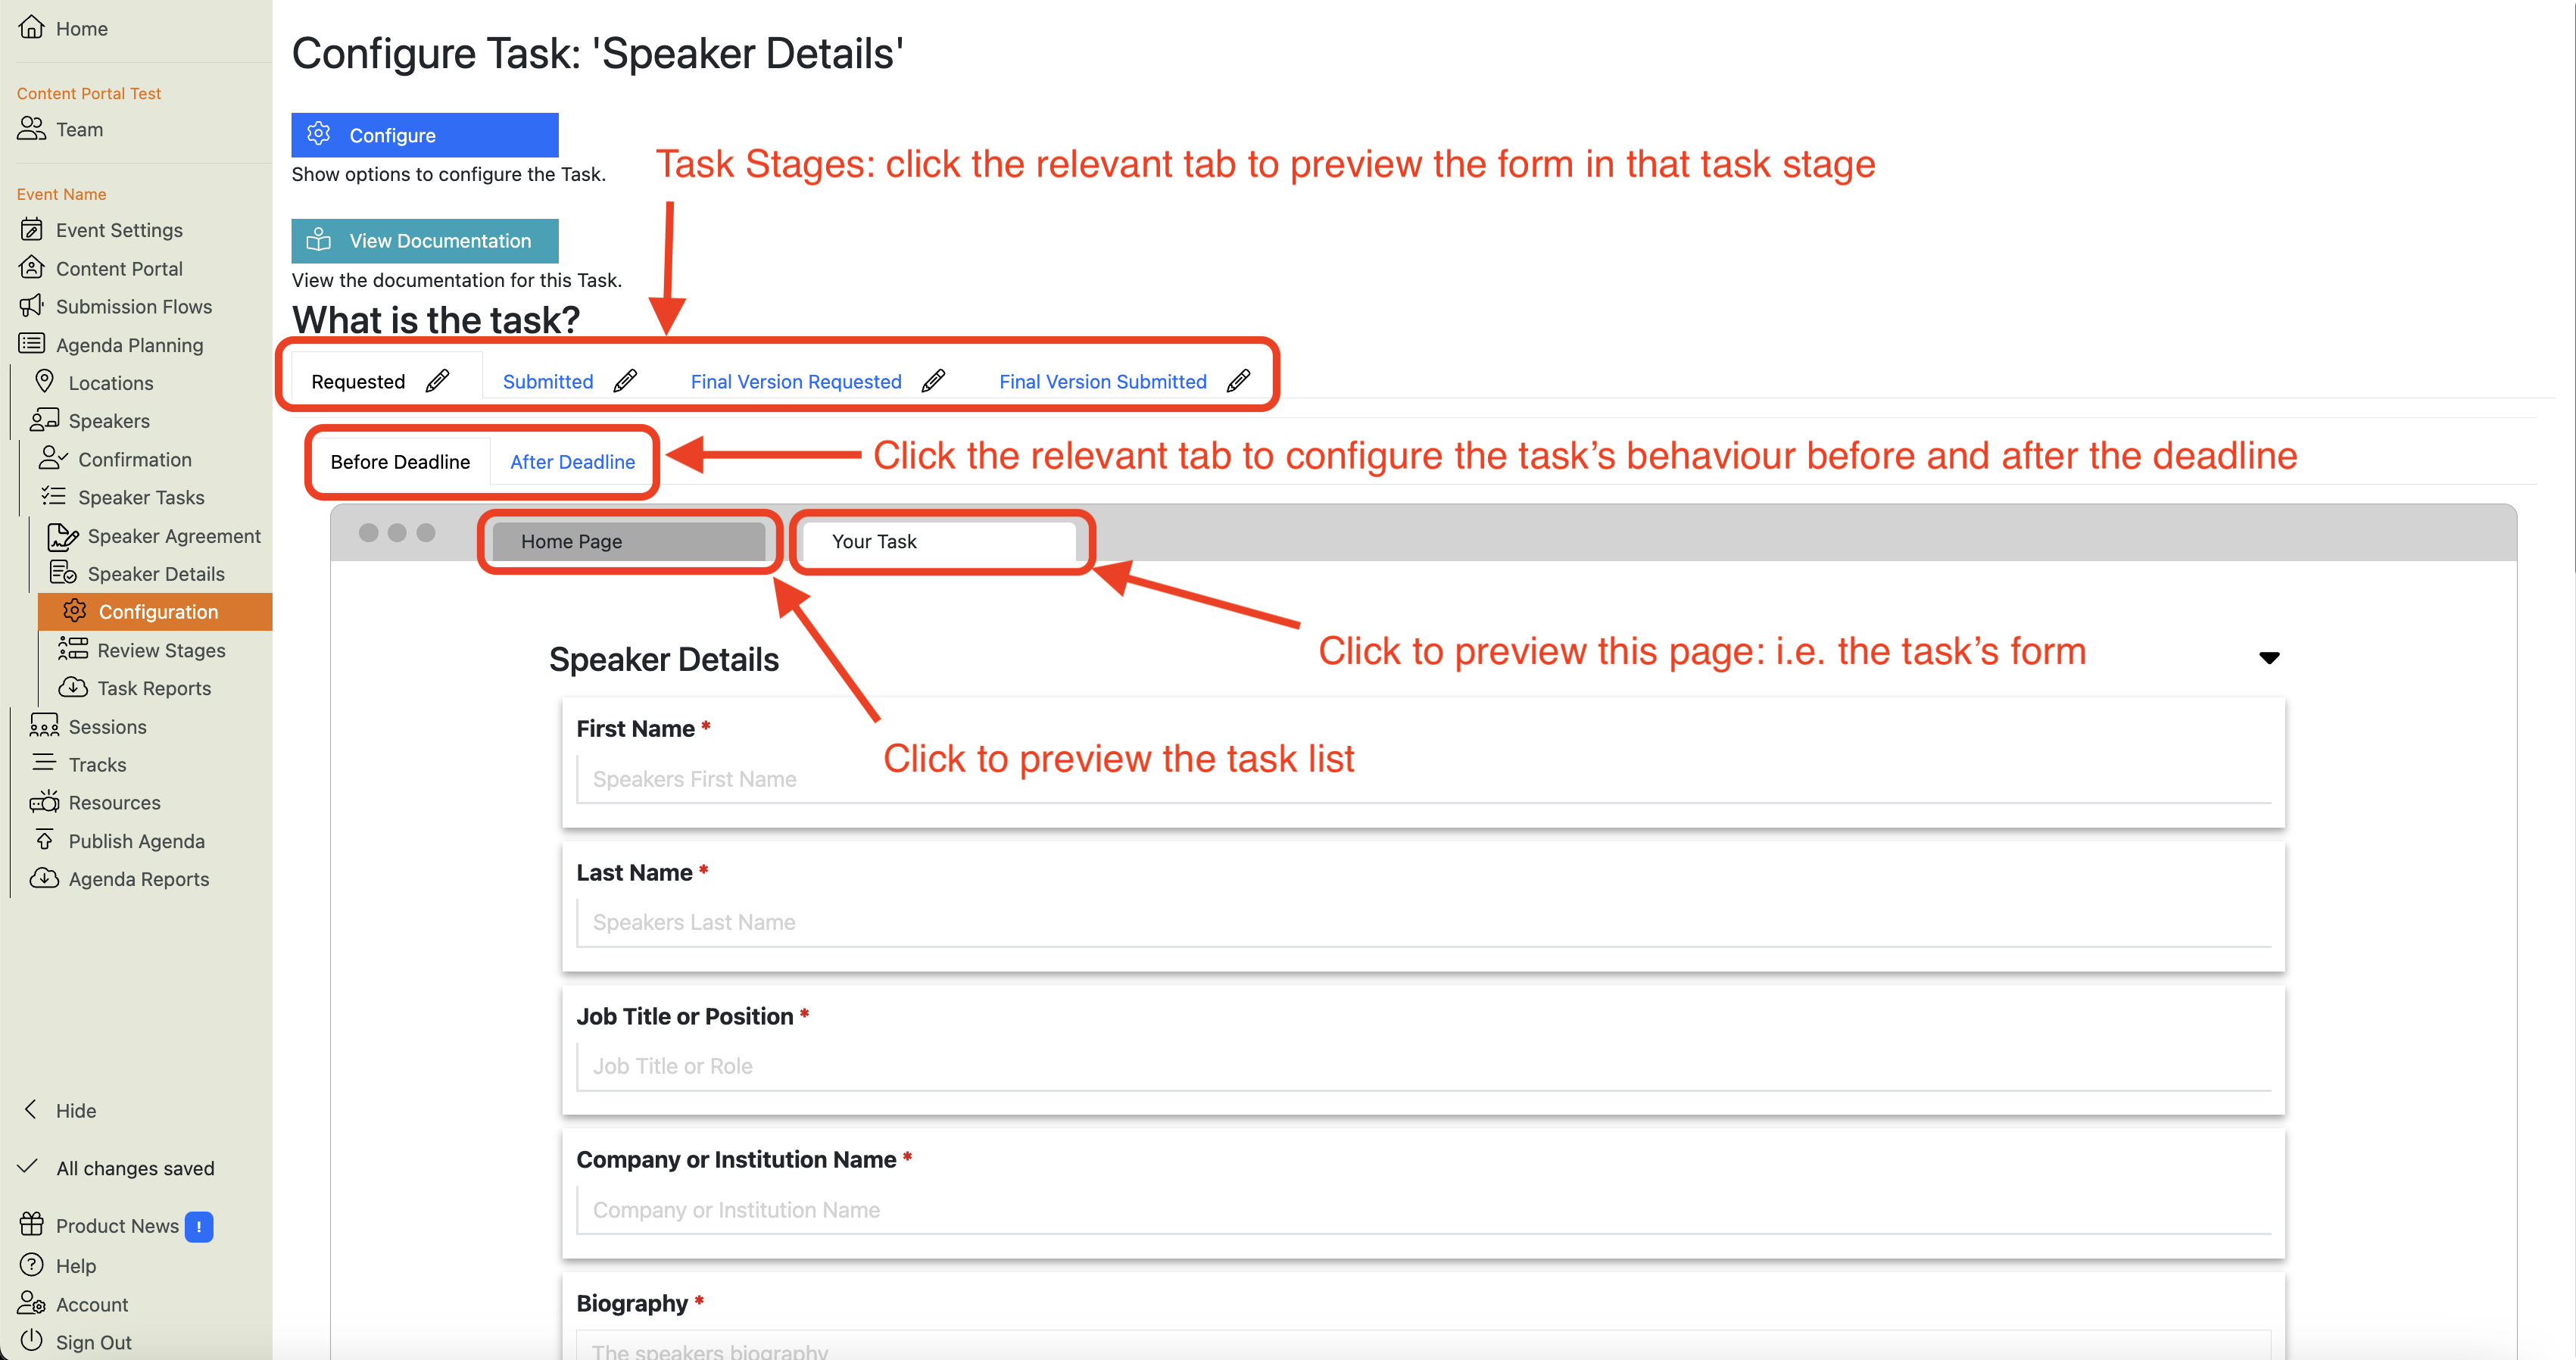
You will now see the Speaker Details Task Configuration ‘Main View’.
This view has various other elements that you can preview and configure:-
The task’s stages
-
The task’s behaviour before and after its deadline
-
A preview of how this task will appear in the “My Tasks” section of the Home Page in the Content Portal.
-
“Your Task” i.e. the form that the task owner will fill in. Note that the form has the questions that correspond to the choices you made in Step 4, above - “Choose which fields you want to capture from your speakers”:

-
If you hover over the form ‘section’ (i.e. where it says ‘Speaker Details’), it will reveal various action buttons which allow you to:
- Add questions,
- Edit the section name
- Delete the section entirely
Hovering over a question reveals options to edit and reposition it: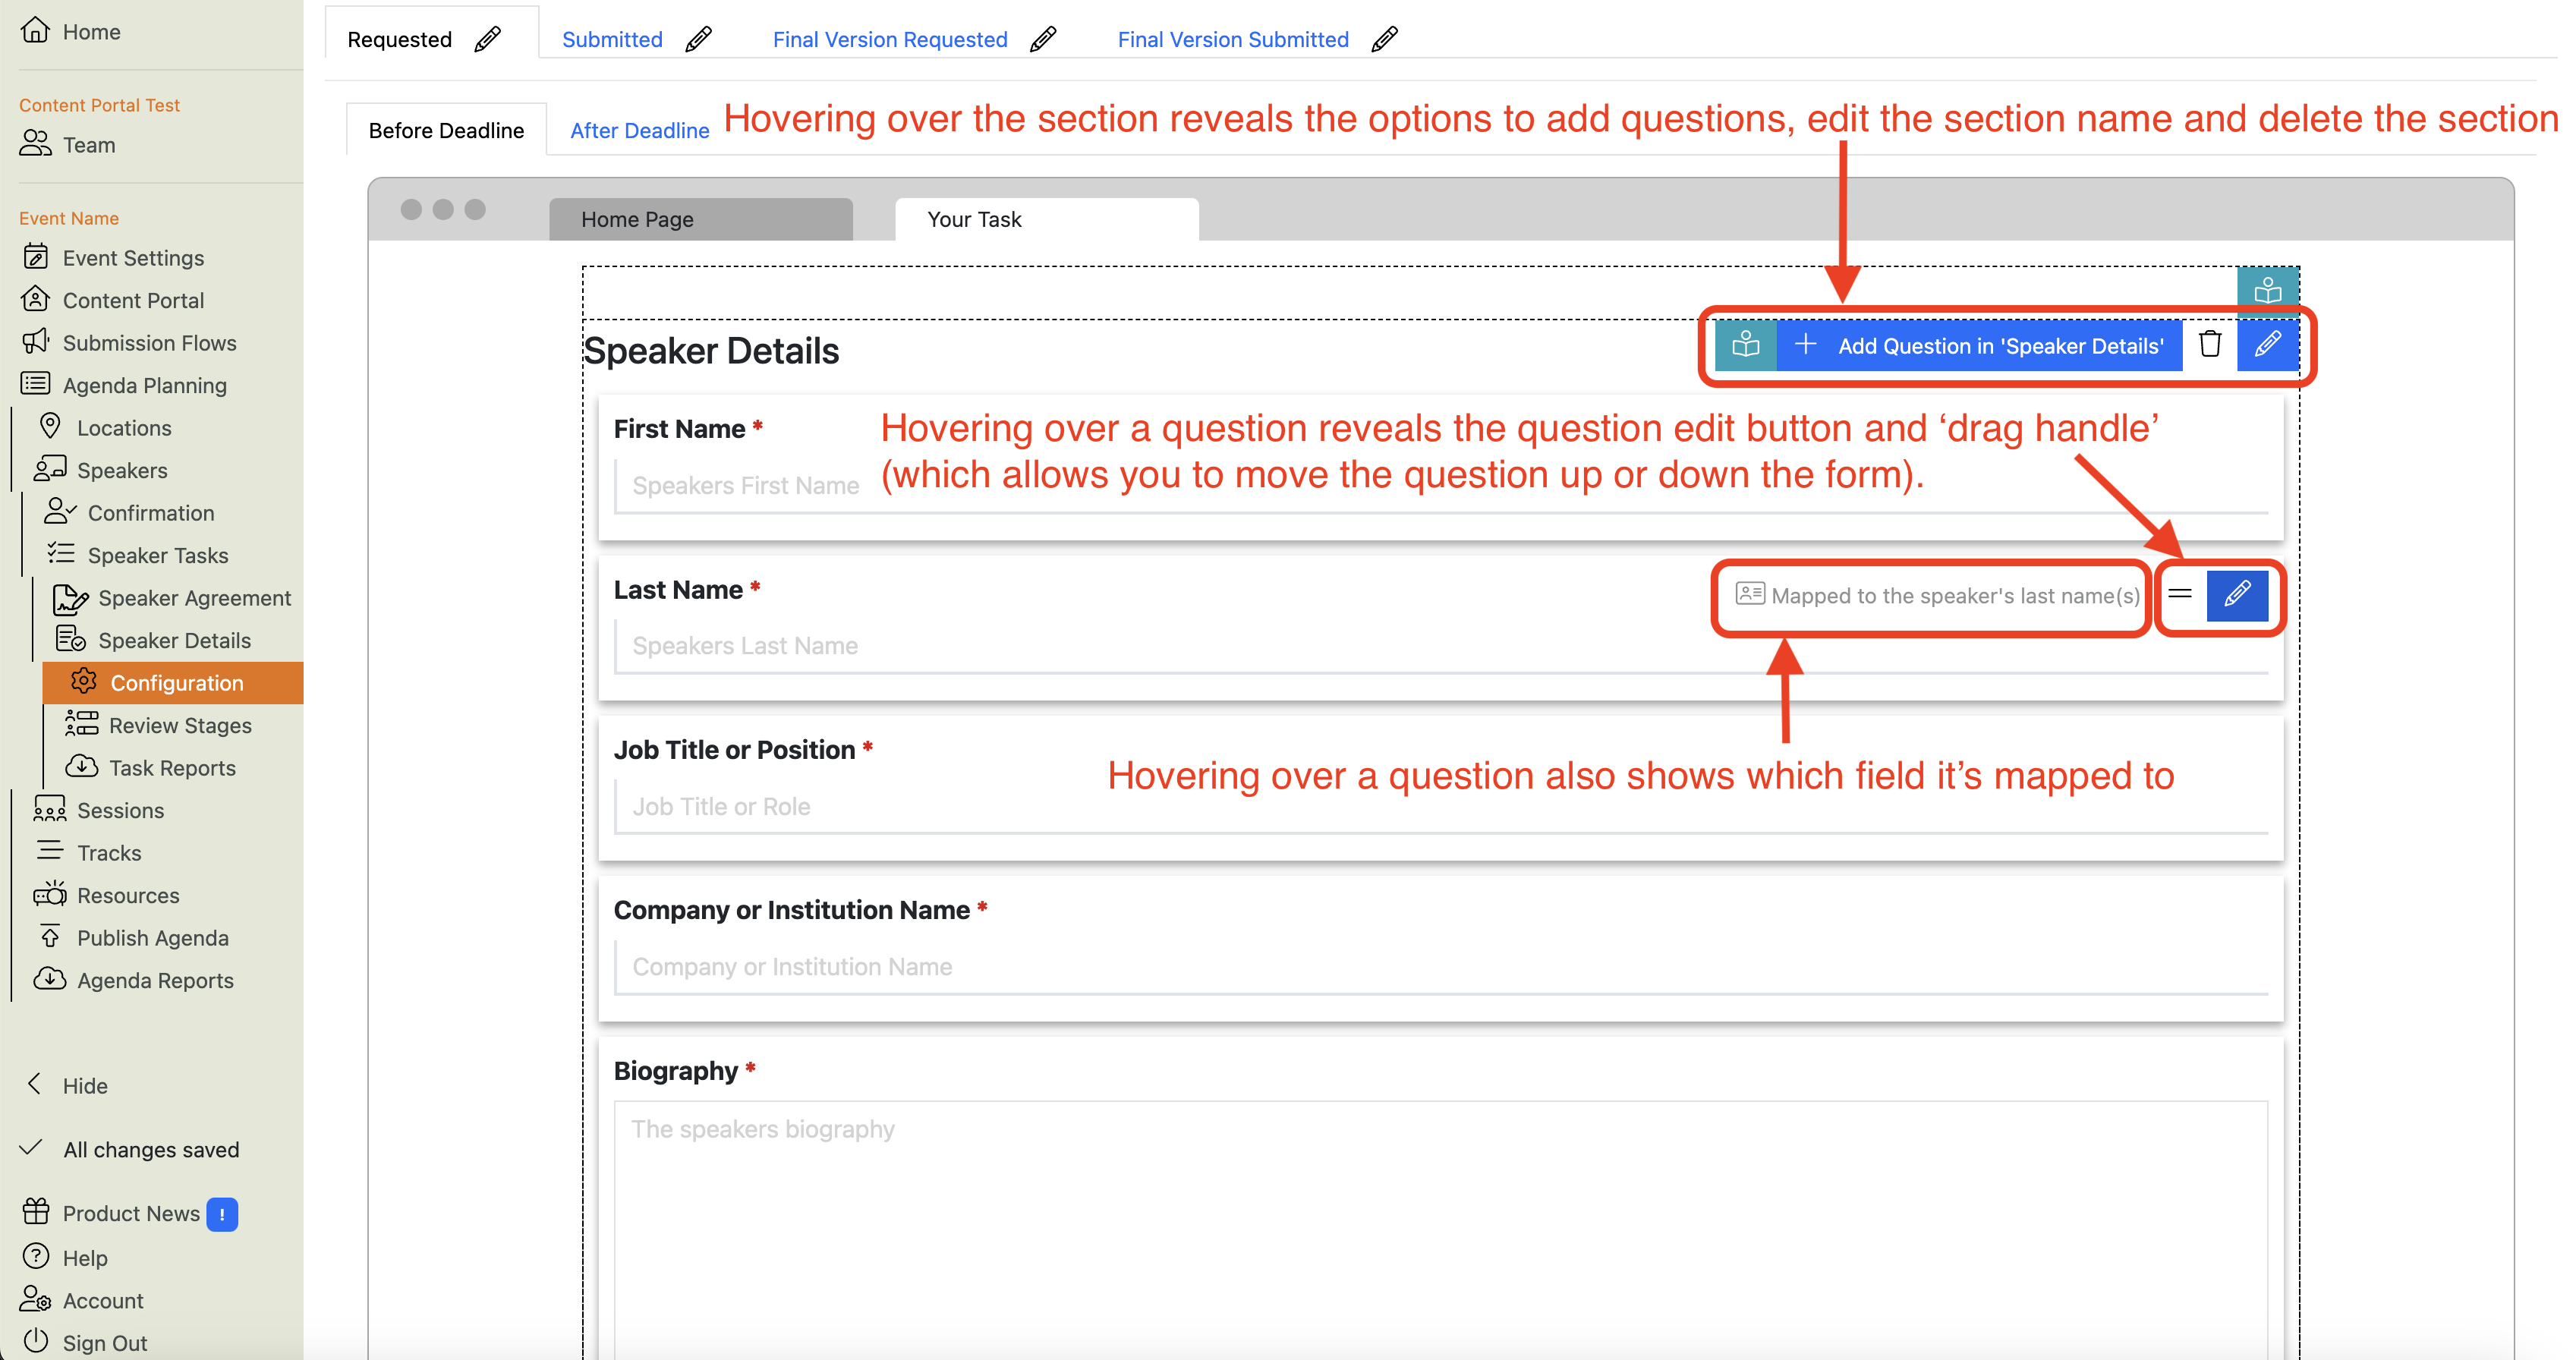

Details
NOTE: Speaker Tasks can only have one section.
-
-
Now you’ve set up the task, see the Speaker Tasks page for details of how to:
- Edit questions
- Add standard questions
- Add custom questions
- Delete questions
- Edit the buttons at the bottom of the form in a Speaker Task
- Add a button to the bottom of the form in a Speaker Task
- Add a confirmation popup to the buttons at the bottom of the form
- Edit email templates for a Speaker Task
- Add email templates for a Speaker Task
- Copy a Speaker Task
- Delete a Speaker Task
- Assign tasks to Task Owners (e.g. speakers)
- Manage and track speakers’ task progress.
- Run a report of a Speaker Task’s status
