Finding your way around lists and detail pages
Info
This page describes the lists and detail pages arriving on Thursday 27 August 2026. Until then, what you see in Lineup Ninja won’t match it.
Your sessions, speakers, tracks, locations, labels and resources — and your lists of submissions — all share the same layout. This page is a tour of it, so if you know what you want to do and can’t see where it lives, start with the table below.
Used Lineup Ninja before August 2026? What changed, and where things moved to.
Where is it?
| Looking for | Where it is |
|---|---|
| Adding a row | The + at the top right of the table. Your new row appears at the top of the list. |
| Sorting a column | Click the column name. Click it again to reverse the order, and once more to clear it. |
| Filtering a column | The small arrow next to the column name. |
| Seeing which filters are on | They’re listed above the table, with the number of rows they’ve left you. |
| Clearing a filter | The x next to it, or Clear filters for all of them at once. |
| How many rows you have | At the top of the table — a plain count, or Showing 25 of 80 sessions once there’s more than one page. |
| Page numbers, and rows per page | At the top of the table. They stay with you as you scroll. |
| Bulk actions — doing something to several rows | Tick the rows, then use the Actions menu at the top left. |
| Showing, hiding or reordering columns | The cog at the top of the table. |
| Making a column wider | Drag the edge of the column. |
| Editing one row without opening it | The pencil at the end of the row. |
| Deleting a row | The pencil at the end of the row, then the bin. |
| Editing a speaker’s or session’s details | Open it, then Edit at the top right — or click straight onto the field you want. |
| A field you’ve hidden on a speaker or session | Click Edit, then Show N more at the bottom. |
| A field that isn’t there at all | It needs creating first — see custom fields. |
| Replacing a file | Replace on the file’s line. |
| Hiding file types you don’t use | The cog at the top right of the record. |
| Putting a table back how it started | The cog at the top of the table, then Restore table defaults. |
The bar at the top of the table
Along the top of every table you’ll find how many rows you have, your page numbers, the cog, and the + button to add a row.
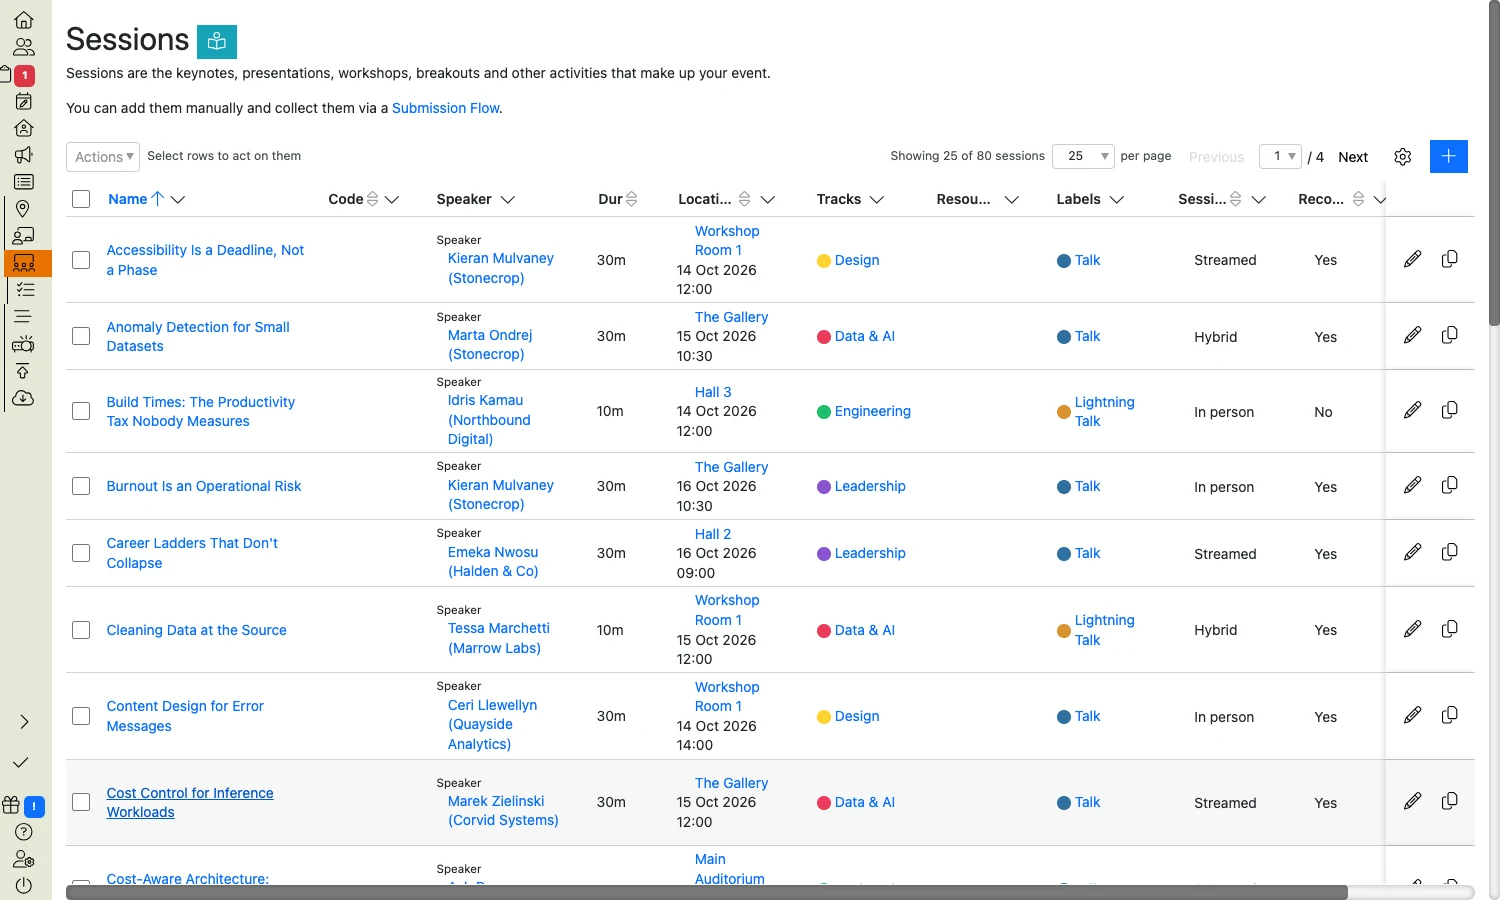
Add, your counts, page numbers and the cog all sit at the top of the table
That bar stays with you as you scroll, so on a long list your page numbers are always within reach. New rows are added at the top of the list.
Sorting and filtering
The column heading does both jobs.
- To sort, click the column name. Click it again to reverse the order, and once more to clear it.
- To filter, click the small arrow next to the column name, then tick the values you want to see.
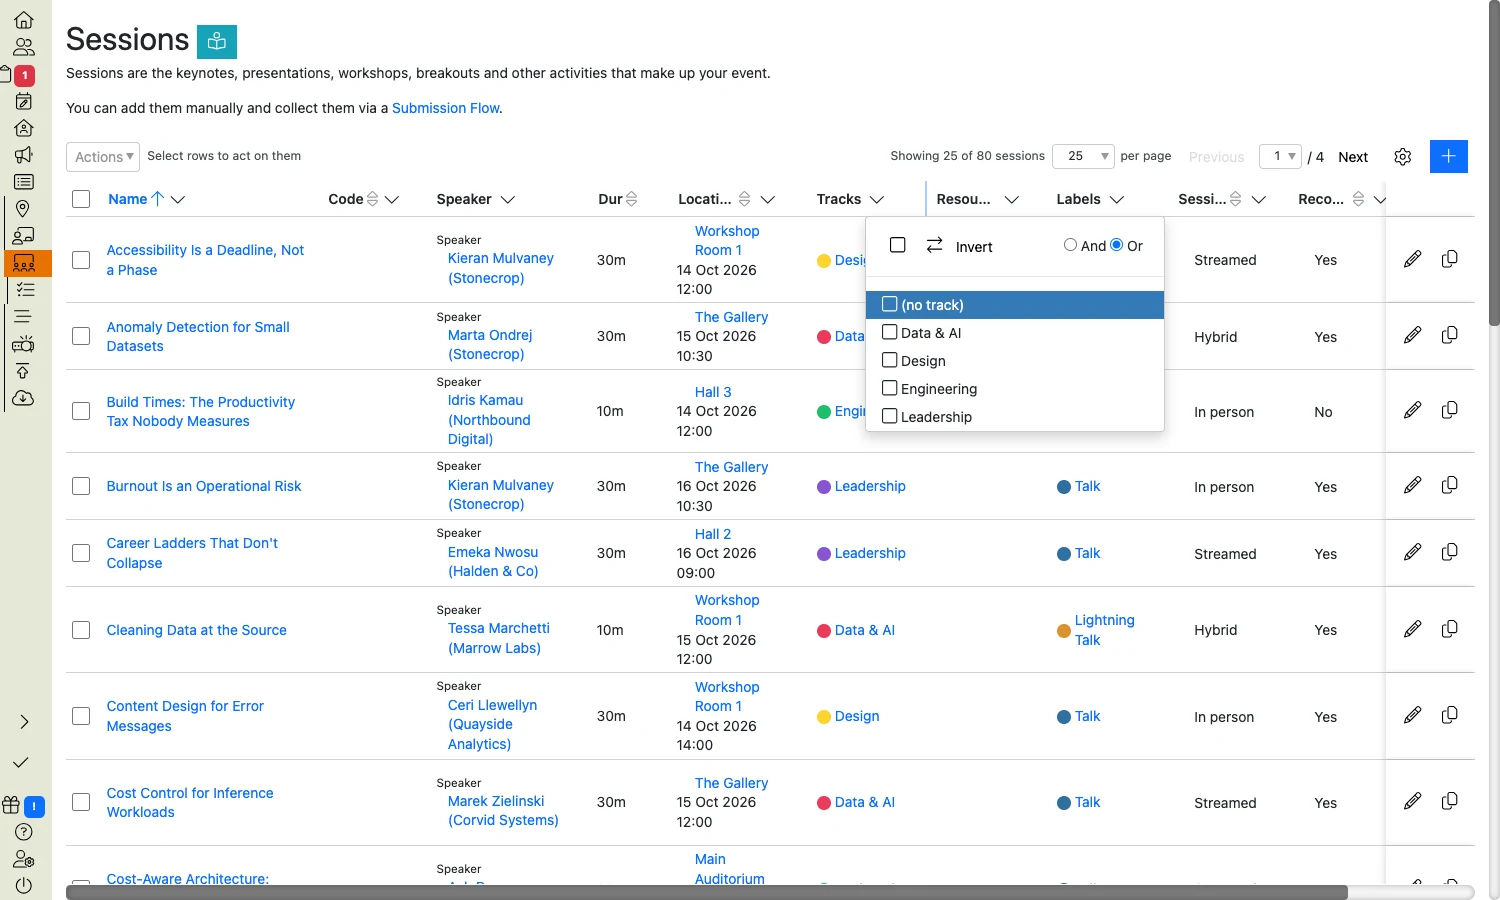
Click the name to sort, the small arrow to filter
Everything you’ve filtered on is then listed above the table, along with the number of rows you’re left with — so you can see all of it in one place.
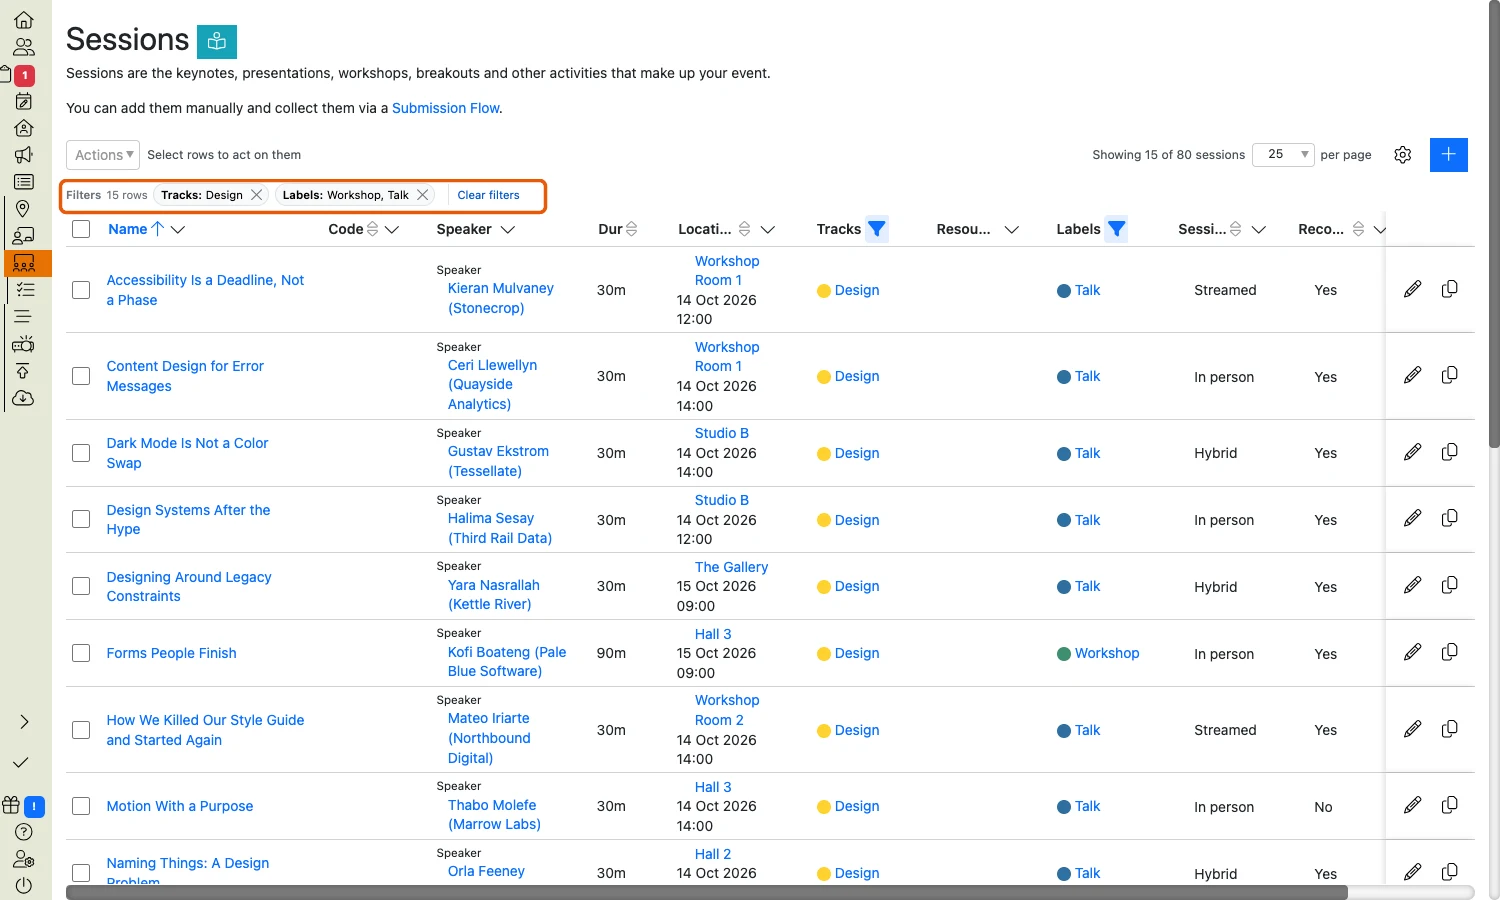
Your filters, all in one place — circled in orange here
Clearing a filter
Each filter listed above the table has an x next to it. Click it to drop that one filter. Clear filters removes all of them at once.
Tip
Your filters stay put until you clear them, including after you close Lineup Ninja and come back. If a list ever looks shorter than you expect, look above the table first — a filter you set last week will still be there.
What each table remembers
Your main lists remember your filters, your sort order and your column widths — and, on your list of submissions, the tab you were on. Come back tomorrow and a list is how you left it. Smaller tables tucked inside settings screens don’t do this — they start fresh each time.
Each table remembers its own settings, so filtering your sessions doesn’t affect your speakers. Lineup Ninja stores this in the browser you’re using, which means it won’t follow you to another computer, and it isn’t shared with the rest of your team.
Column widths
Drag the edge of any column to make it wider or narrower, and the table will keep your widths from then on.
To go back to the widths Lineup Ninja chose, open the cog at the top of the table and click Restore table defaults.
Note
Showing, hiding and reordering columns
The cog at the top of the table opens Table Settings. The eye next to each field shows or hides that column, and the handle on the right lets you drag your fields into a different order.
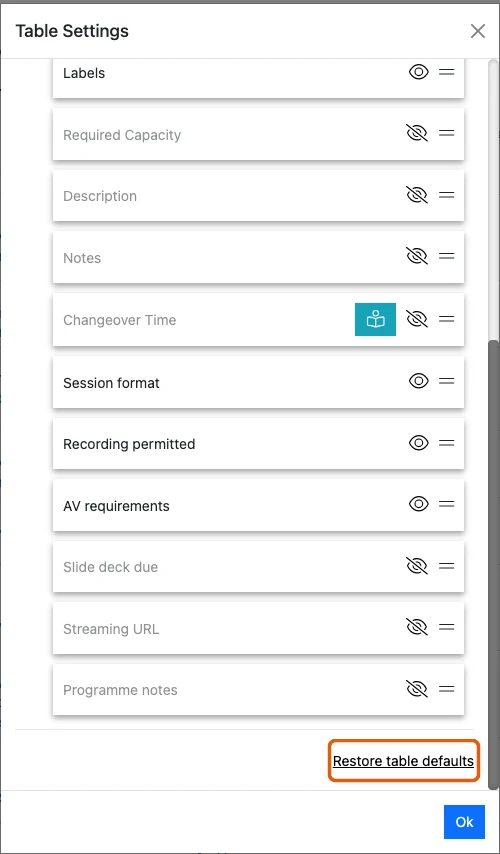
Restore table defaults is at the bottom of Table Settings — circled in orange here
What you set here is yours alone — hiding a column doesn’t hide it for anyone else.
Bulk actions: doing something to several rows at once
Actions sits at the top left of the table. Until you’ve picked anything it’s next to the words Select rows to act on them; tick some rows and the count of what you’ve picked appears beside it, along with everything you can do to them — labelling them, copying them, changing their durations, and so on.
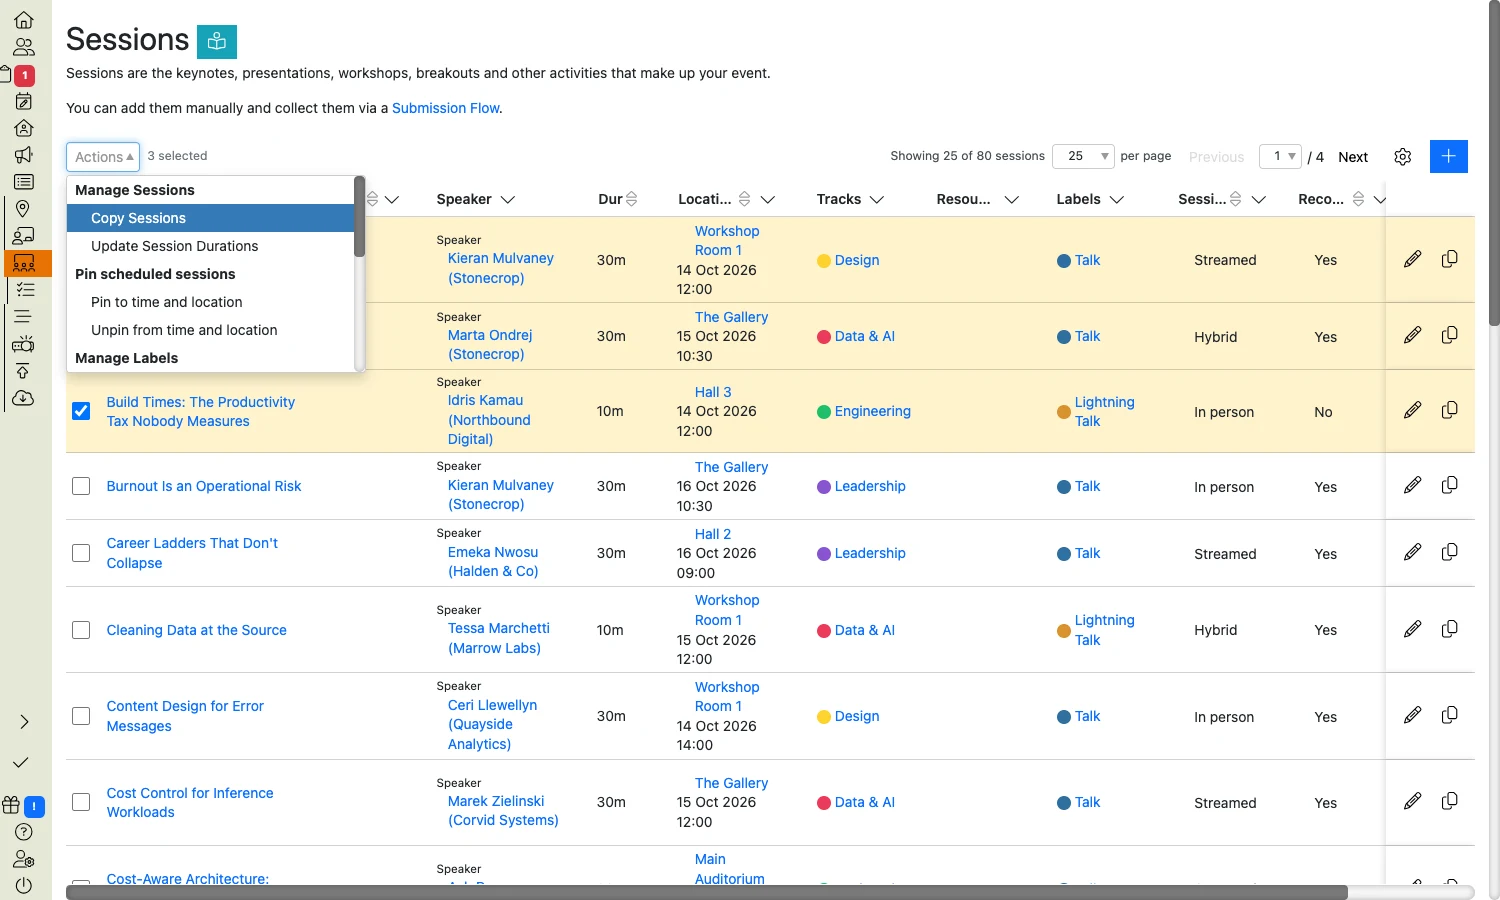
Tick some rows and the count appears next to Actions, at the top of the table
Ticking the box in the heading selects every row in the list, across all its pages. Rows that a filter is currently hiding aren’t included, so whatever you’ve filtered to is what you’ll act on.
Note
Your list of submissions is split into tabs. There, ticking the heading box selects the rows on the tab you’re looking at — the All tab is the one that covers every submission at once.
Editing a row without opening it
You don’t have to open a row to change something on it. The pencil at the end of the row makes that one row editable where it sits, so you can work down a list without leaving it. A tick saves the row and a cross abandons it, and the bin deletes the row once you’ve confirmed.
Cancel and the cross both put the row back as it was, so nothing is committed until you save.
Opening a speaker or a session
Click a name in the list to open it. You’ll get their details laid out to read — the Speaker Details view, and the equivalent for a session, track, location, label or resource — with Edit at the top right.
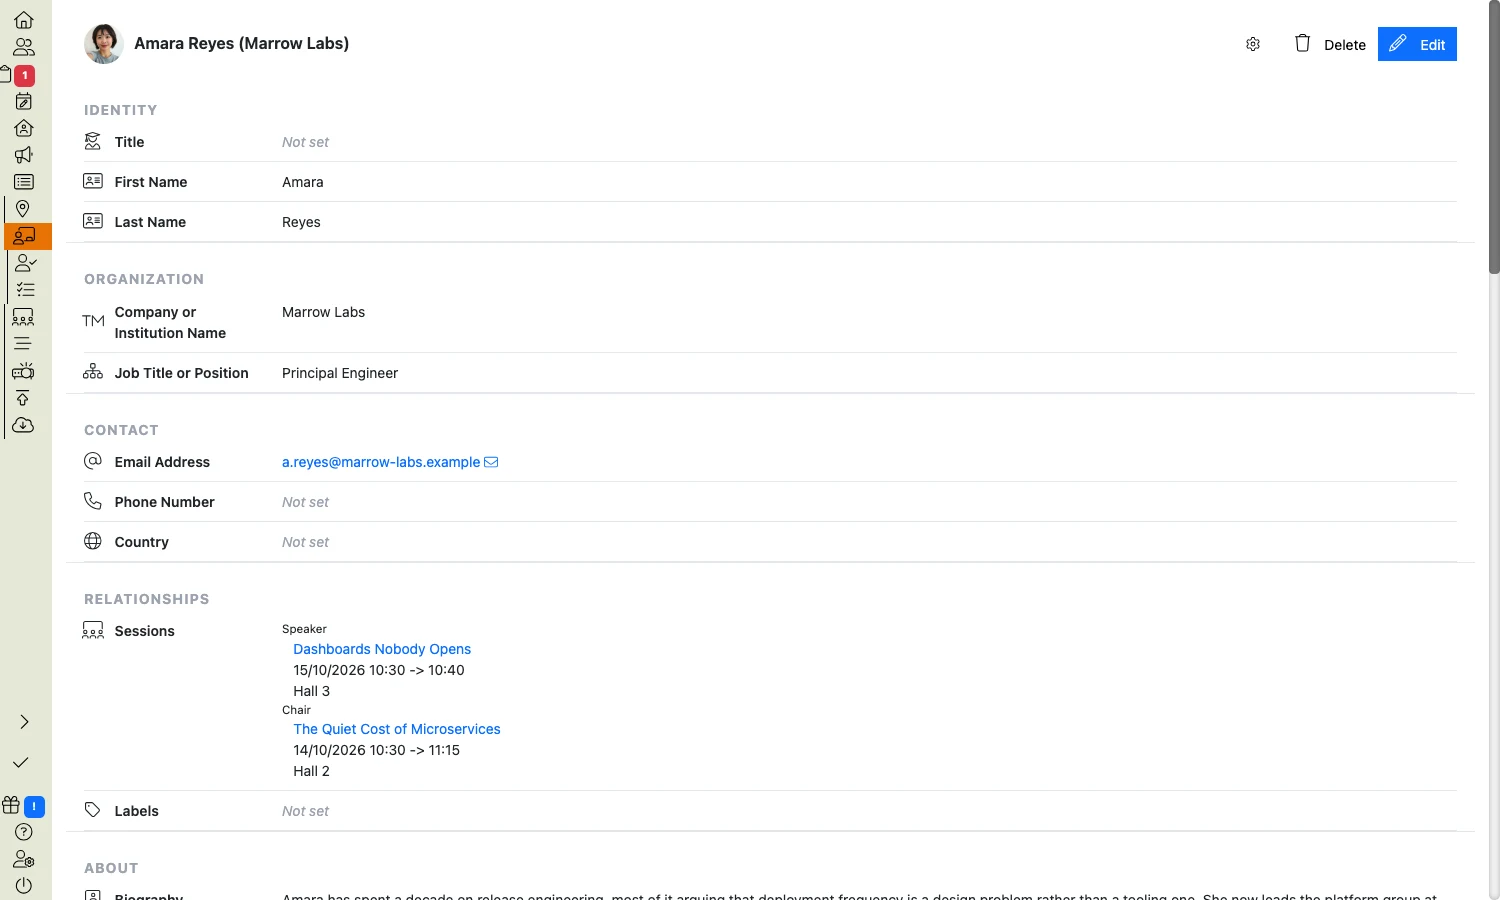
A speaker’s details, before you start editing
Fields are gathered into groups — who they are, where they work, how to reach them, and your own custom fields in a group of their own.
Editing
Click Edit and every field becomes editable together. Make all your changes, then click Save, which saves the whole lot.
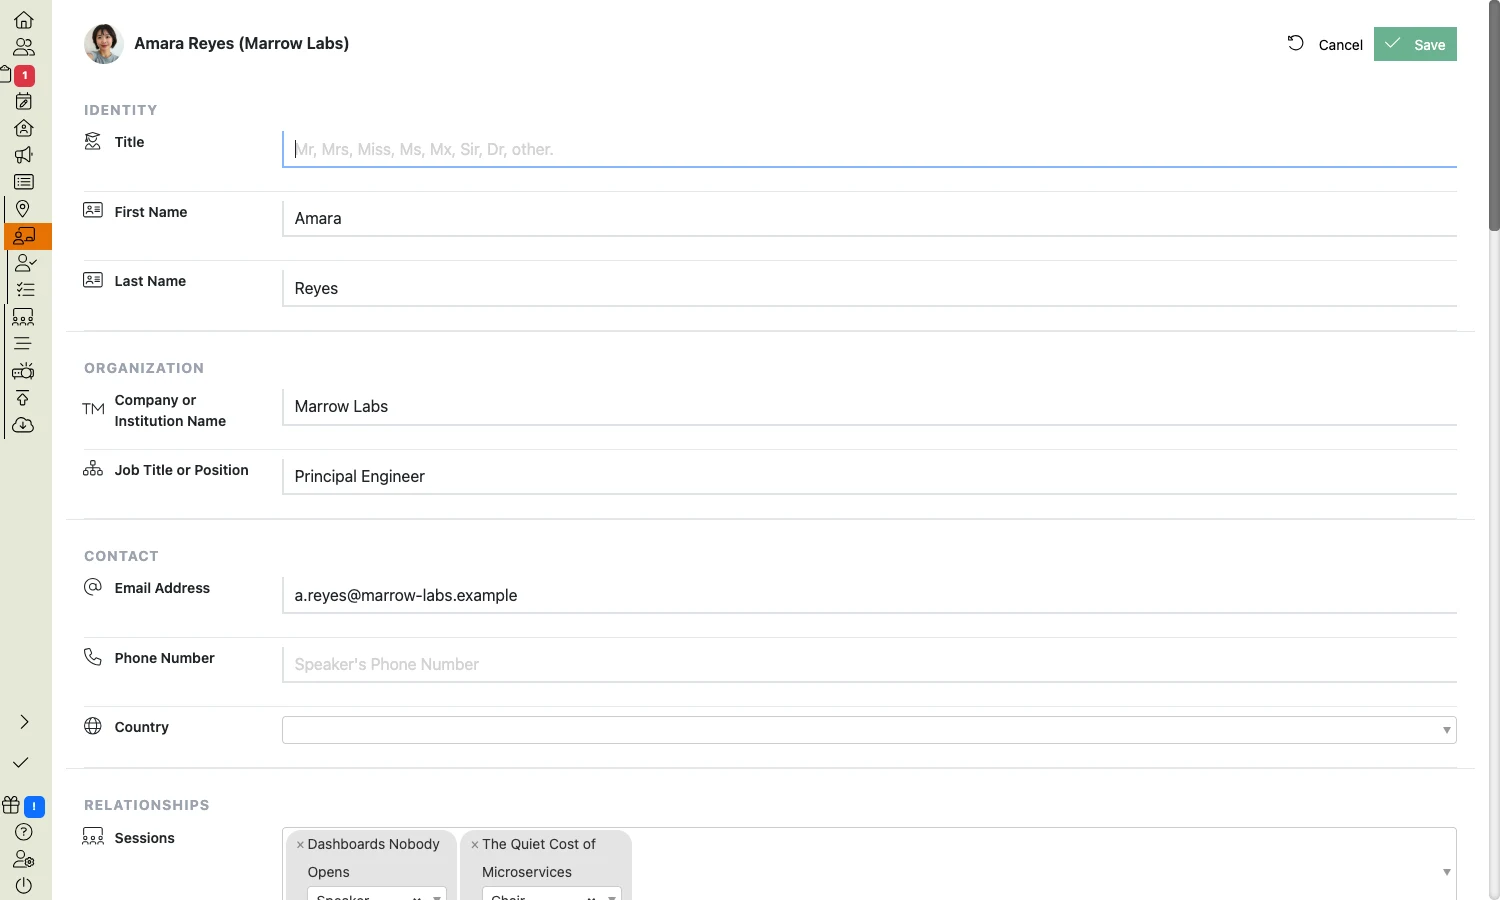
One Save for the whole lot, however many fields you changed
If you already know which field you want, click straight onto its value instead of using the button. That starts editing with your cursor in the right place.
Cancel puts everything back as it was.
Fields you can’t see on a record
A speaker or session has its own cog, at the top right next to Edit. It shows and hides fields on that record — it doesn’t reorder them, and it’s separate from the cog on the list.
Anything you’ve hidden with it is tucked behind Show N more at the bottom of the record while you’re editing. Click that to bring them all back, and Show less to put them away again.
If a field isn’t there at all, hidden or otherwise, it needs creating first — see custom fields.

Show N more sits at the bottom while you’re editing — circled in orange here
Files and images
Wherever you upload — a speaker’s headshot, session slides, your event branding, answers gathered on a Submission Flow — your files are shown as a list, one line each, oldest uploaded first. There’s no sorting or filtering on a file list; click a file for its size and the rest of its details.
Every file and image type set to show on this kind of page has its own place, empty or not, so you can drop a file straight onto the one you want. Create new file type… at the top right of the section adds a new type to the whole event, for everyone.
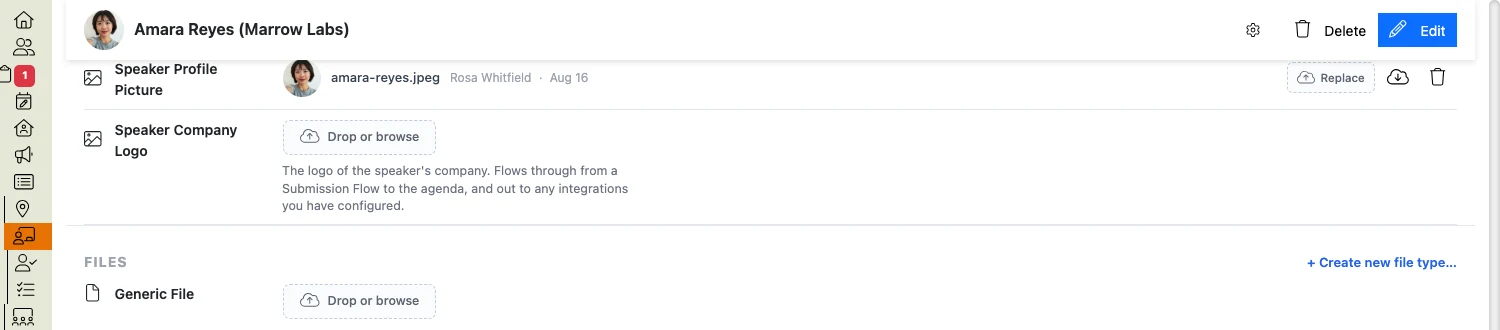
Every type set to show here has its own place, filled or empty
If that’s more places than you need, the record’s cog hides the ones you don’t use. That’s per person, so hiding one won’t hide it for the rest of your team.
Click a file to see its size and the rest of its details, or to download it.
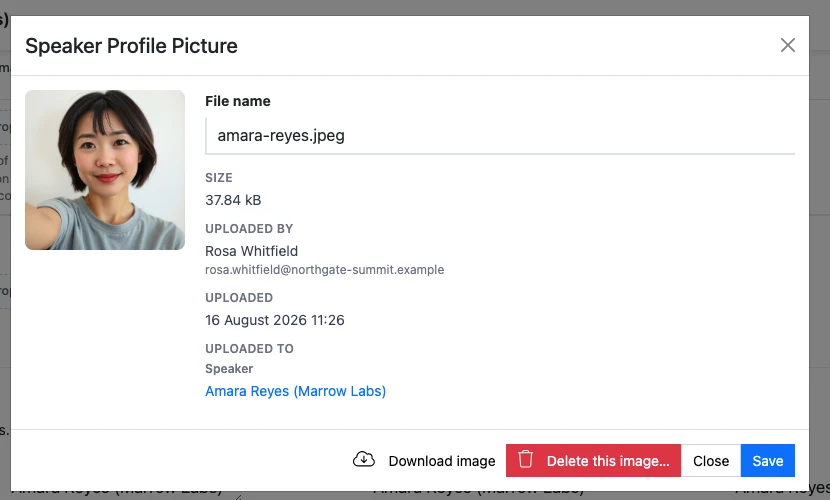
Click a file for its size, who uploaded it and when
To swap a file for a newer one, either delete it and upload again, or drop the new file onto Replace, on the right-hand end of that file’s line.
You can rename files on your own submissions. When you’re reviewing someone else’s, you can open and download their files but not rename them — so a rename always shows the name the file’s owner gave it.
Still can’t find what you’re looking for? Email support@lineupninja.com and one of the team will get back to you as soon as possible.