Submission Flows
Submission Flows are used to collect content from submitters. You can use them to manage:
- Call for Speakers
- Call for Abstracts / Call for Papers
- Awards Programs
- Custom submission, review and decision processes.
Tip
You can run multiple Submission Flows per event to gather different types of content.
Submission Flows are made up of some key elements:
- Submission Stages: the various steps a submission passes through, from draft to submitted, to accepted/declined etc.
- Forms: the form containing the questions that submitters fill in, guidance text and action buttons (e.g. “Save for Later”, “Submit for review”).
- Email Templates: the automated emails that are sent to submitters as a submission moves through the submission stages (e.g. “Thanks for submitting”, “You’ve been accepted” etc).
- Review stages: the reviewing/judging system, which includes its own forms and email templates for reviewers/judges.
All these elements are highly configurable, so you can map out your own processes, configure your own questions, write your own email copy etc.
Here’s a high level overview of Submission Flows in Lineup Ninja, explaining how these elements work together:
How do I Run a Call for Speakers?
Lineup Ninja includes a Submission Flow template for a Call for Speakers. It has many configurable options which you’ll want to edit to match your process.
Here’s a high-level overview of how to use our template for your event’s Call for Speakers:
- In your event, navigate to the
page.
- Create a new submission flow - choose “Create Flow: Run an Open Call for Papers”
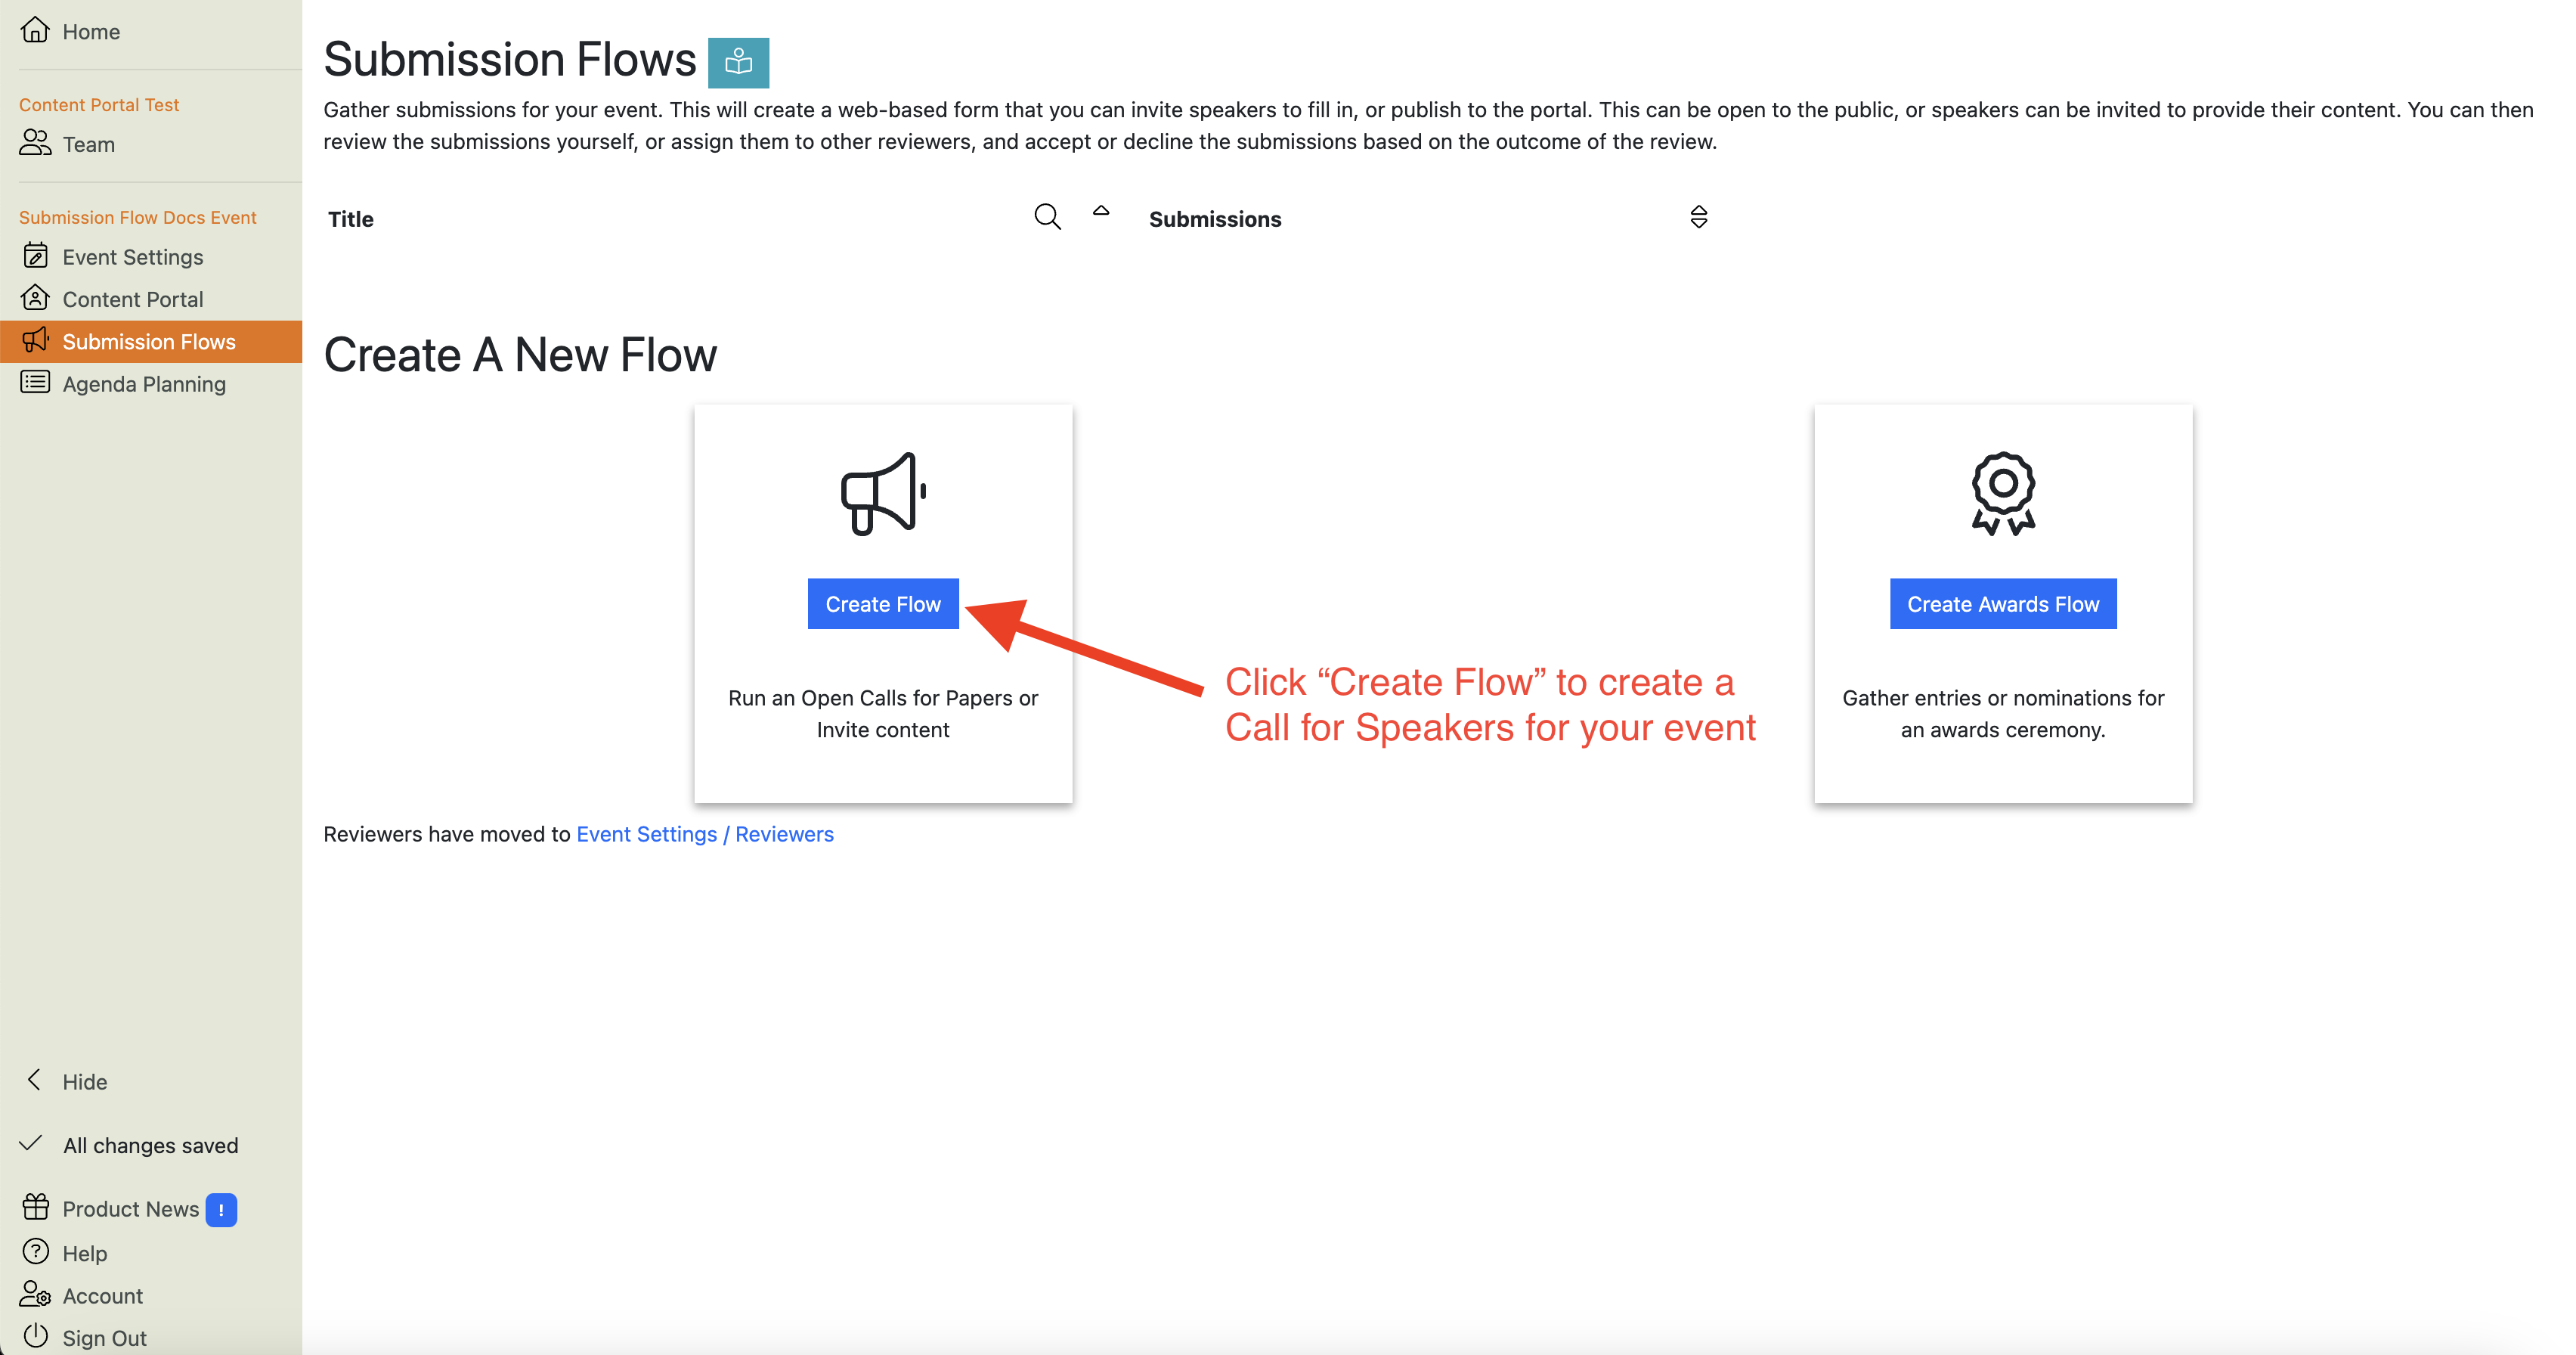

The New Flow wizard will take you through setting up the Submission Flow. You’ll probably still want to make some changes once it’s set up though… - Check the flow configuration:
- Check that the Submission Stages are correct for your event’s process: add and delete Submission Stages as required.
- Edit the questions to use your own terms (e.g. “Session description” vs “Synopsis” etc.).
- Edit the email templates to ensure you’re happy with the copy.
- Optionally add deadline reminder email templates and schedule them.
- If you’re using reviewers to grade submissions, design your review process:
- Create a Review Stage for the Submission Flow.
- Decide which answers to show to reviewers (e.g. NOT speaker’s name and email if you want to run a blind review!)
- Decide what questions to ask your reviewers:
- Score
- Recommendation
- Feedback for submitters
- Internal comments
- Decide whether reviewers should be able to see other reviewers’ responses, and if so, which answers, and from which review rounds.
- Publish your Submission Flow to the Content Portal
- Review how the submission flow appears in the Content Portal
- Test your Submission Flow by making some test submissions.
- If you’re using reviewers to grade submissions, test your review process:
- Test the review process by assigning some submissions to reviewers
- Review reviewers’s scores and comments
- After testing is complete, reset your Submission Flow to delete any test submissions and reviews
- Publicise your Call for Speakers through your usual comms channels
- Monitor your submissions in the Submissions List view in the Submission Flow
- If you’re using reviewers to grade submissions, manage reviews:
- Invite reviewers
- Assign submissions to reviewers (this will trigger notification emails to reviewers)
- Monitor reviewers’ progress in the Submissions List view.
- Review submissions’ review scores, recommendations and reviewers’ comments
- Decide which sessions to accept, waitlist and decline and move the submissions into the relevant stages. By default, this will trigger automated notification emails to submitters, although you can opt not to.
- Create sessions on your agenda from accepted sessions.
Note
By default, when you move a Submission into the “Accepted” Submission Stage, Lineup Ninja will ask the submitter to confirm that they still want to speak at the event.
You can disable this behaviour by editing the “Accepted” Submission Stage and its corresponding Email Template.
How do I Run a Call for Abstracts / Call for Papers?
Lineup Ninja includes a Submission Flow template for a Call for Papers. By default it uses terms like “Speaker” instead of “Author”, and “Session Description” instead of “Abstract”. However, you can change these terms easily as you set up your Call for Abstracts and tailor it to your own event.
Here’s a high level overview of how to use our Call for Papers template for your event’s Call for Abstracts:
- In your event, navigate to the page.
- Create a new submission flow - choose “Create Flow: Run an Open Call for Papers”
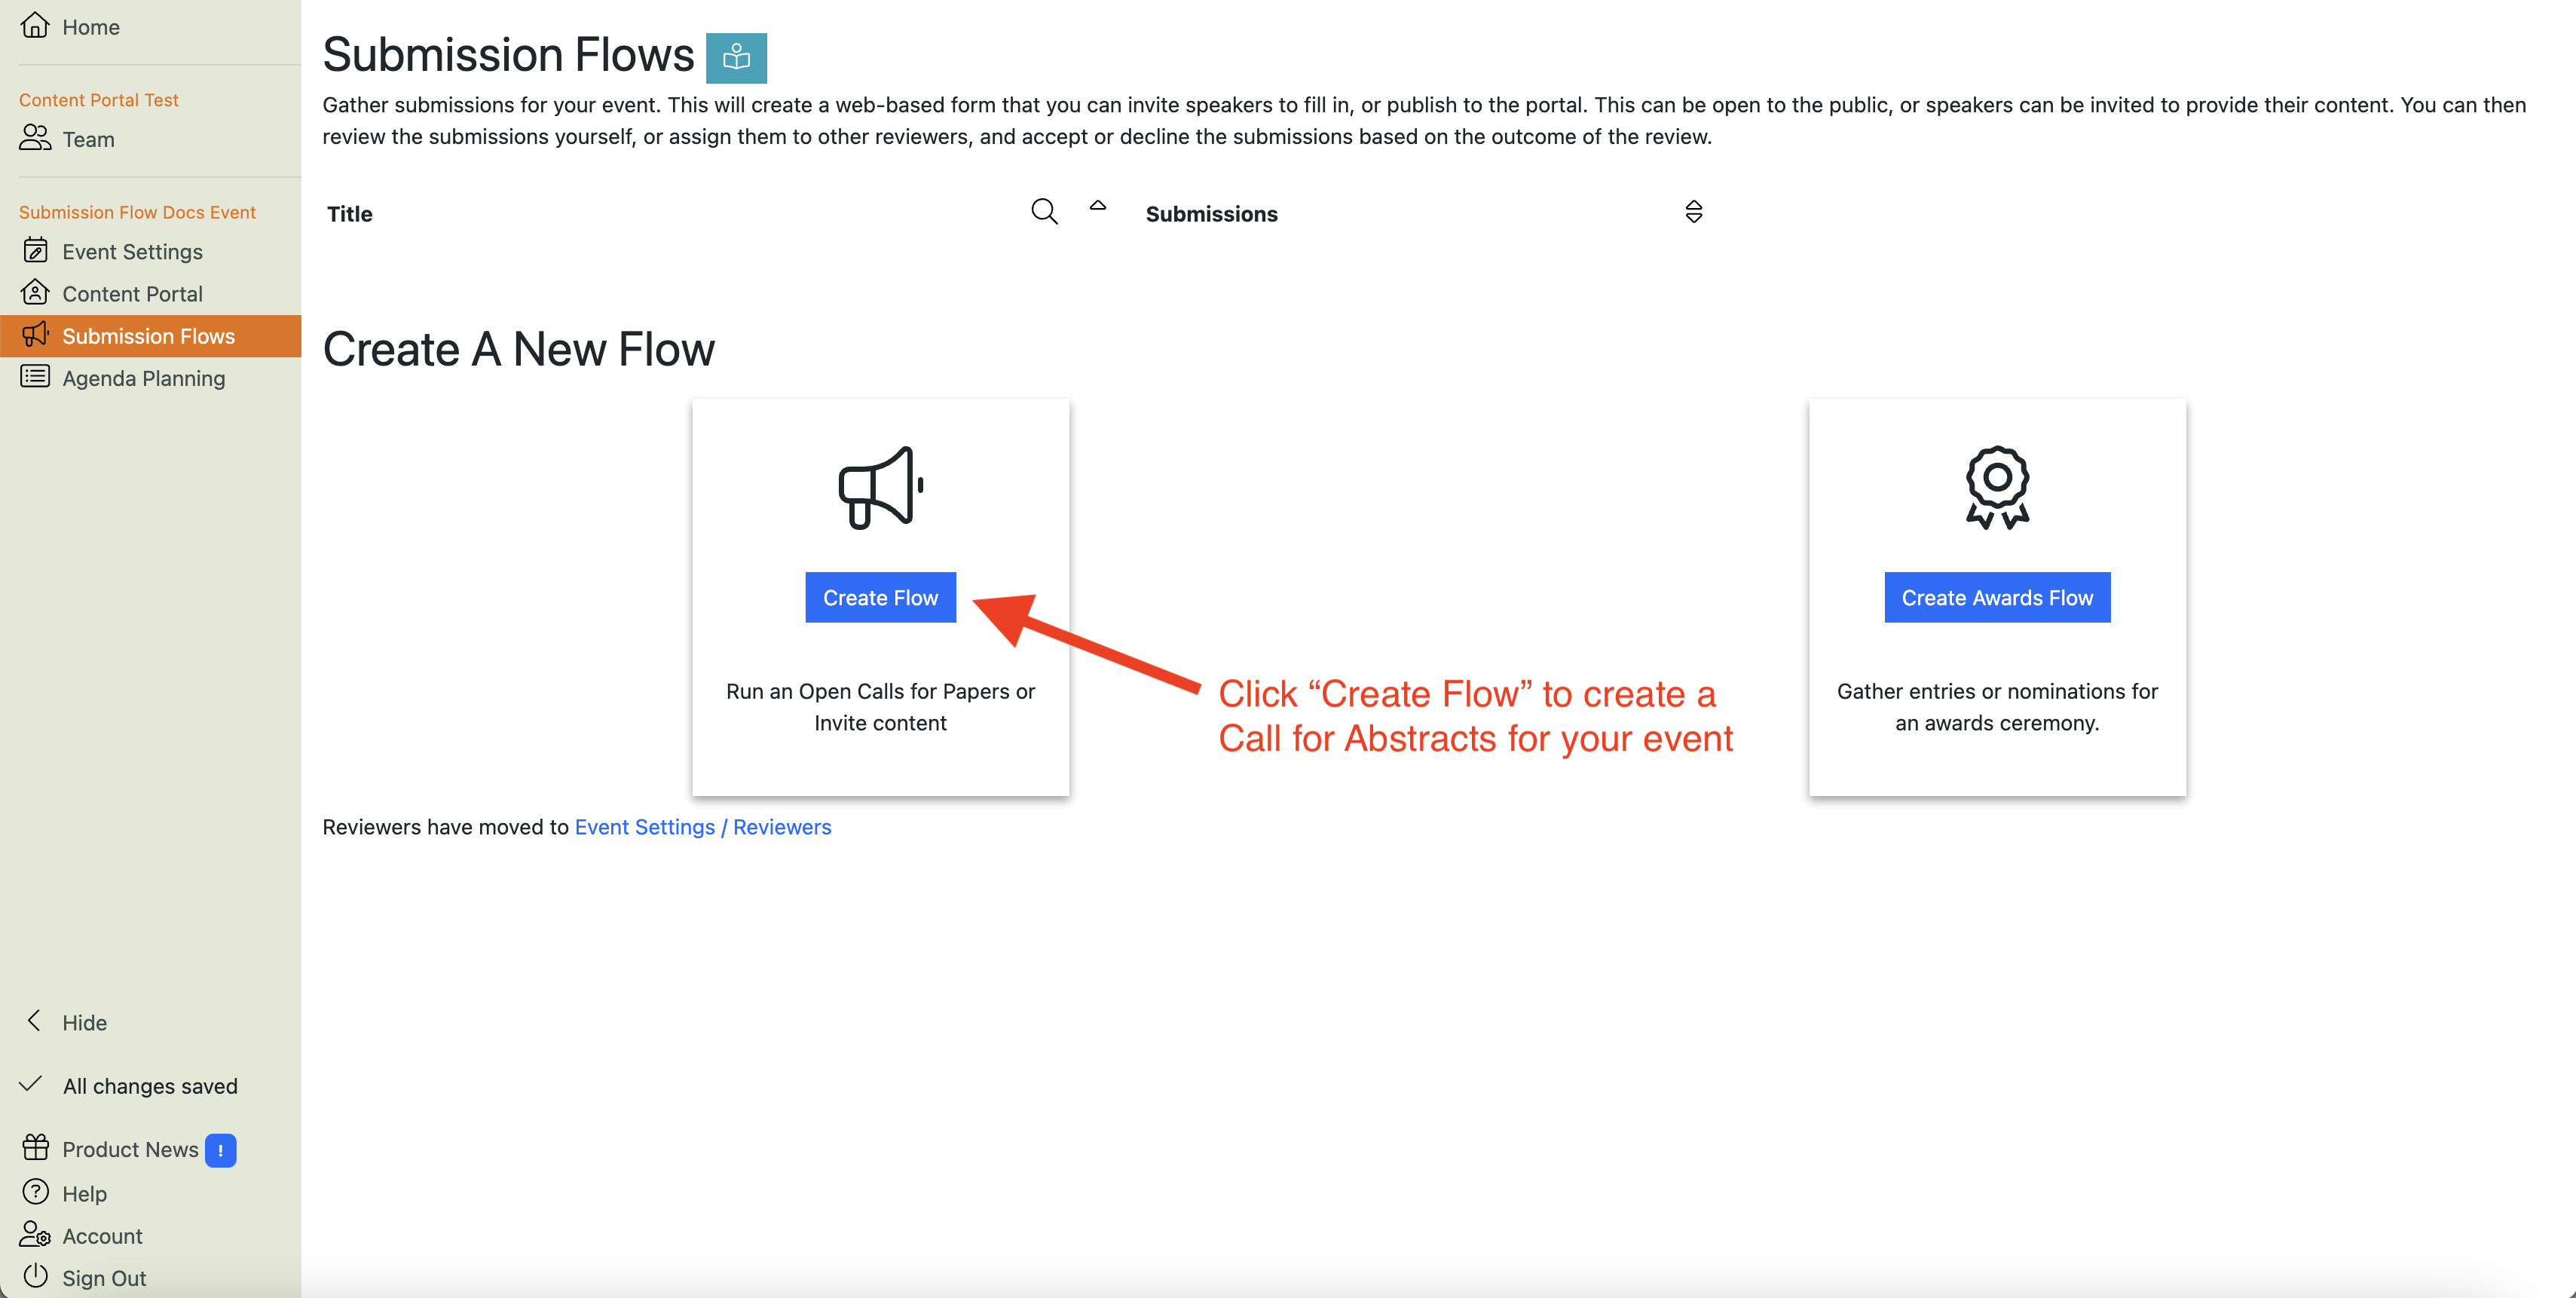

The New Flow wizard will take you through setting up the Submission Flow.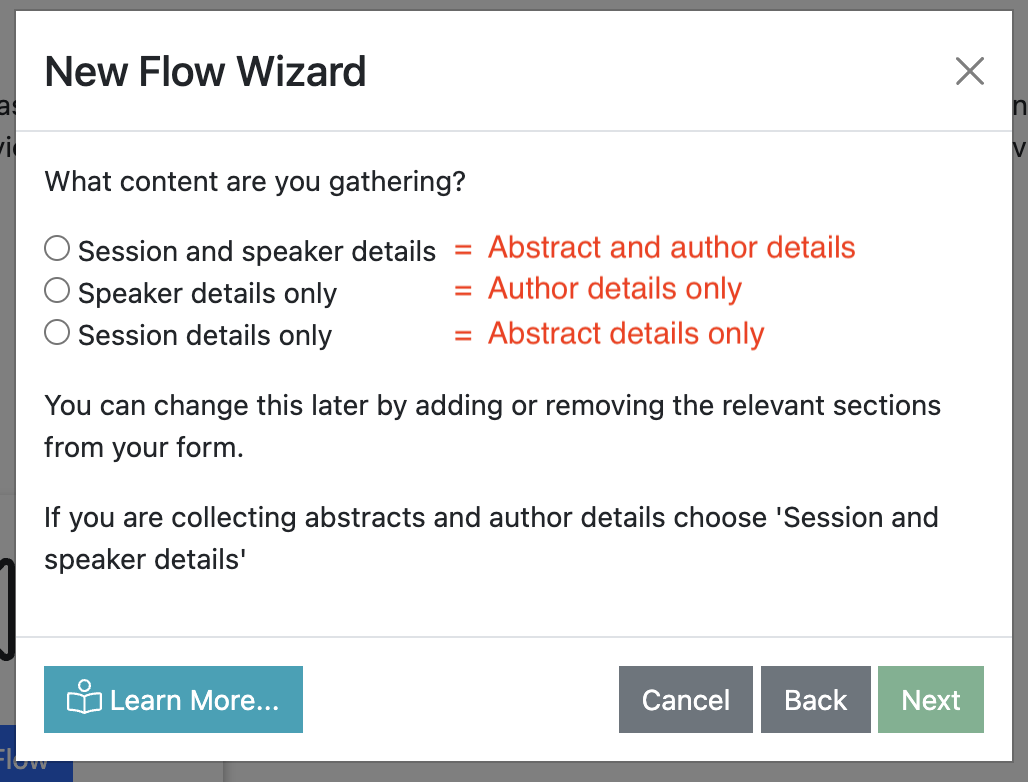

After you’ve finished with the New Flow wizard, you’ll probably still want to make some changes and set other things up… - Check the flow configuration:
- Check that the Submission Stages are correct for your event’s process: add and delete stages as required.
- Edit the questions on the form to use your own language and terms (e.g. “Speaker” vs “Author”; “Session description” vs. “Abstract” etc.).
- Edit the email templates to ensure you’re happy with the copy.
- Optionally add Deadline Reminder email templates and schedule them.
- Create a Review Stage(s), and decide:
- Which data to show reviewers (e.g. NOT author name and email address if you’re running blind reviews!).
- Which questions to ask your reviewers:
- Scores
- Recommendations (Accept, Maybe, Decline)
- Feedback for submitters
- Internal comments
- Whether reviewers should be able to see other reviewers’ responses, and if so from which review rounds.
- Publish your Submission Flow to make it visible in the Content Portal
- Review how the submission flow appears in the portal
- Test your Submission Flow by making some test submissions.
- Test your review process:
- Test the review process by assigning some submissions to reviewers
- Review reviewers’s scores and comments
- After testing is complete, reset your Submission Flow to delete any test submissions and reviews
- Publicise your Call for Speakers through your usual comms channels
- Monitor your submissions in the Submissions List view in the Submission Flow
- Manage reviews:
- Invite reviewers
- Assign submissions to reviewers (this will trigger notification emails to reviewers)
- Monitor reviewers’ progress in the Submissions List view.
- Review submissions’ review scores, recommendations and reviewers’ comments
- Decide which sessions to accept, waitlist and decline and move the submissions into the relevant stages. By default, this will trigger automated notification emails to submitters, although you can opt not to.
- Create sessions on your agenda from accepted sessions.
Note
By default, when you move a submssion into the “Accepted” Submission Stage, Lineup Ninja will ask the submitter to confirm that they still want to speak at the event.
You can disable this behaviour by editing the “Accepted” Submission Stage and its corresponding Email Template.
How do I Run an Awards Program?
Lineup Ninja includes a Submission Flow template for a awards. It has many configurable options which you’ll want to edit to match your process.
Here’s a high-level overview of how to use our template for your event’s Call for Speakers:
-
In your event, navigate to the page.
-
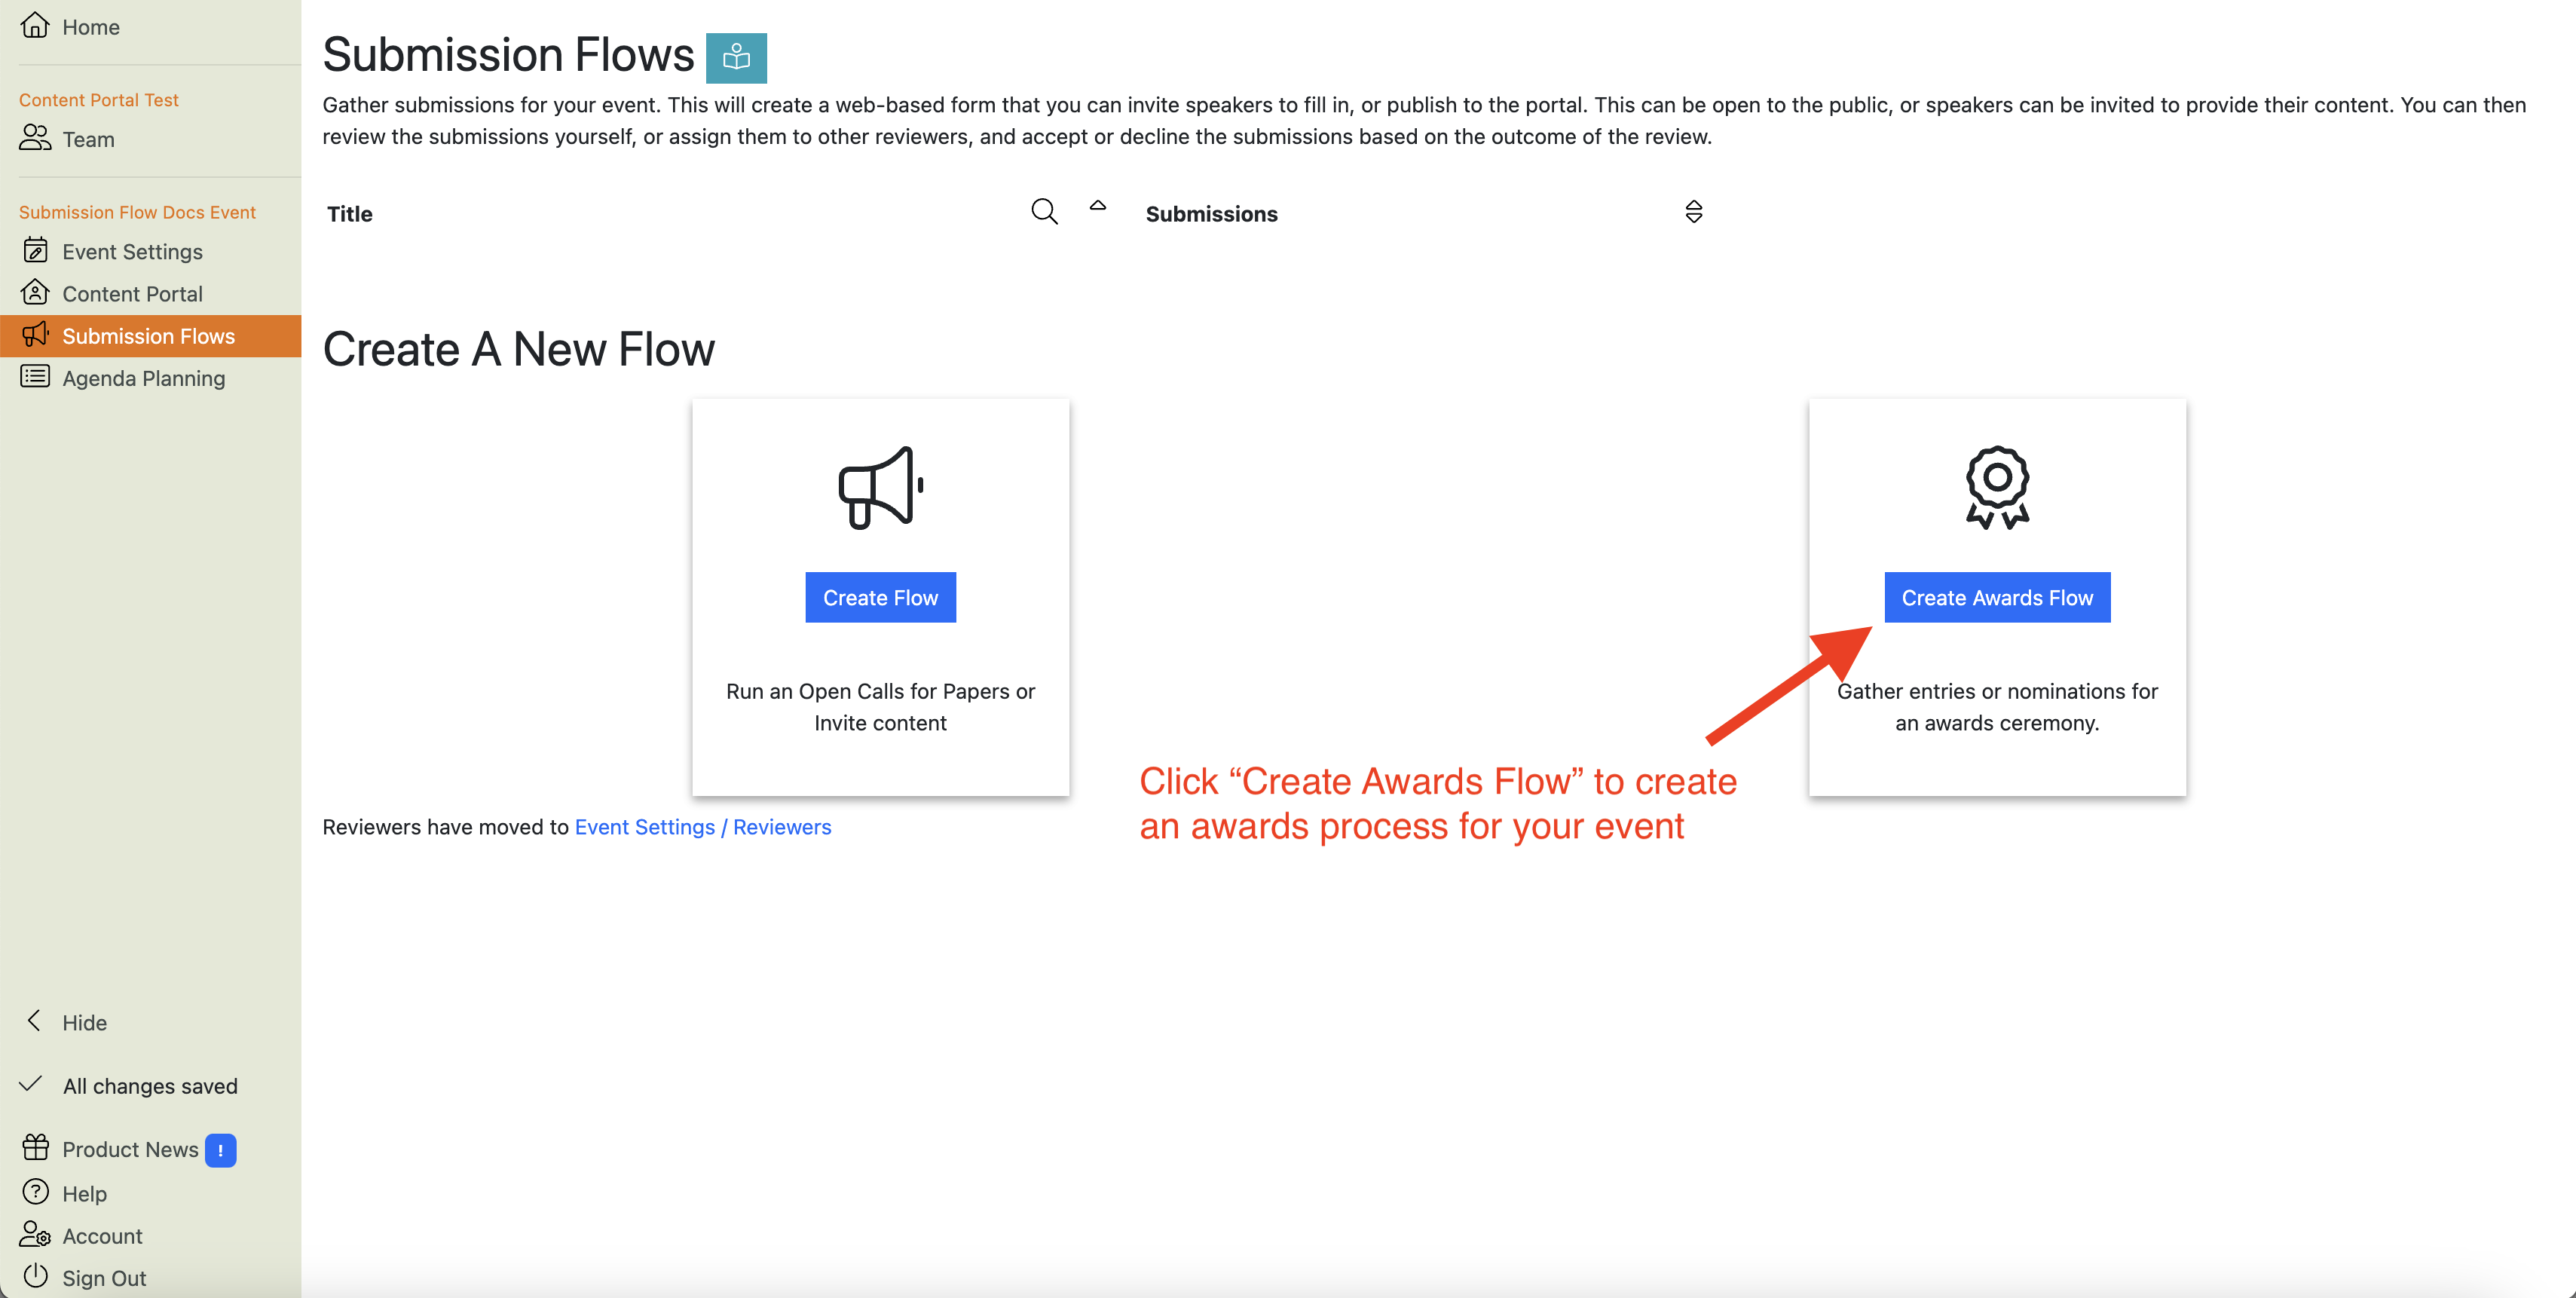
Create a new submission flow - choose “Create Awards Flow”:
-
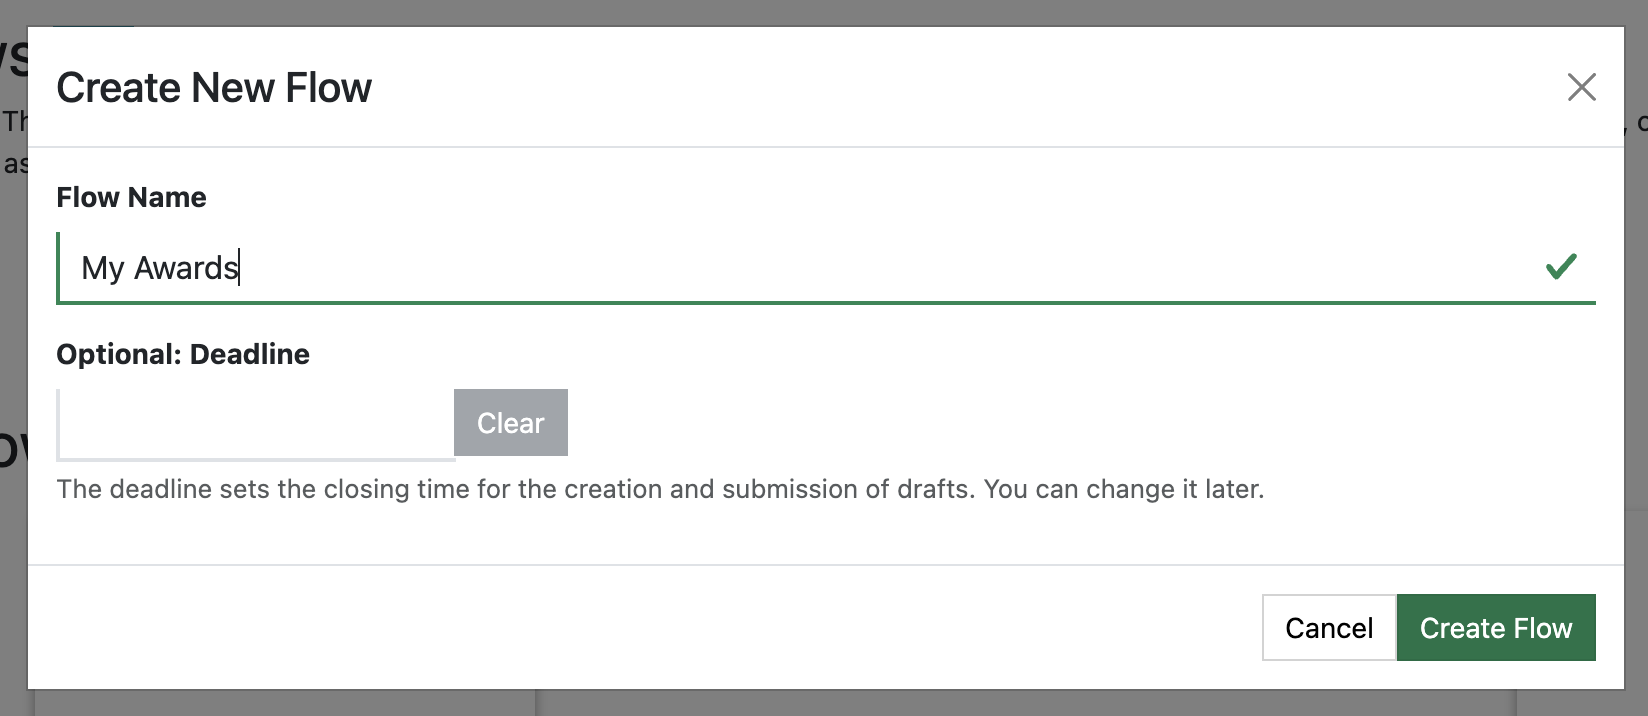
The New Flow wizard will prompt you for a name and (optionally) a deadline for the Flow:

-
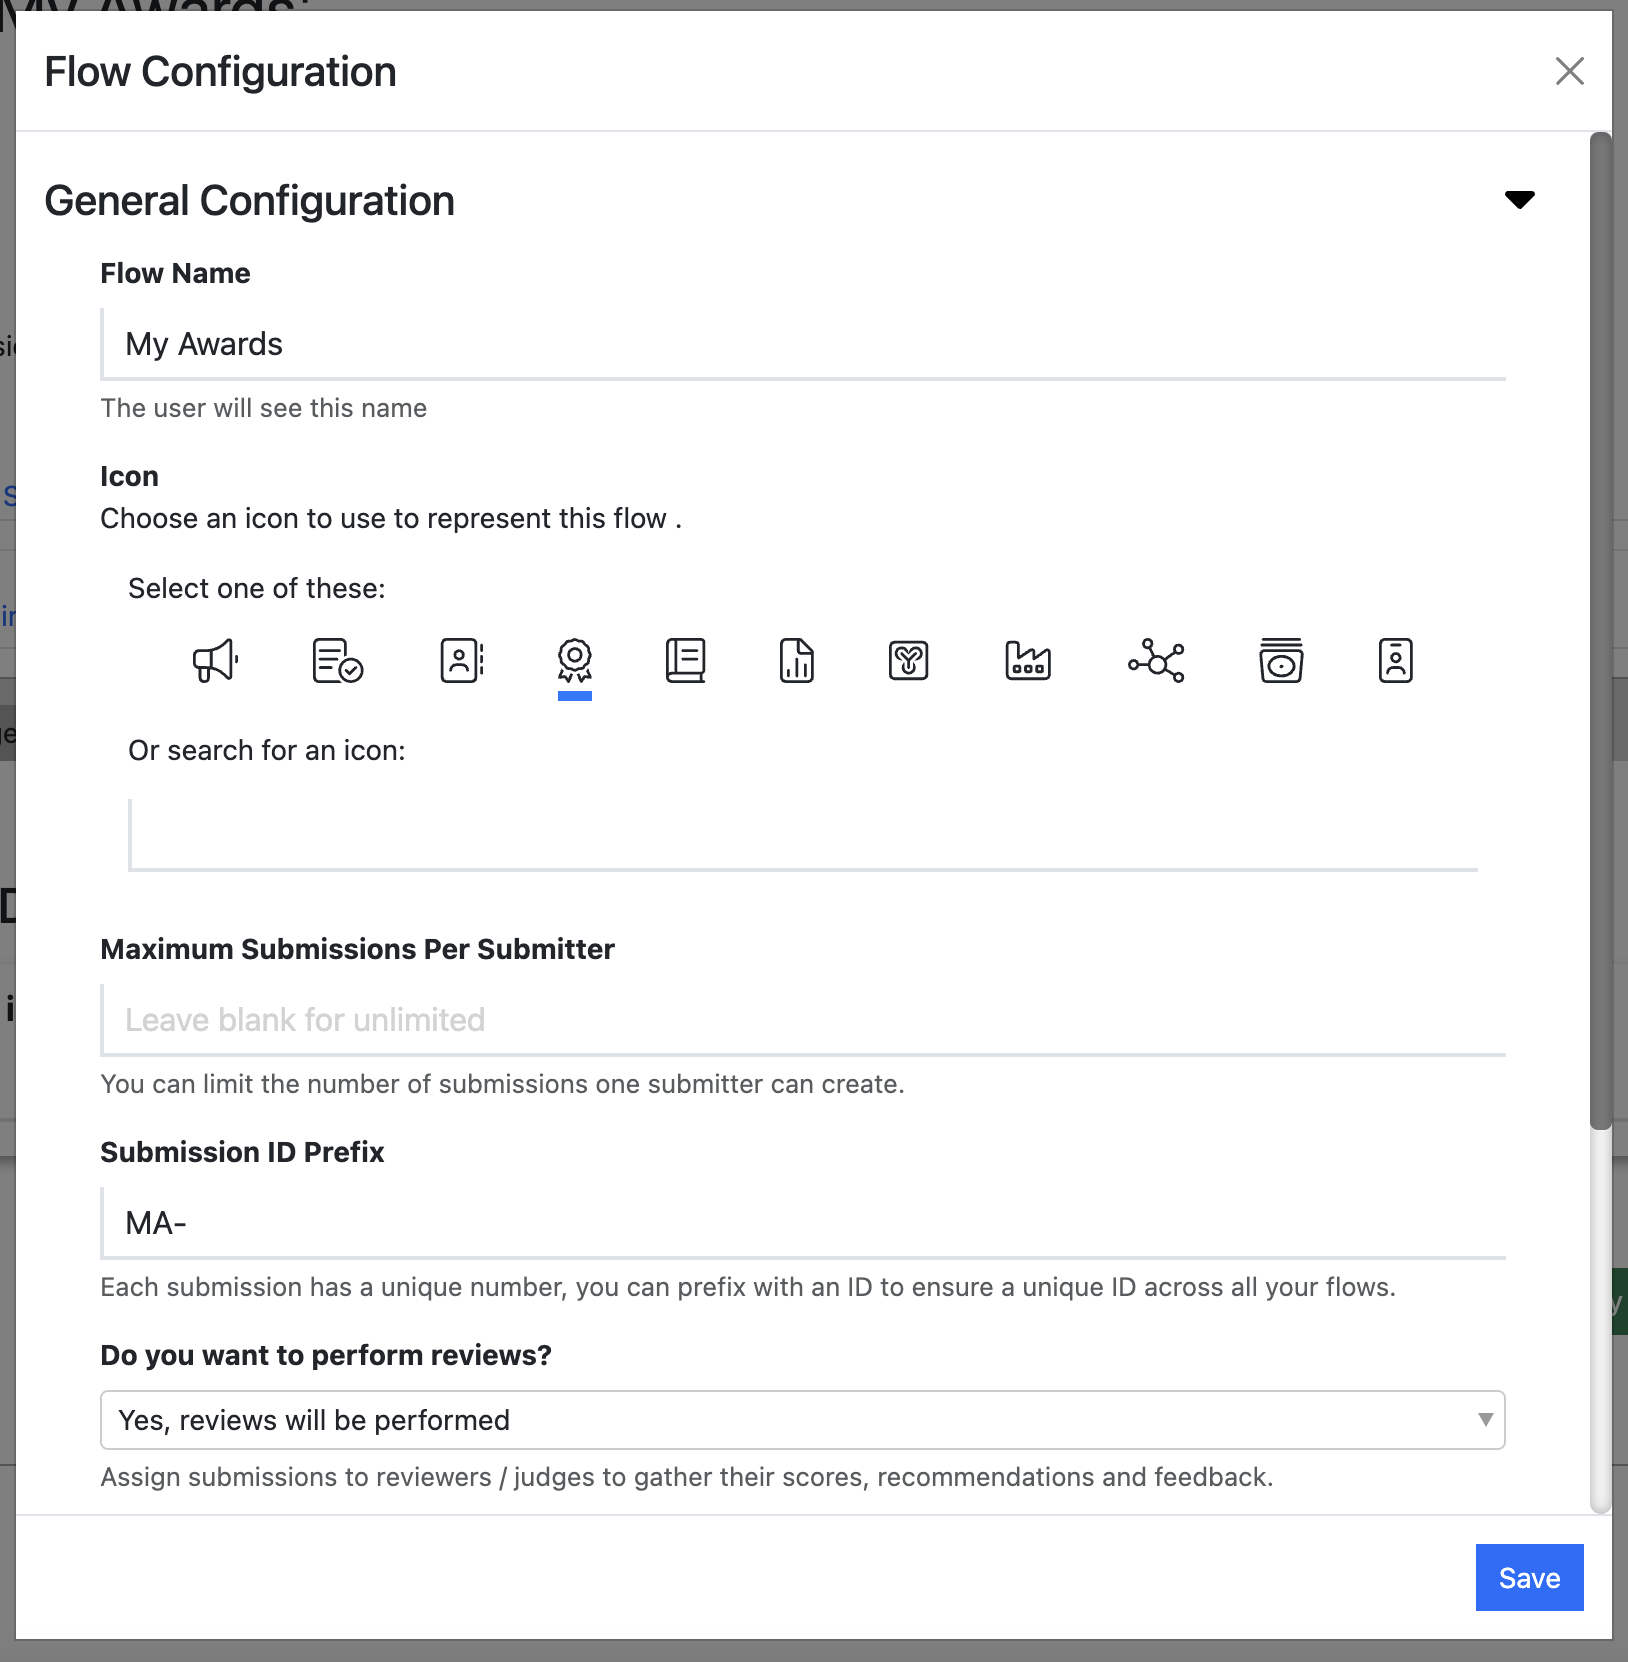
Click “Create Flow”, and you’ll be taken to the Flow Configuration view, where you can review and change settings.

-
Click “Save” and you’ll now see the Submission Stages and the Form Designer. Check the rest of the flow configuration:
- Check that the Submission Stages are correct for your awards process: add and delete stages as required.
- Add and edit the questions on the form to use your own language and terms
- Edit the email templates to ensure you’re happy with the copy.
- Optionally add Deadline Reminder email templates and schedule them.
-
Create a Review Stage (AKA Judging round) and decide:
- Which answers to show to reviewers/judges
- Which questions to ask your reviewers/judges:
- Scores
- Recommendations (by default, “Accept”, “Maybe”, “Decline”, but can be changed to eg “Winner”, “Shortlist”, “Not this time”)
- Feedback for entrants
- Internal comments
- Whether reviewers/judges should be able to see other reviewers’/judges’ responses, and if so from which review rounds.
-
Publish your Submission Flow to make it visible in the Content Portal
-
Review how the Submission Flow appears in the portal and make any changes
-
Test your Submission Flow by making some test submissions/entries
-
Test your review/judging process:
- Test the process by assigning some submissions/entries to reviewers/judges
- Review judges’ scores and comments in the Submissions List view
-
After testing is complete, reset your Submission Flow to delete any test submissions/entries and reviews/judges’ scores
-
Publicise your awards entry process through your usual comms channels
-
Monitor your submissions/entries in the Submissions List view in the Submission Flow
-
Manage reviews/judging:
- Invite reviewers/judges
- Assign submissions to reviewers/judges (this will trigger notification emails to reviewers)
- Monitor reviewers’/judges’ progress in the Submissions List view.
- Review submissions’/entries’ scores, recommendations and reviewers’/judges’ comments
-
Decide which entries are shortlisted and which are winners.
Note
By default, when you move a submission into the “Shortlisted” submission stage, Lineup Ninja will send an email to the submitter telling them that they’ve been shortlisted (although you can change this behaviour if you want).
When you move a submission into the “Winner” or “Runners Up” Submission Stages, Lineup Ninja will NOT email the submitter to tell them that they have won!
Learn how to invite and manage submissions.
Learn how to use create, configure, copy and delete Submission Flows
Overview of the review process on Lineup Ninja.
Learn how to publish your Submission Flows.
Learn how to generate a report of your submissions.
What you need to know if your flow was copied into a Content Portal event
Still can’t find what you’re looking for? Email support@lineupninja.com and one of the team will get back to you as soon as possible.
